Salesforce (Login and EventLog)
Customers with Enterprise, Unlimited, or Performance Edition Salesforce organizations will be able to onboard Login events, but not the Salesforce EventLog, unless the Event Monitoring Add-On is purchased.
Create Application#
- Log in to your Salesforce account.
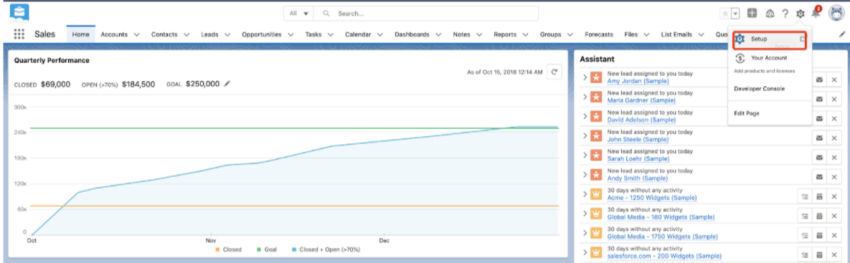
- Click Setup on the top navigation menu.
- Select Platform Tools > APPS > APP Manager from the left pane of the screen.
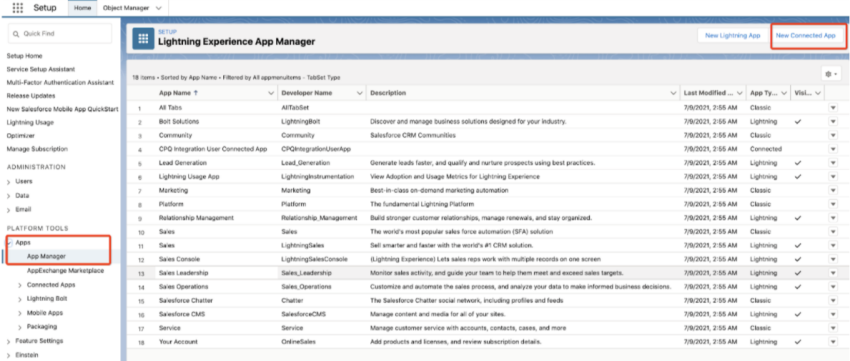
- Click New Connected App.
- On the Apps page within the Connected Apps section, click New to create a new connected app for Securonix.
- Enter information for the following information:
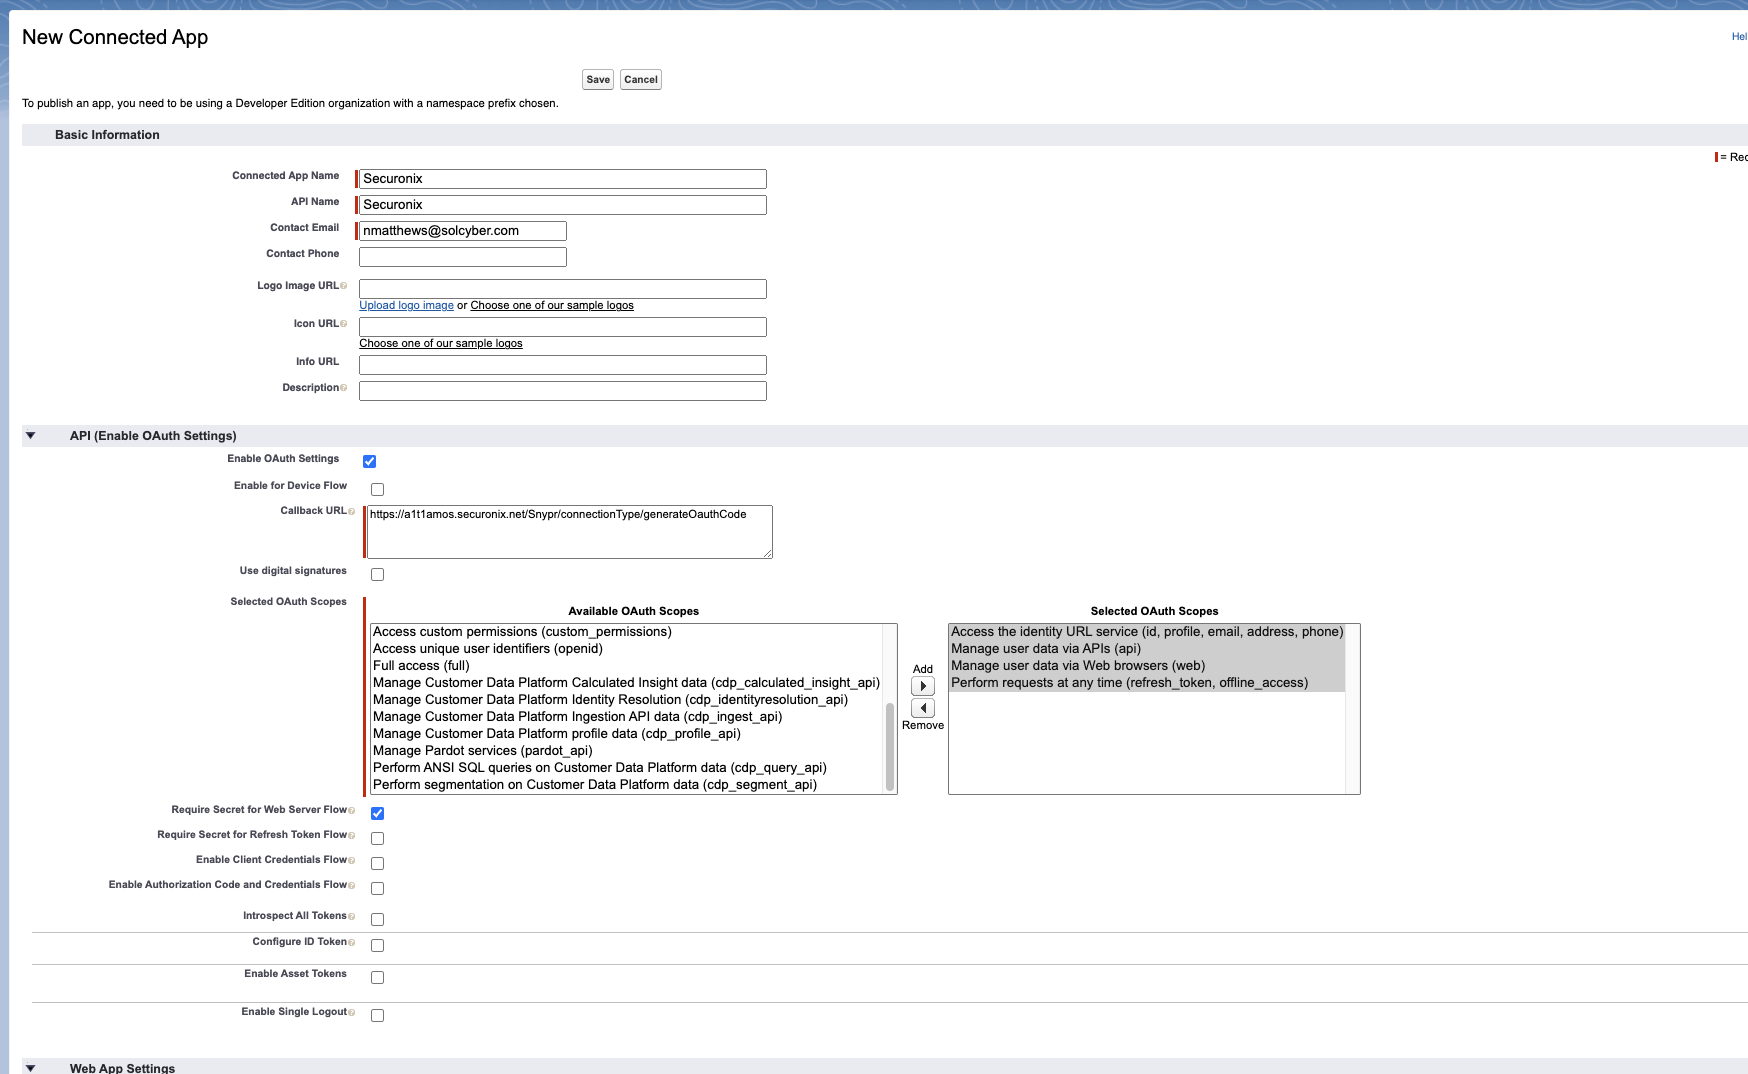
- Connected App Name: Securonix
- API Name: Securonix
- Contact Email: Enter the email of the Salesforce administrator creating the app.
- Enable OAuth: Check box to enable OAuth.
- Callback URL: https://a1t1amos.securonix.net/Snypr/connectionType/generateOauthCode
Note: Ensure the Salesforce portal can communicate with the local host using port 8443/TCP to send the token. The local host should also have connectivity 443/TCP to the Salesforce portal.
- Available OAuth Scopes: Select and add the following scopes to “Selected OAuth Scopes”:
- Access the identity URL service (id, profile, email, address, phone)
- Manage user data via APIs (api)
- Manage user data via Web browsers (web)
- Perform requests at any time (refresh_token, offline_access)
- Require Secret for Web Server Flow: Check box to enable.
- Be sure to UNCHECK “Require Secret for Refresh Token Flow” if it is selected by default
- Click Save.
Note: The app will take 10-15 minutes to take effect.
- Click Continue.

- Click CONTINUE and you will be take to the App page. Click Manage Consumer Details to retrieve the following information:
- Consumer Key
- Consumer Secret
- Provide these credentials to SolCyber via an encrypted email or https://www.onetimesecret.com.

Create Service Account User#
- On the left side of the screen, under Administration, click Manage Users > Profiles.
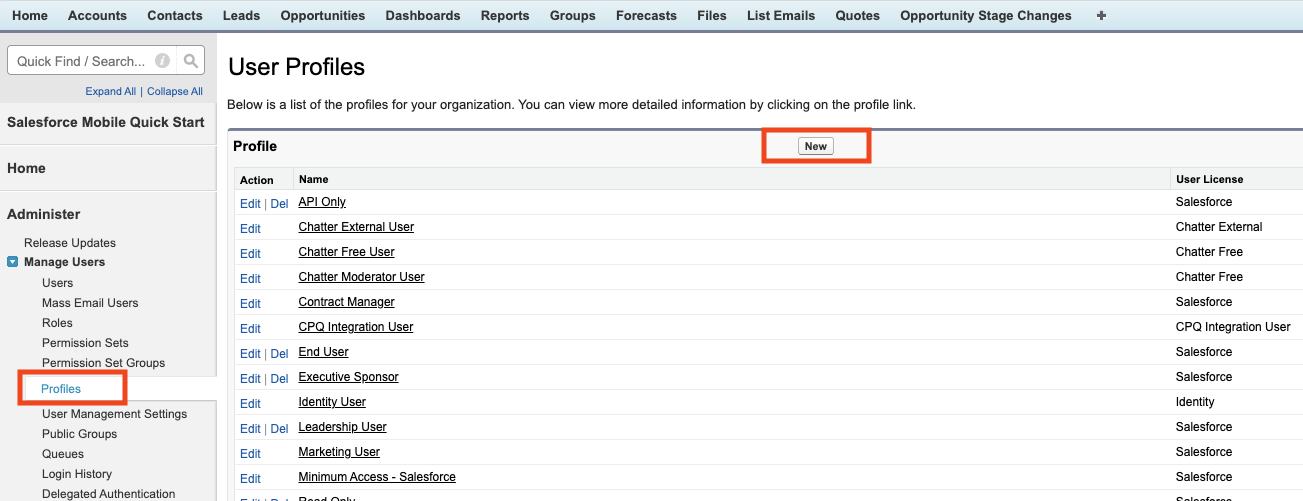
- Click Profiles > New.
- Enter following information to create a profile:
- Profile Name: Securonix
- Existing Profile: Select Read Only.
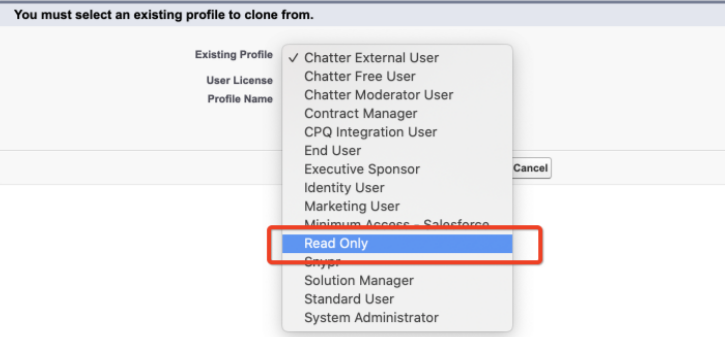
- Click Save.
- Edit the profile and enable permissions:
- Under Administrative Permissions, ensure the following are selected. You can unselect anything else that may be enabled by default:
- View Flow Usage and Flow Event Data (this will automatically enable View Roles and Role Hierarchy)
- View Setup and Configuration
- API Enabled
- Apex REST Services
- Under General User Permissions, ensure the following are selected. You can unselect anything else that may be enabled by default:
- Multi-Factor Authentication for API Logins
- Multi-Factor Authentication for User Interface Logins
- Lightning User
- Save the profile.
You will need to create a user, to serve as a service account, that will be used to authorize the connection between Securonix and your Salesforce account.
- Click Administration > Users > Users.

- Click New Users.
- Fill required user details (ensure “Salesforce” is selected for “User License” and assign it to the profile you just created. Suggested options:
- First Name: Securonix
- Last Name: App
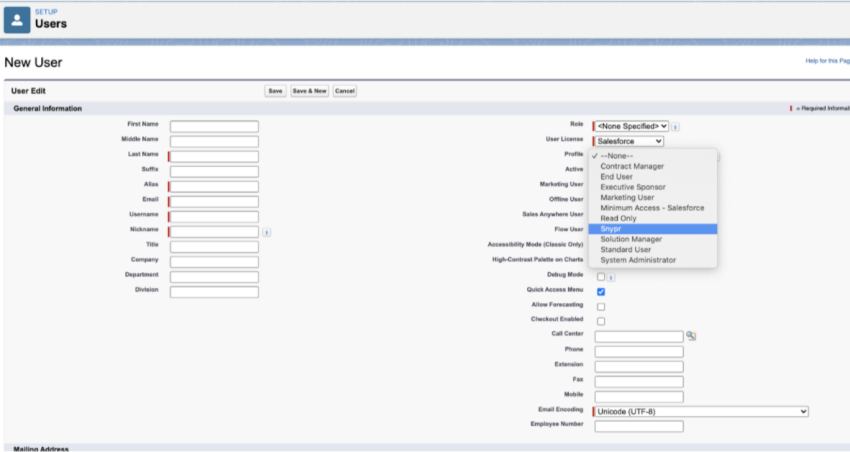
- Click Save.
After completing these steps, please contact SolCyber to set up a working session to onboard the Salesforce logs to Securonix.