Google Workspace
Note: The steps described in this section are specific to Google and the configuration steps can change. Please consult Google documentation for the latest information.
- Navigate to the Google Developers Console: https://console.developers.google.com.
- Logon using an account with admin privileges.
- Click Create Project.
- Enter a project name (ex: “Securonix-Logs”), select the correct organization and location.
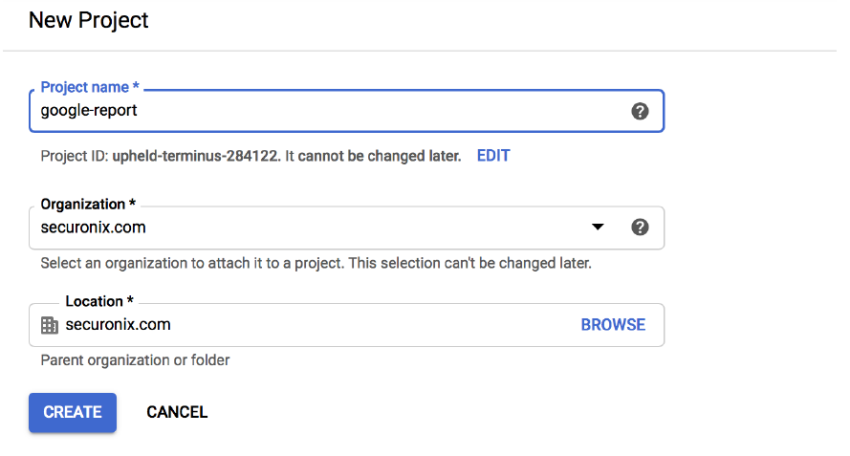
- Click Create.
- Select the new project that you created from the top section of the screen.
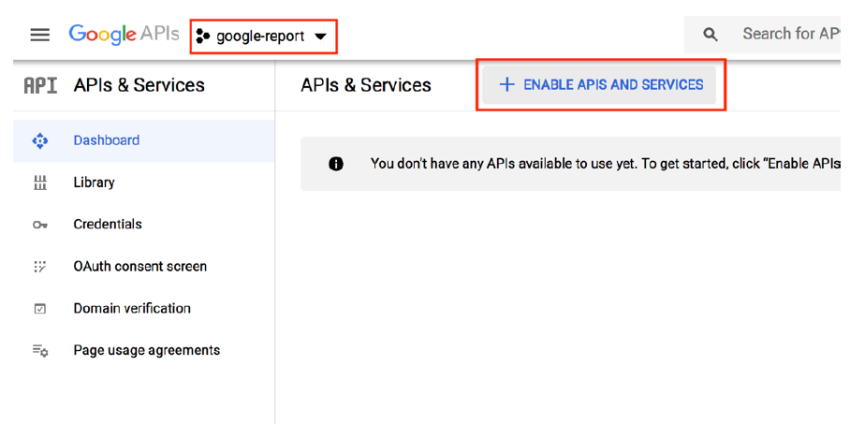
- Click Enable APIs and Services. The screen displays the new project ID.
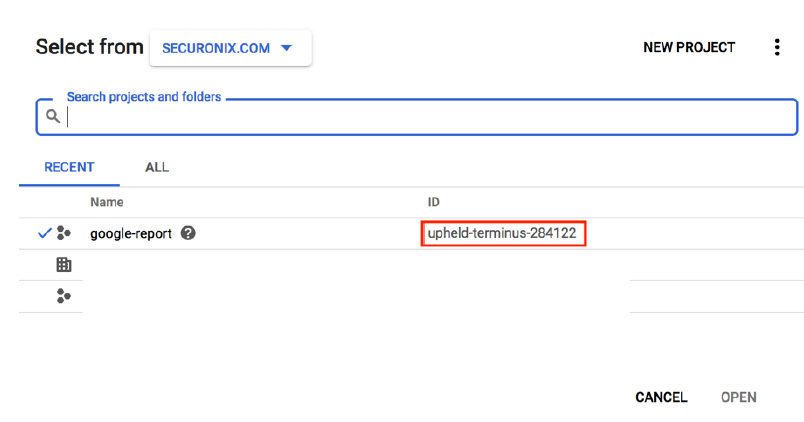
- Save the new project ID. You will need this in a later step.
- Search for Admin SDK and click Enable.
- Click OAuth consent screen from the left panel and select User type as Internal.
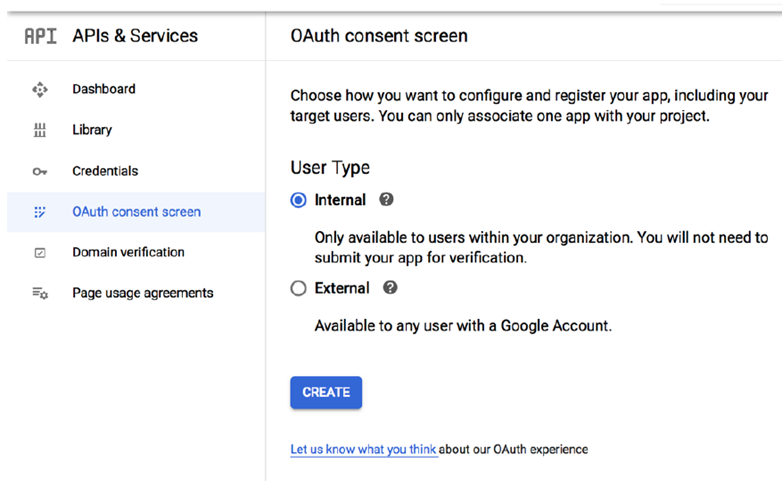
- Click Create.
- Enter the name “Securonix” for the application.
- For the application homepage, enter “https://a1t1amos.securonix.net/Snypr"
- For the Authorized Domain enter “securonix.net”
- For User Support Email and Developer Contact Information, enter the email address of your Google Administrator in any area asking for contact information.
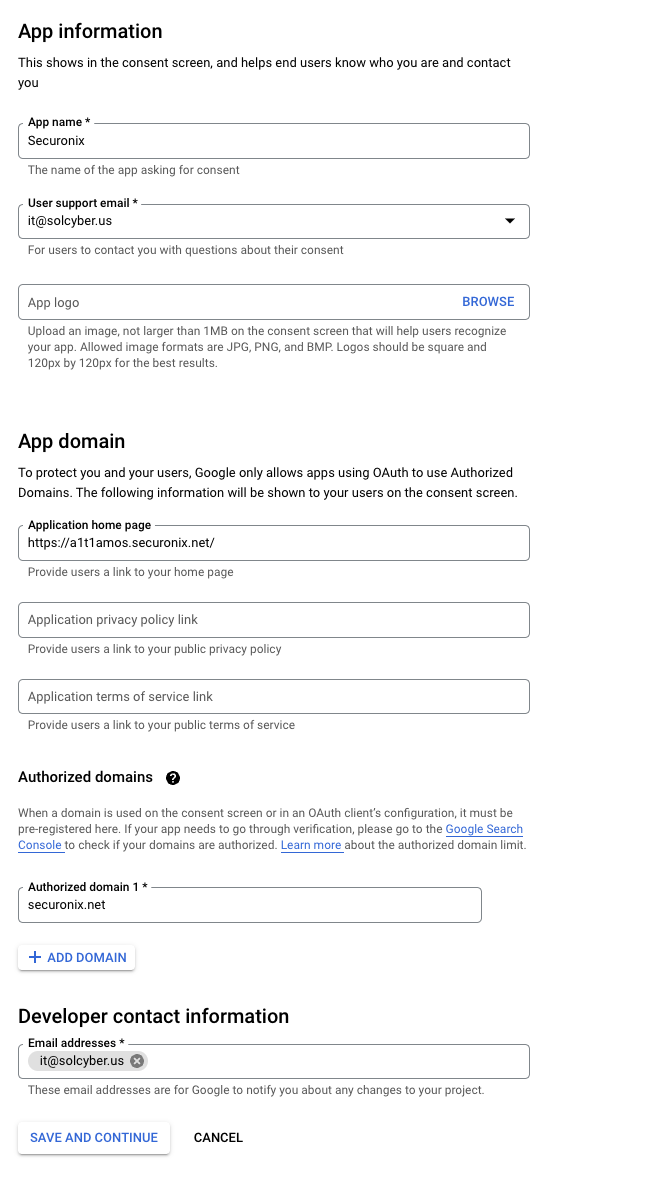
- Click Save and Continue.
- Select Add Scope from the Scopes for Google API section.
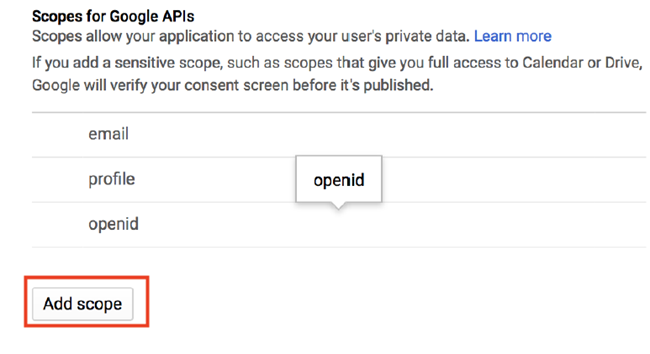
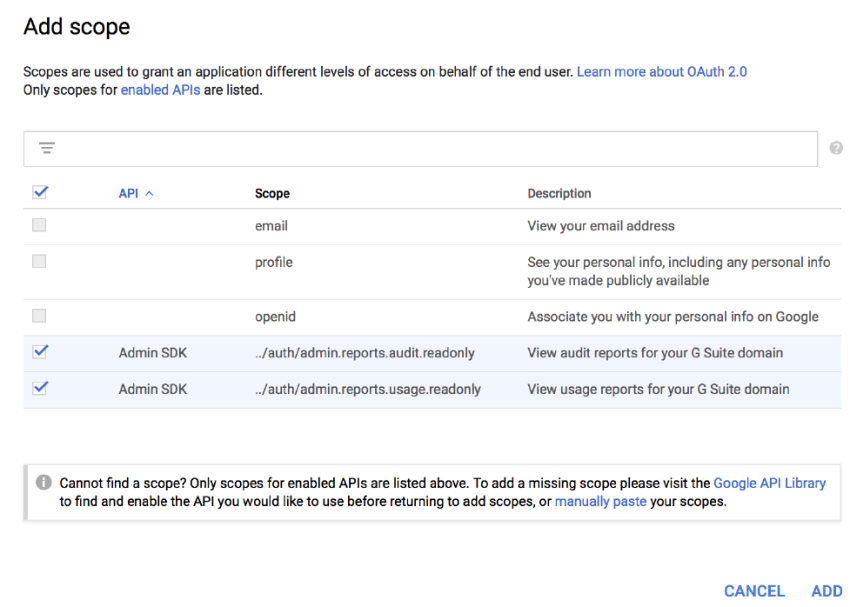
Select the following API scopes for Admin SDK:
- https://www.googleapis.com/auth/admin.directory.user.readonly
- https://www.googleapis.com/auth/admin.directory.user.alias.readonly
- https://www.googleapis.com/auth/admin.directory.domain.readonly
- https://www.googleapis.com/auth/admin.directory.orgunit.readonly
- https://www.googleapis.com/auth/admin.reports.audit.readonly
- https://www.googleapis.com/auth/admin.reports.usage.readonly
Click Save and Continue.
Verify the Summary page with selected Oauth Scopes.
Access Dashboard.
Click Credentials from the left section of the screen.
Click Create Credentials > OAuth client ID.

- Select Application Type as Web application and provide OAuth client name.
- Enter information for the following fields:
- Authorized JavaScript’s origin URI: https://a1t1amos.securonix.net
- Authorized redirected URI: https://a1t1amos.securonix.net/Snypr/connectionType/generateOauthCode
- Click Save.
- Save the Client ID and Client secret in a secure location. You will need this to import data into SNYPR.
- Access https://admin.google.com as a super admin.
- Navigate to Security > API Control.
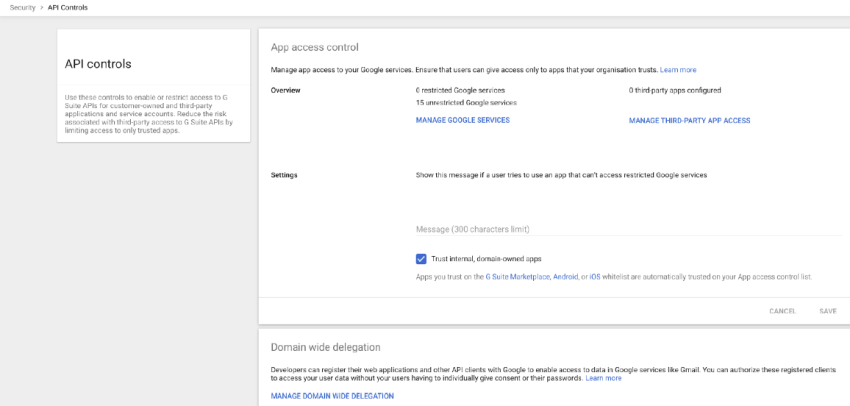
- Select Manage Domain Wide Delegation from the Domain wide Delegation section.
- Click Add New and enter the ClientID generated above.
- Add the following scopes required for Admin Reports:
- https://www.googleapis.com/auth/admin.directory.user.readonly
- https://www.googleapis.com/auth/admin.directory.user.alias.readonly
- https://www.googleapis.com/auth/admin.directory.domain.readonly
- https://www.googleapis.com/auth/admin.directory.orgunit.readonly
- https://www.googleapis.com/auth/admin.reports.audit.readonly
- https://www.googleapis.com/auth/admin.reports.usage.readonly
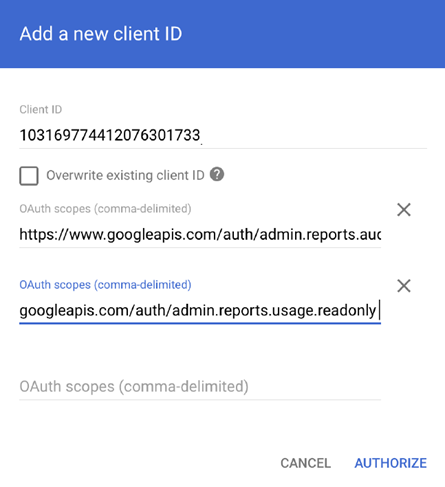
- Click Authorize.
During your onboarding session, you will need to provide SolCyber with the Project Name, Google Administrator email address, Client ID and Client Secret.