Phishing Simulation Whitelisting - Office 365
SolCyber partners with Right-Hand Cybersecurity to deliver phishing-simulation campaigns. The IP addresses, custom headers, and sending domains documented on this page belong to Right-Hand; the campaigns themselves are scheduled and reviewed by SolCyber.
To make sure simulated phishing messages reach the inbox unmodified and your training metrics stay accurate, configure both the Exchange Admin Center and the Microsoft 365 Defender Portal with the rules and policies below.
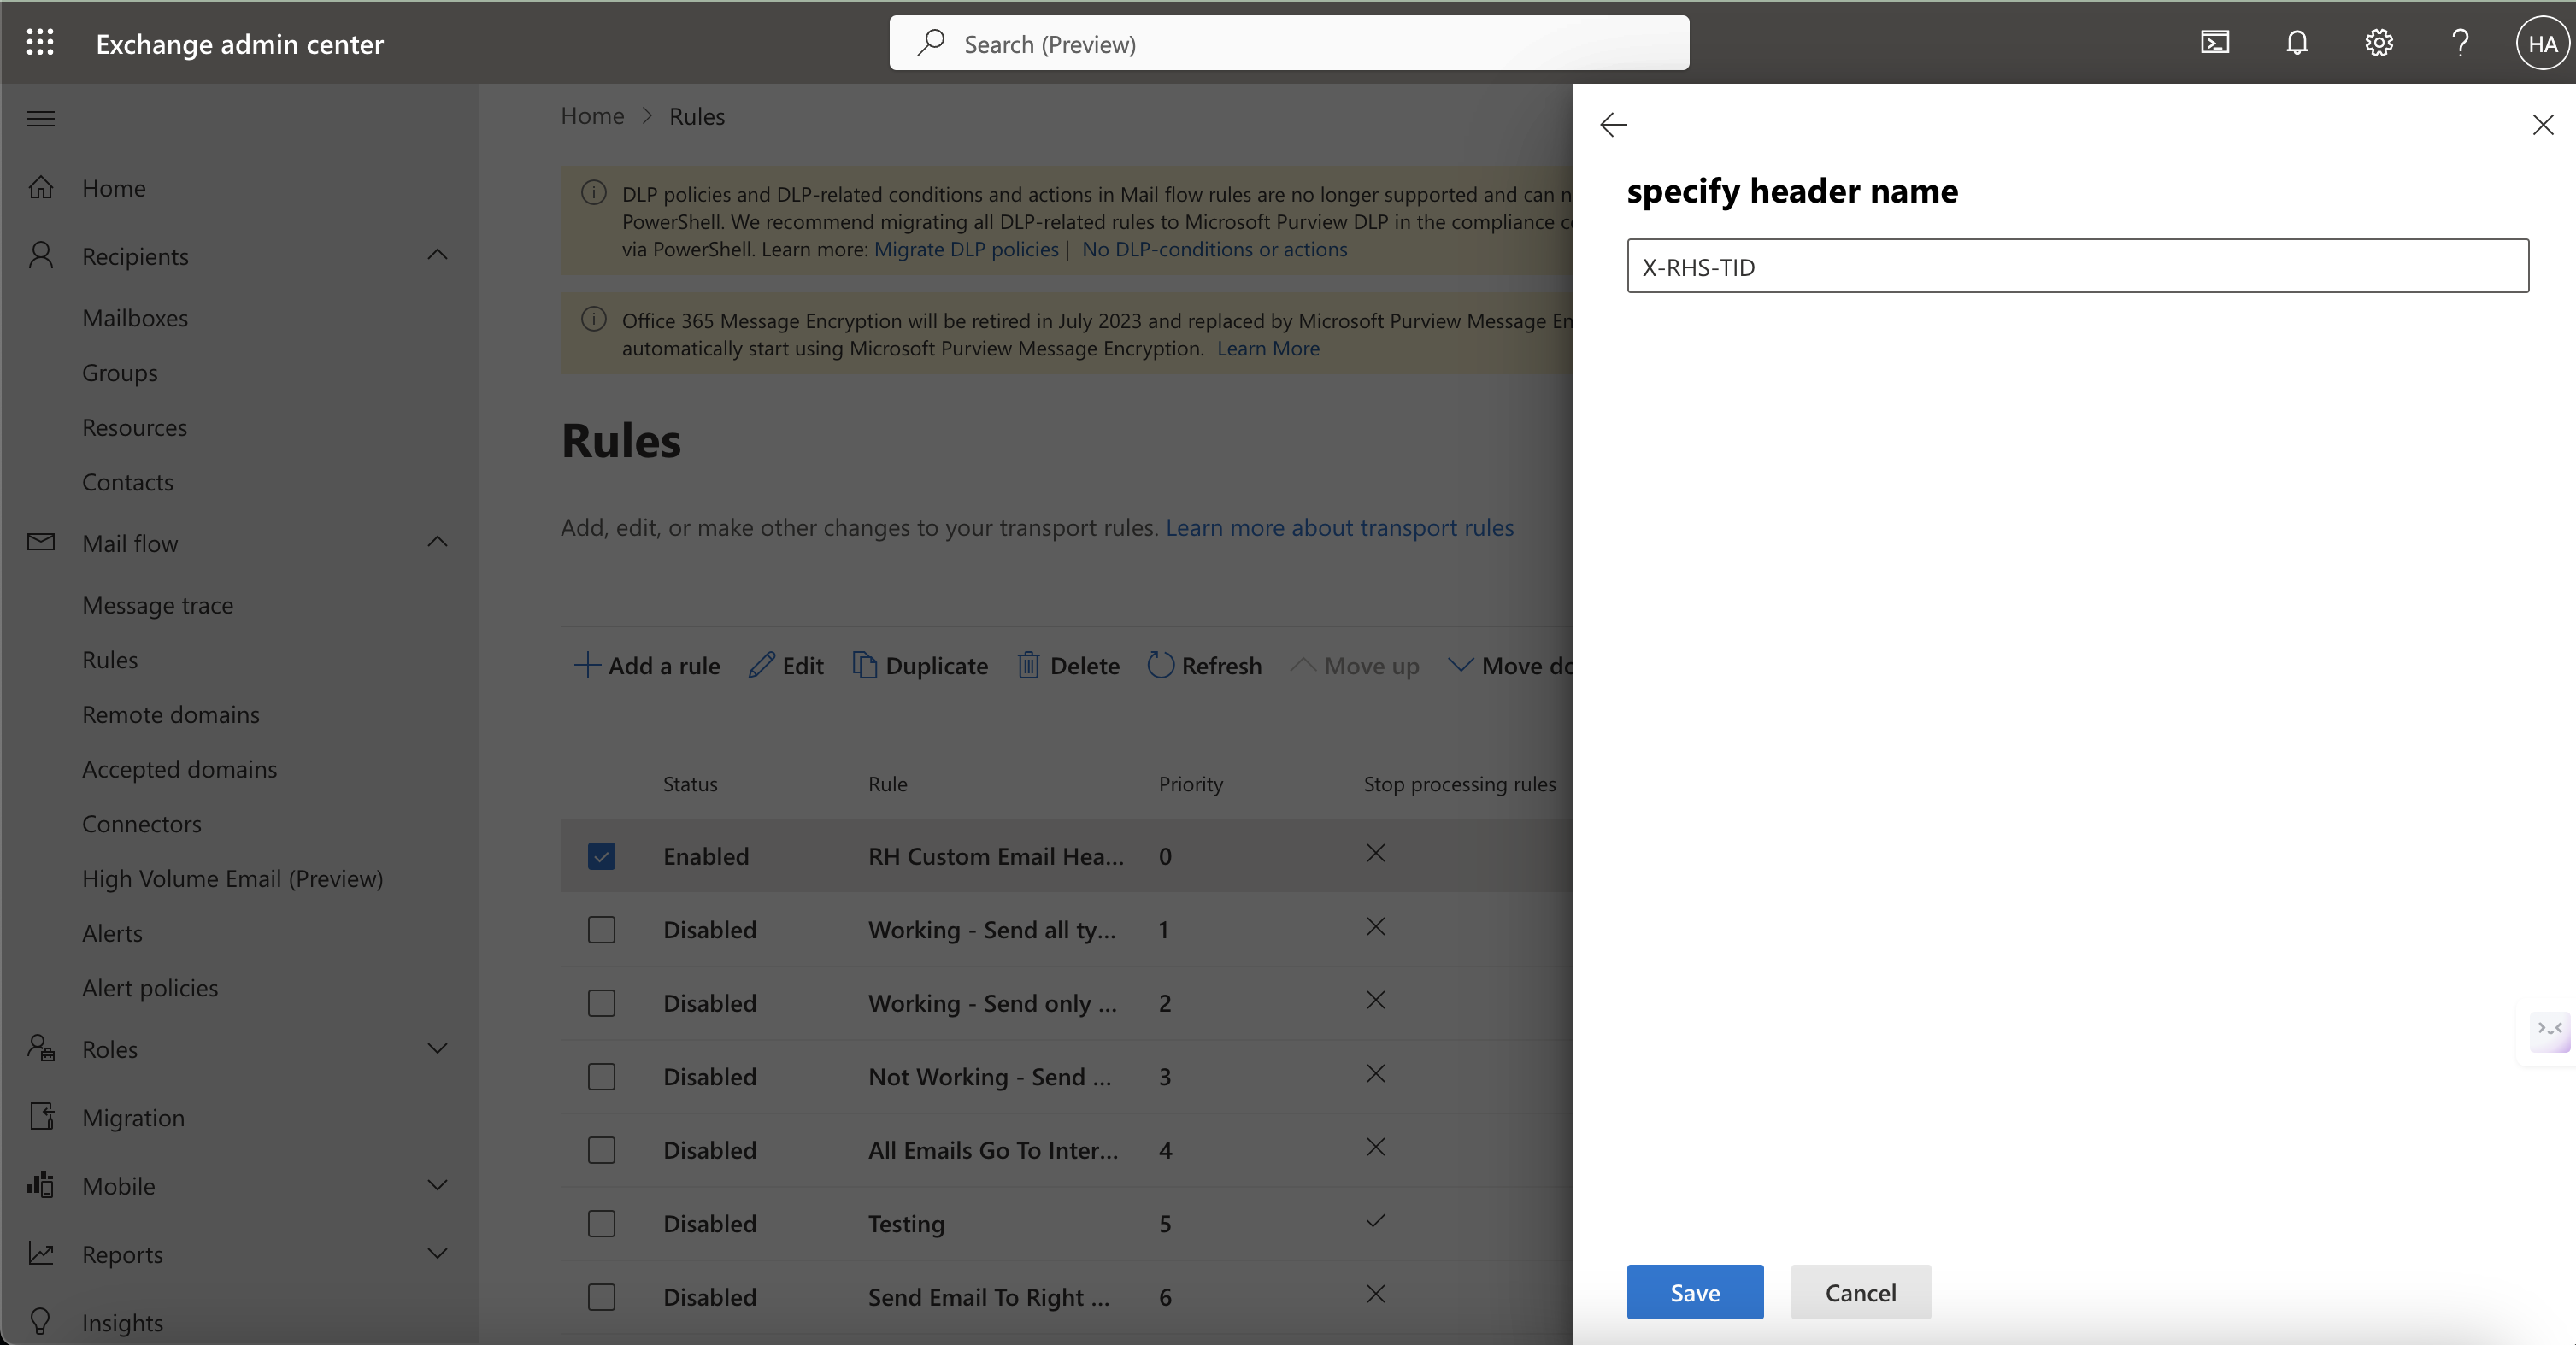
NOTE — Right-Hand custom header. Several mail flow rules below match on a tenant-specific header named
X-RHS-TID-<hash>. Your SolCyber Customer Success Manager will provide the exact header name and hash value for your tenant before you begin. Have those values on hand.
NOTE — Right-Hand IP addresses. All Exchange and Defender rules below use the same three sending IPs:
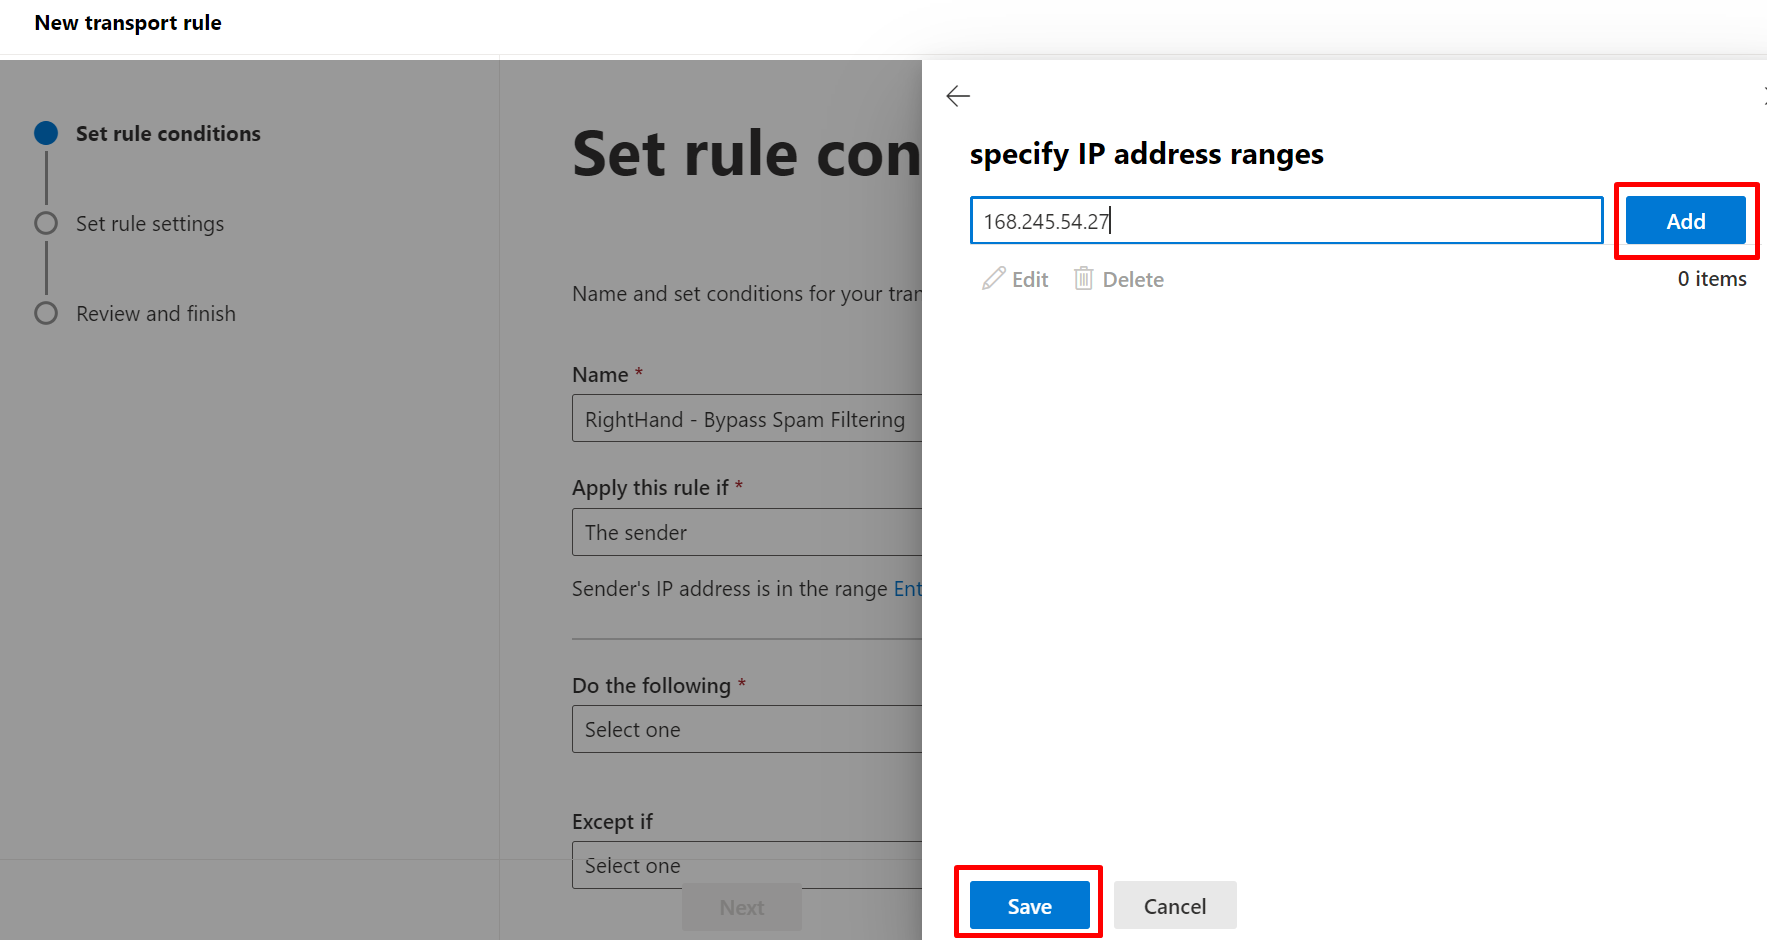
168.245.54.2752.74.95.172149.72.49.118
NOTE — Rule priority. Exchange mail flow rules and Defender threat policies are evaluated in priority order. A higher-priority rule that conflicts with these allow-rules will pre-empt them. After you create each rule below, review its position in the rule list and adjust the priority so it runs before any rule that could re-quarantine, re-junk, or otherwise modify Right-Hand mail.
Part 1: Exchange Admin Center#
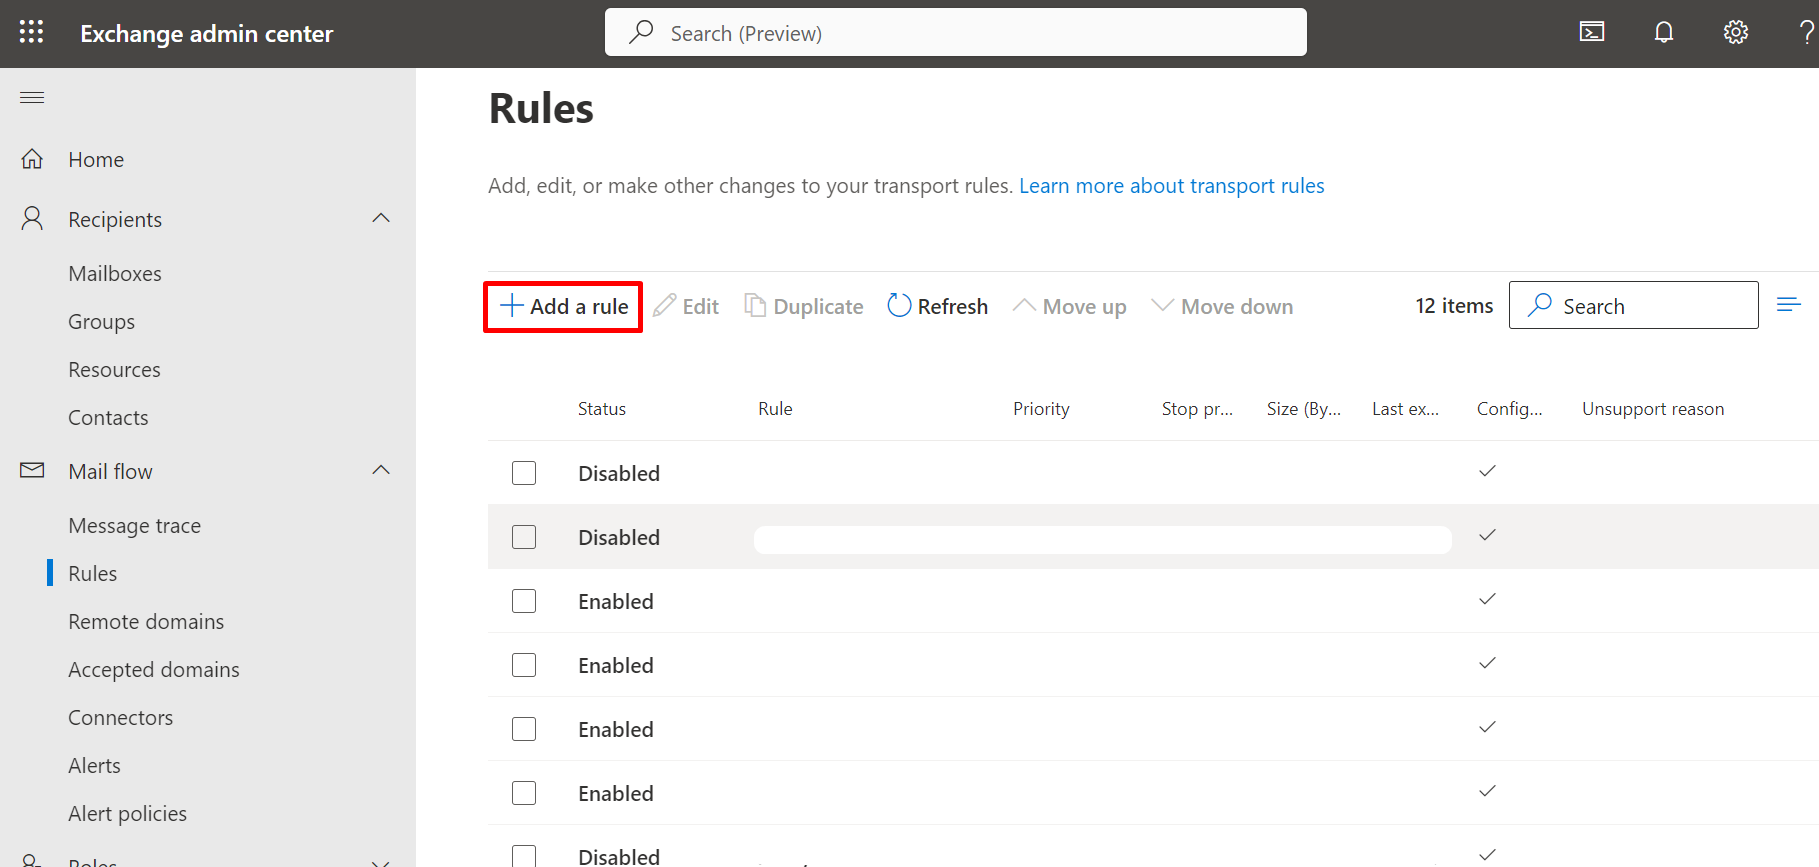
All procedures in Part 1 start from Exchange Admin Center → Mail flow → Rules.
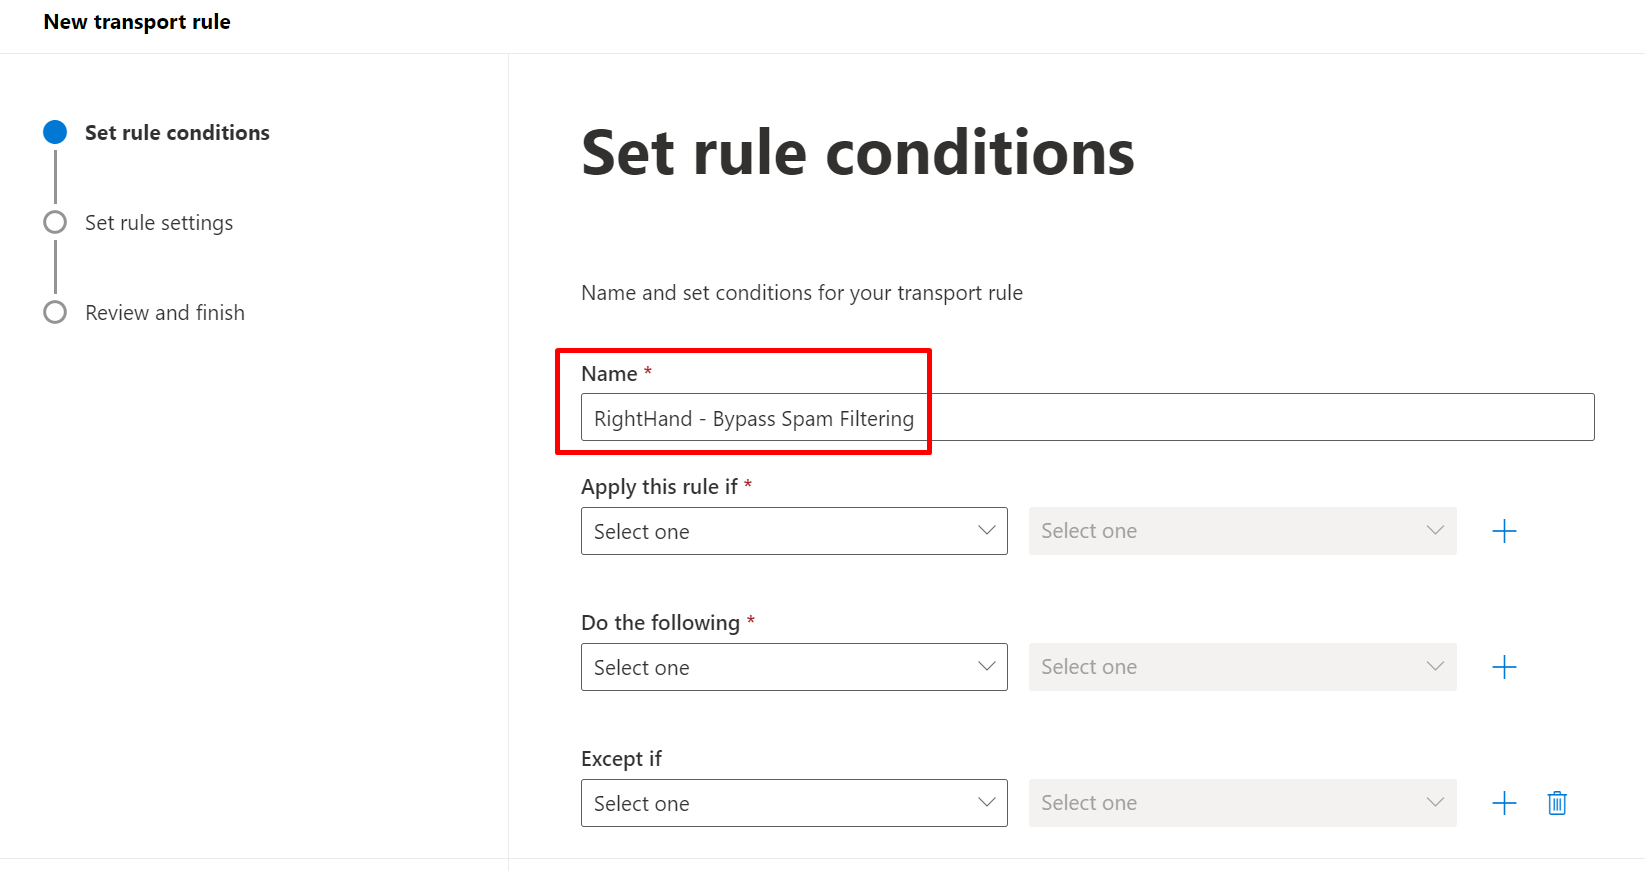
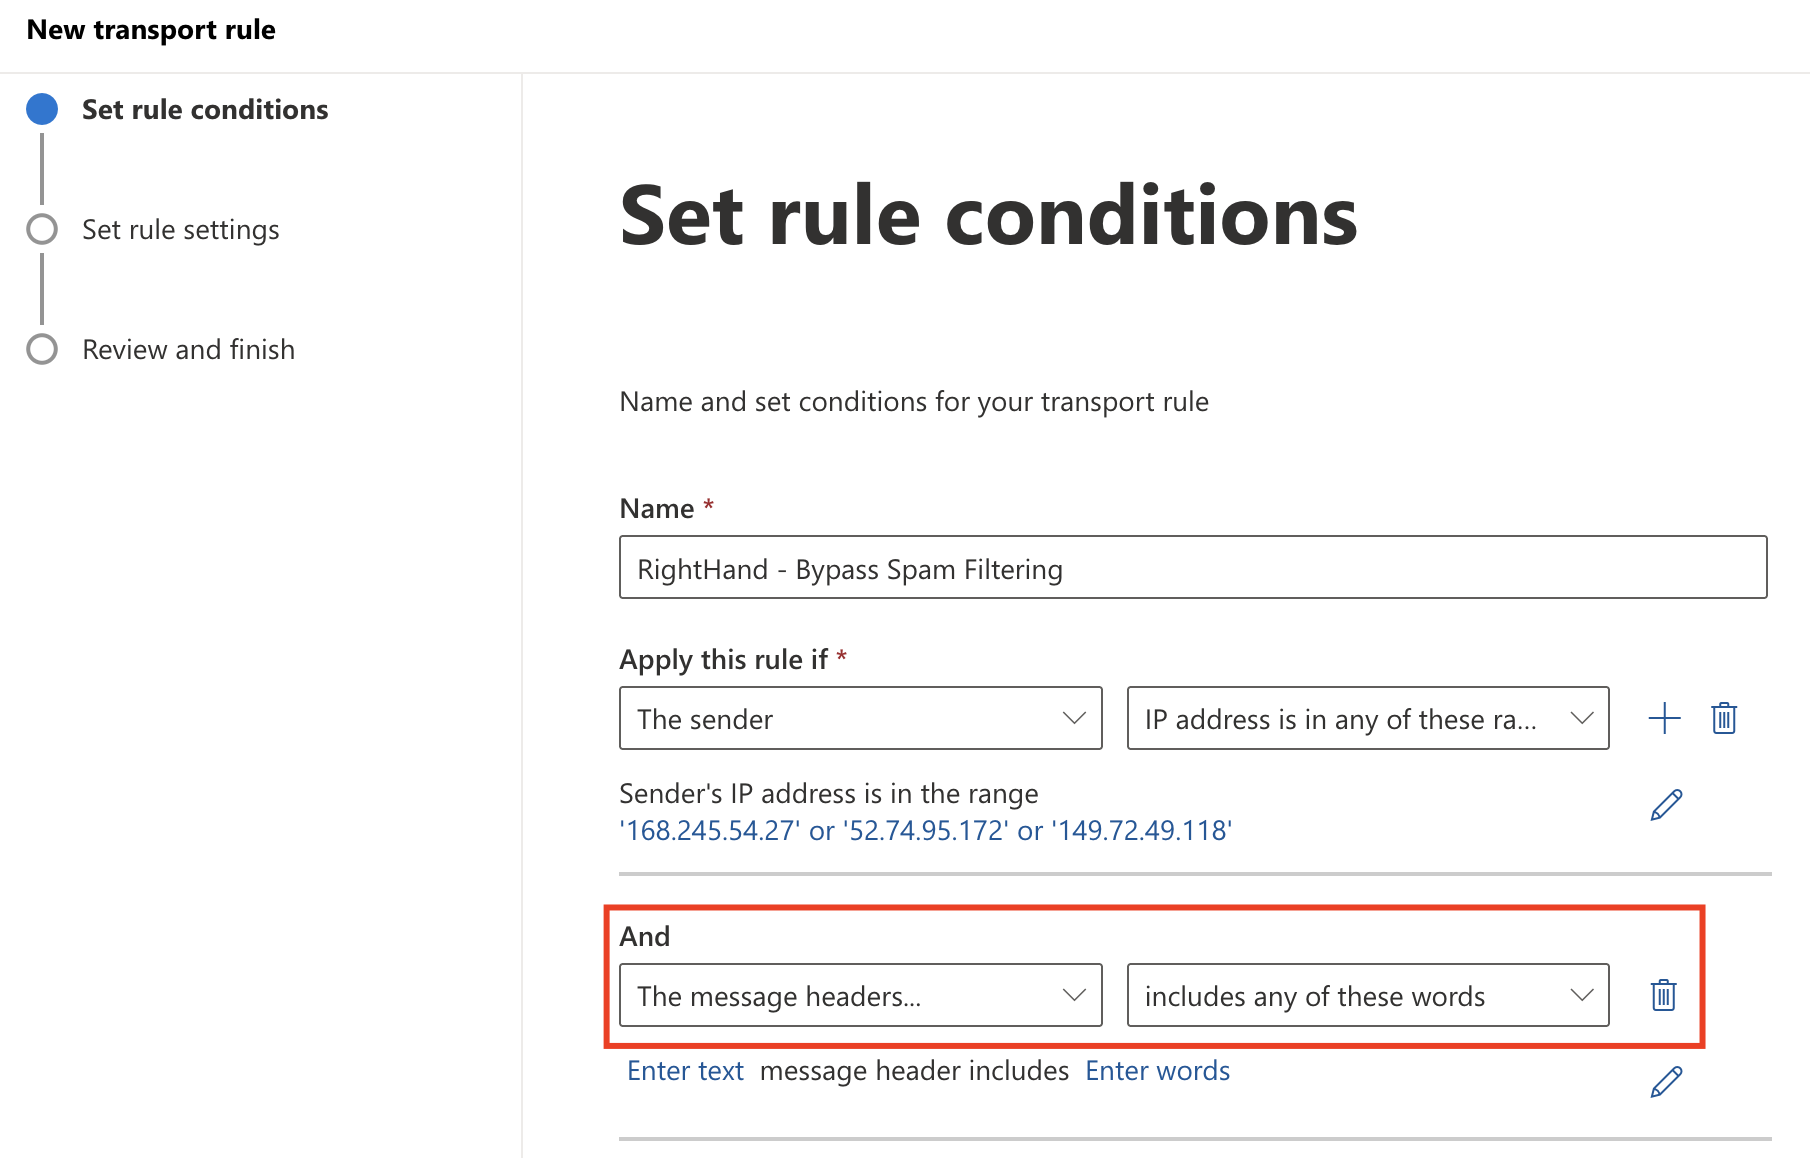
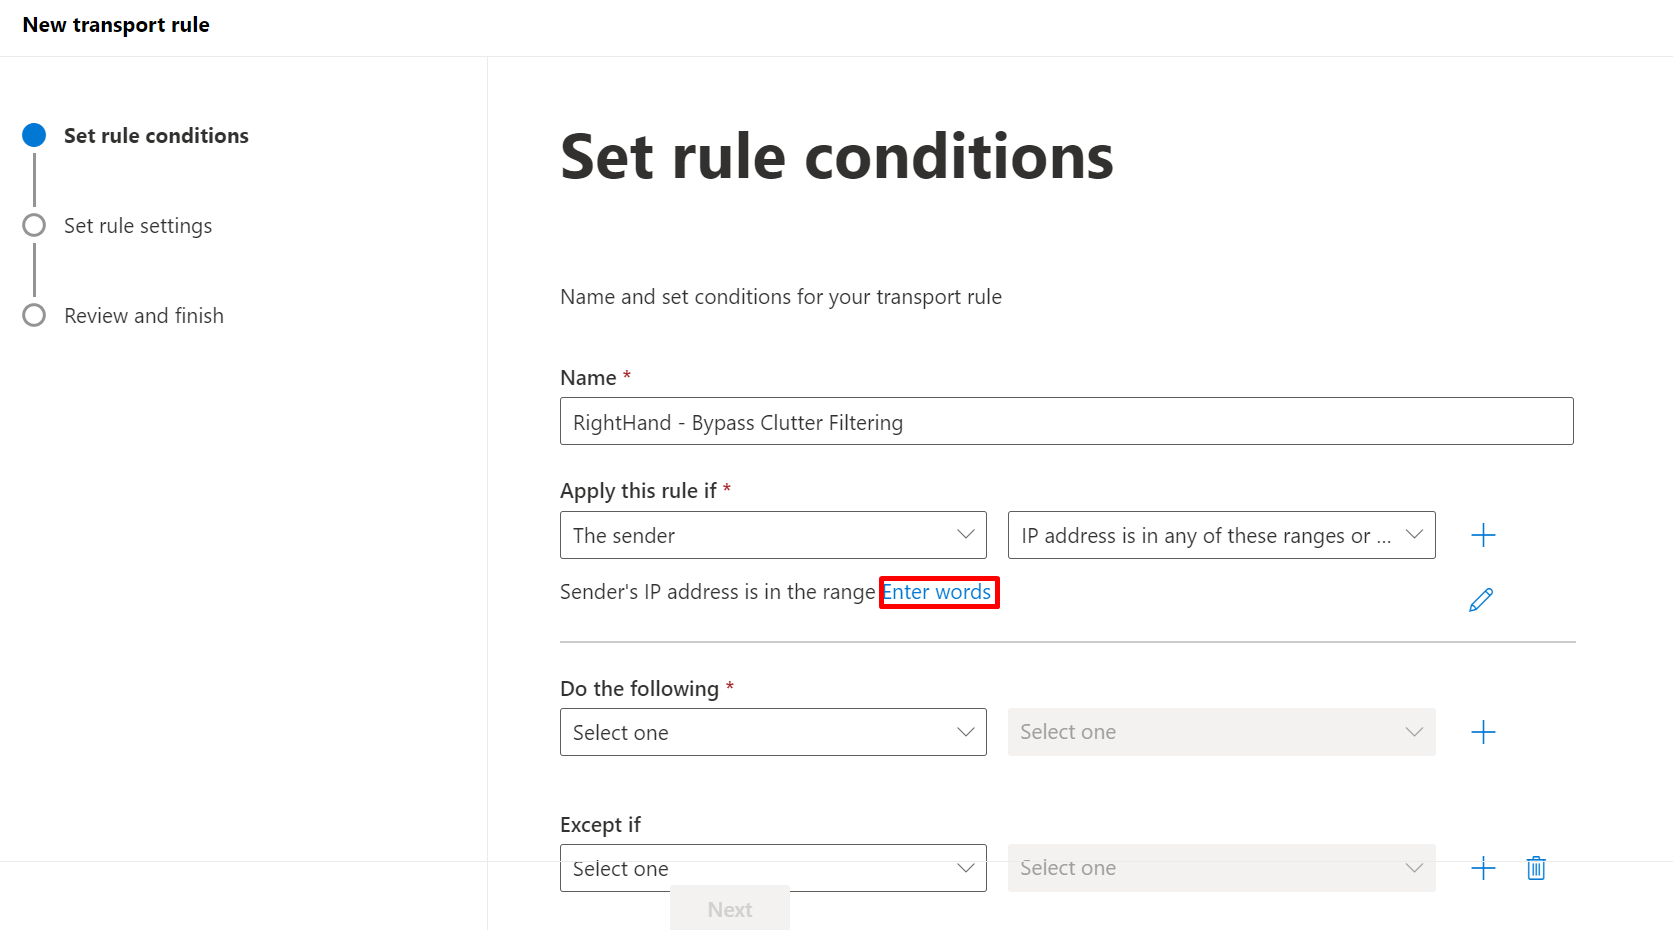
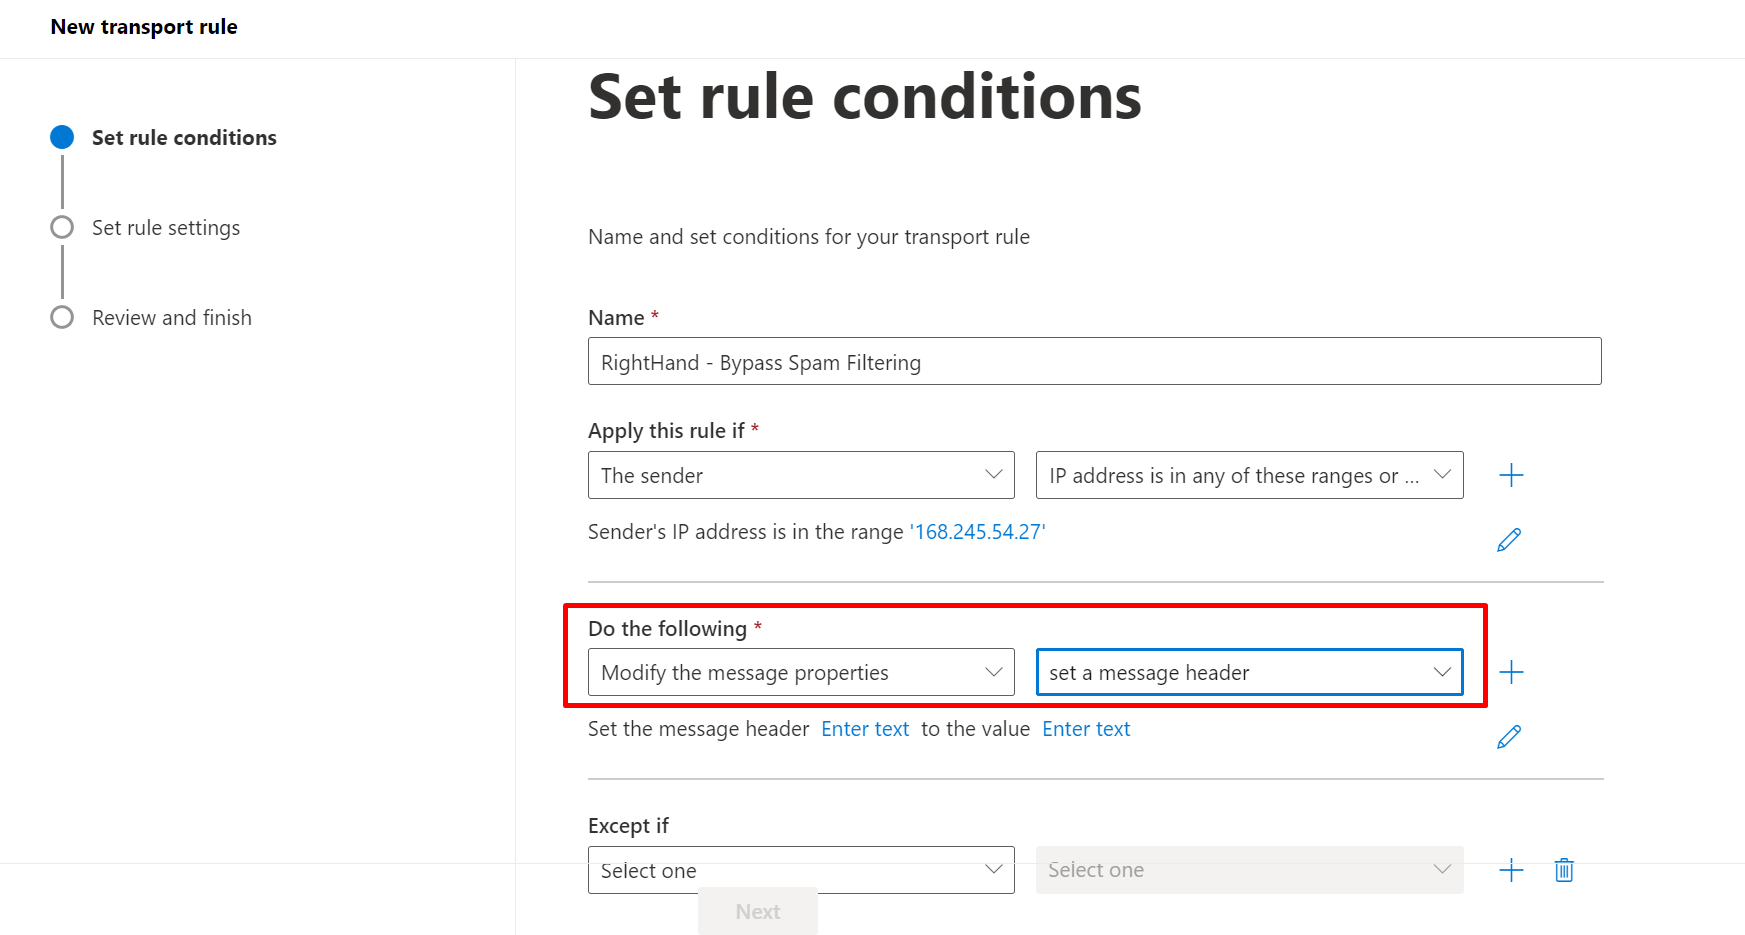
Step 1: Mail flow rule - Bypass spam filtering #
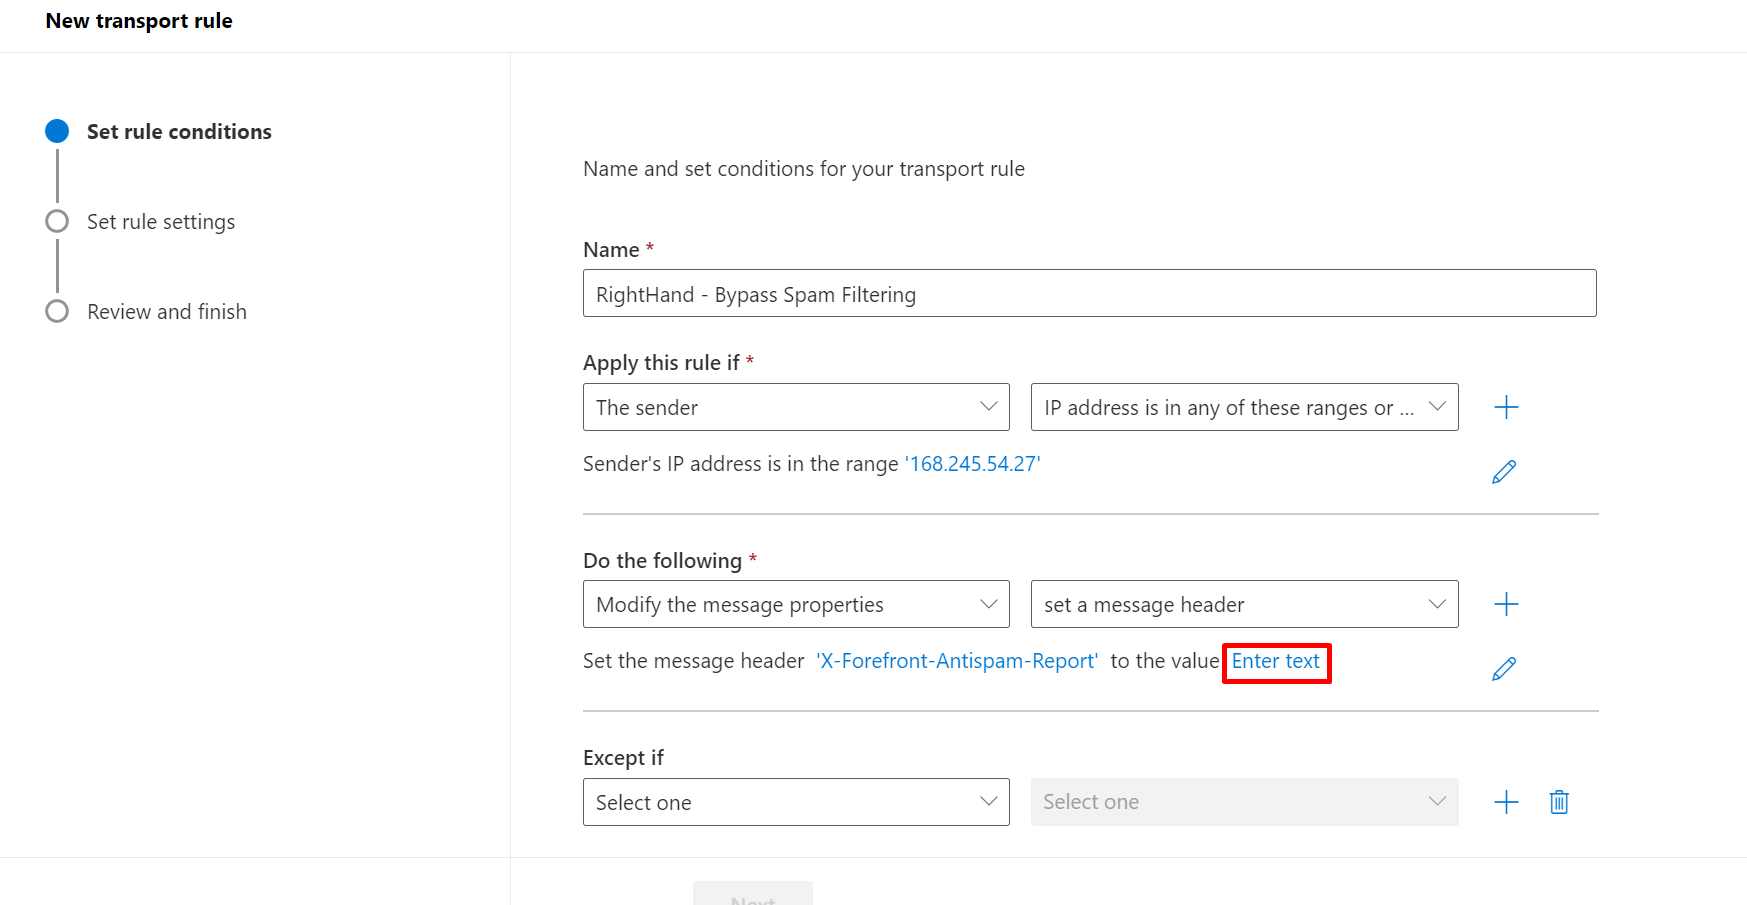
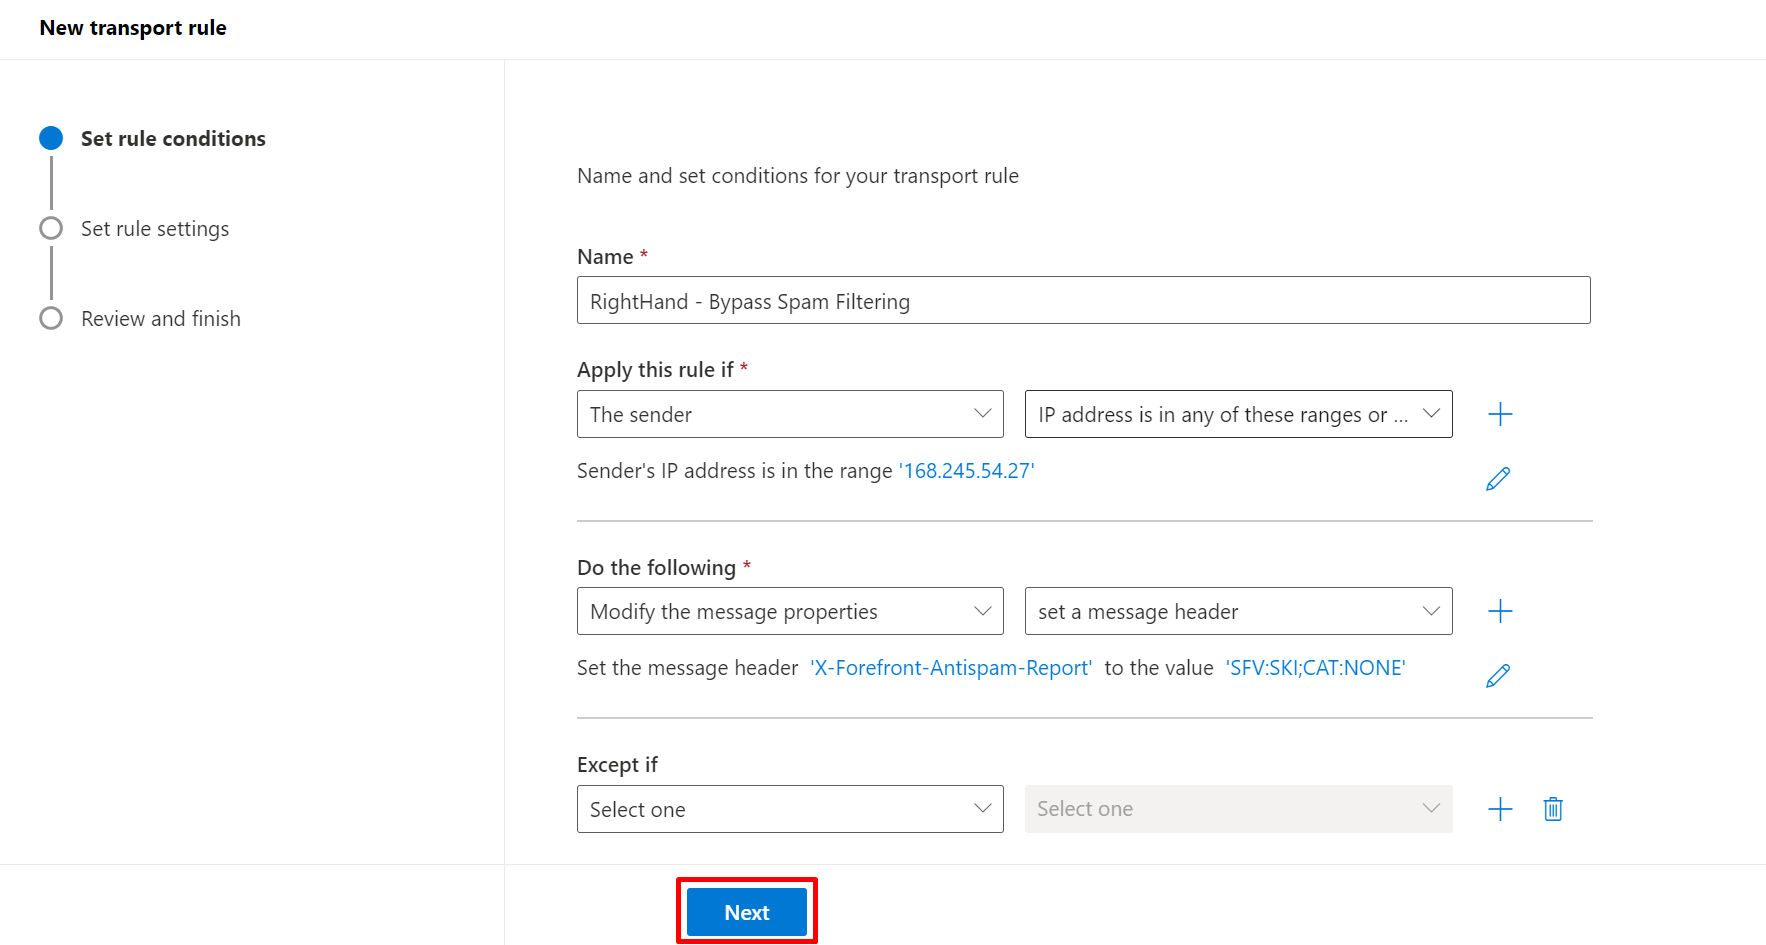
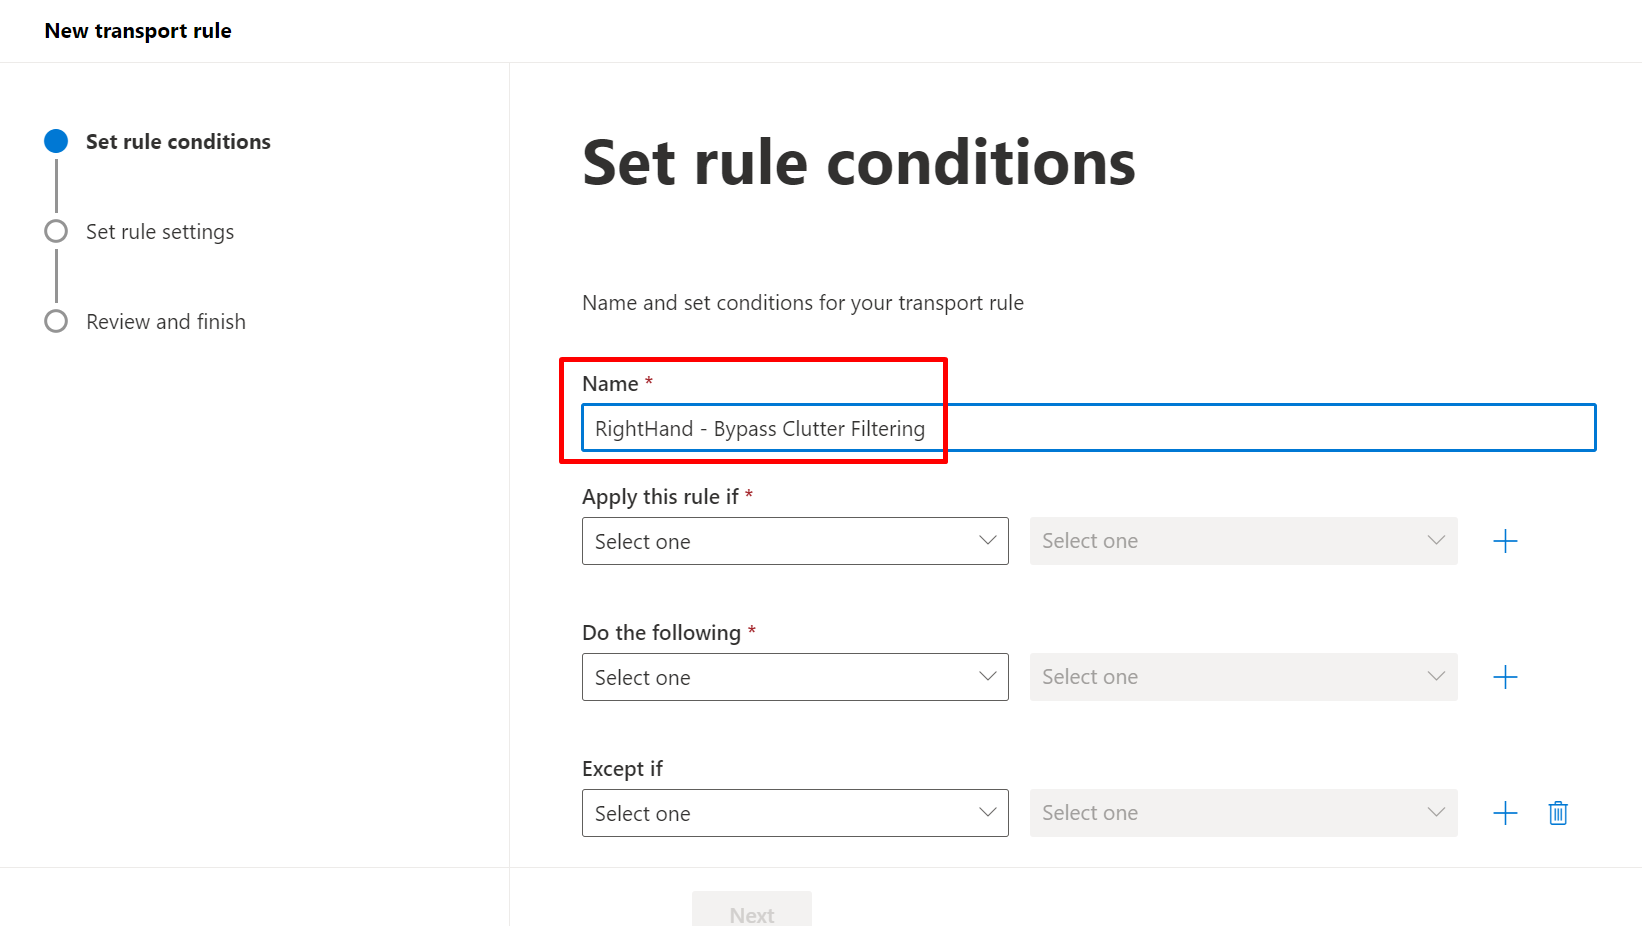
- In the Exchange Admin Center, navigate to Mail flow → Rules and click + Add a rule → Create a new rule.
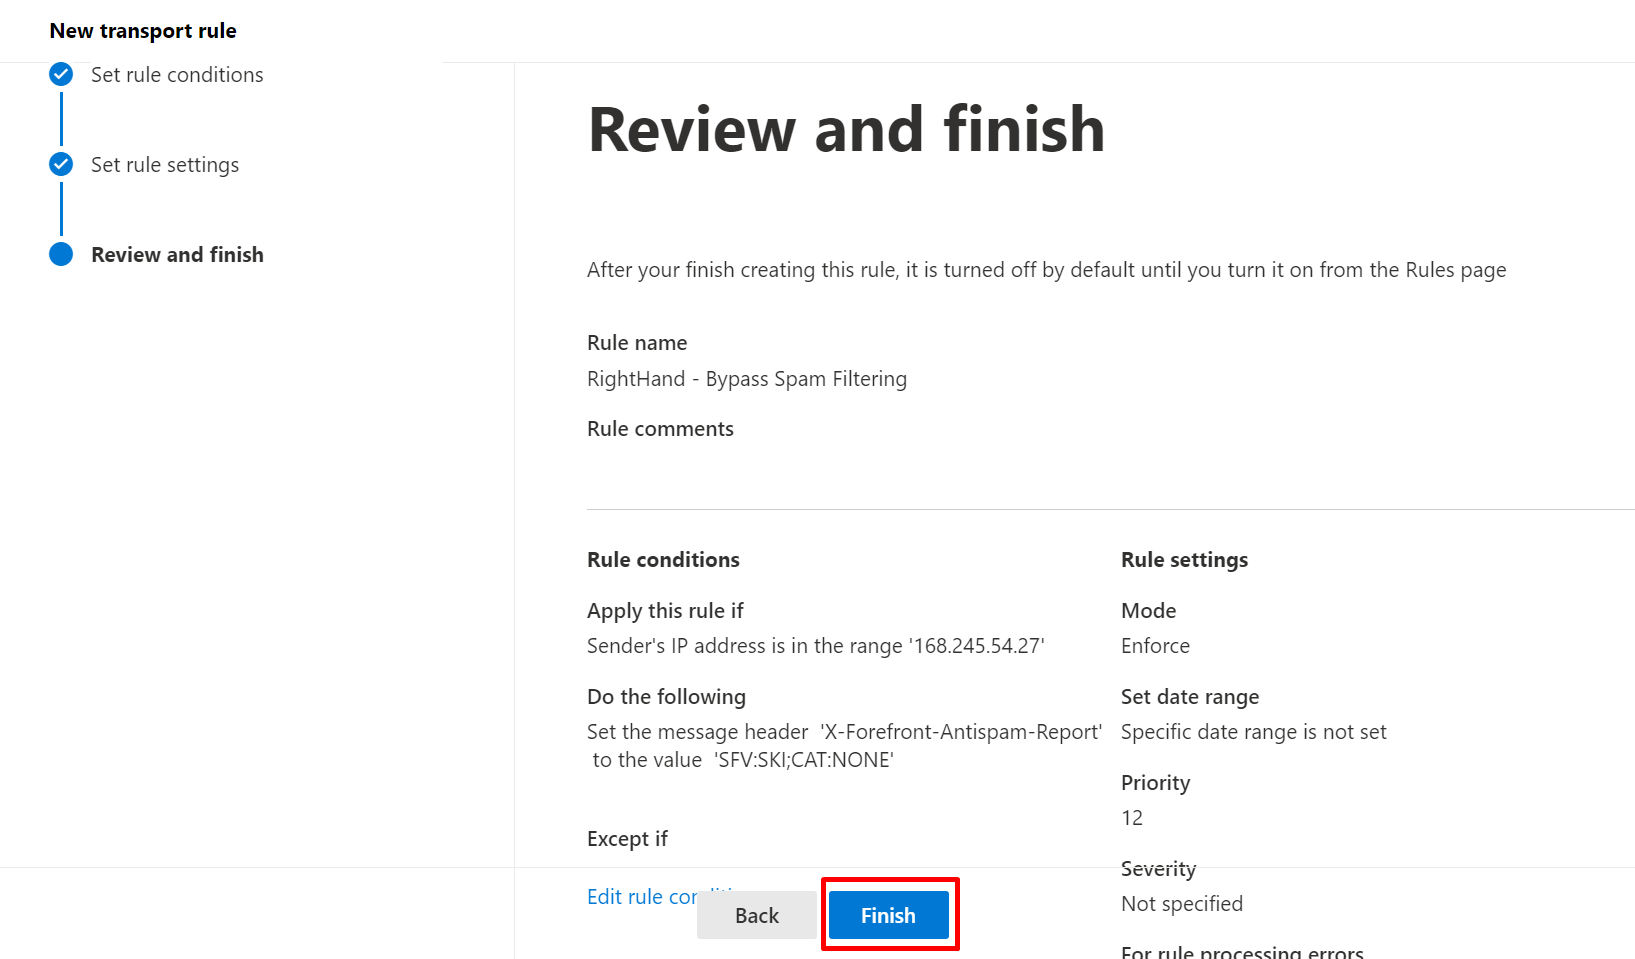
- Name:
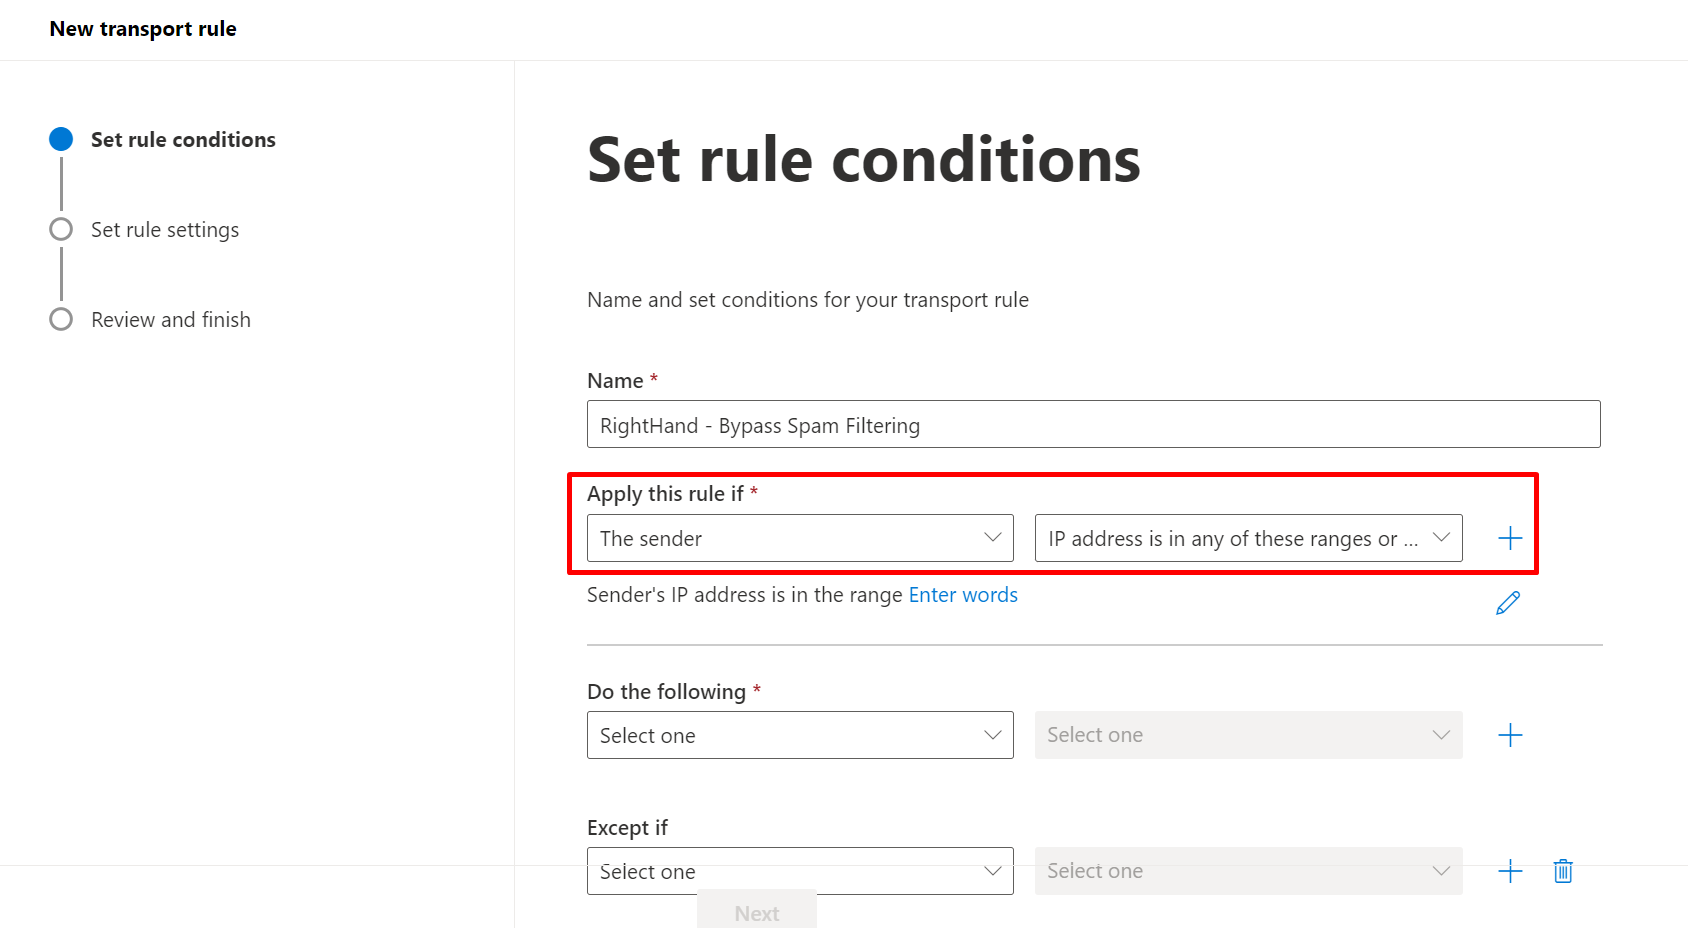
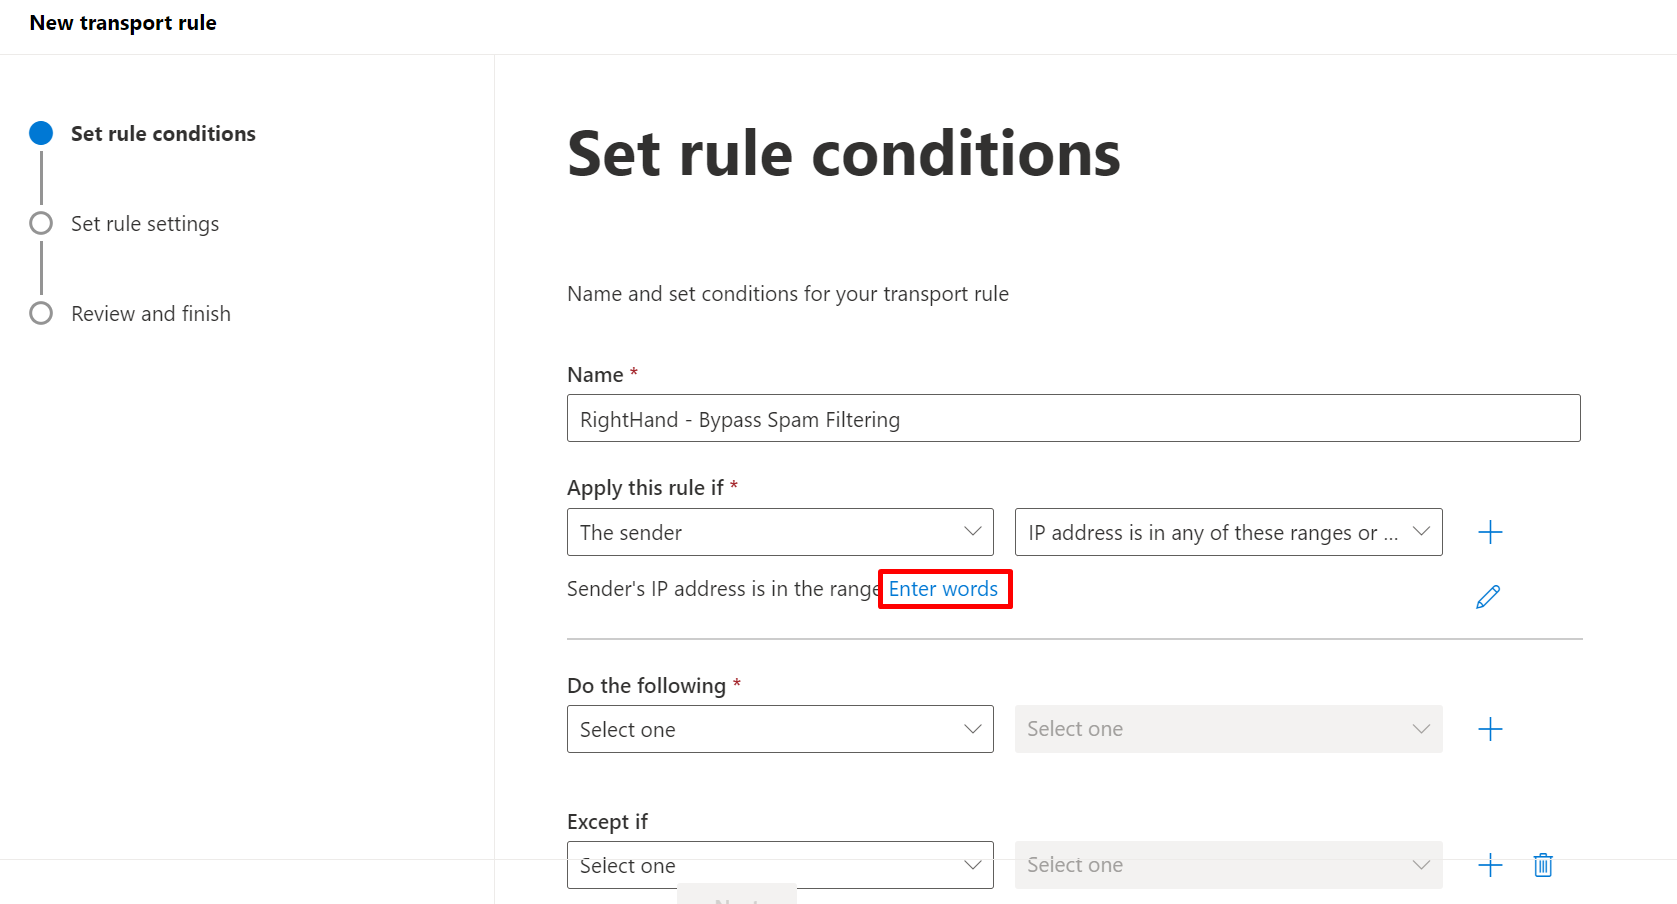
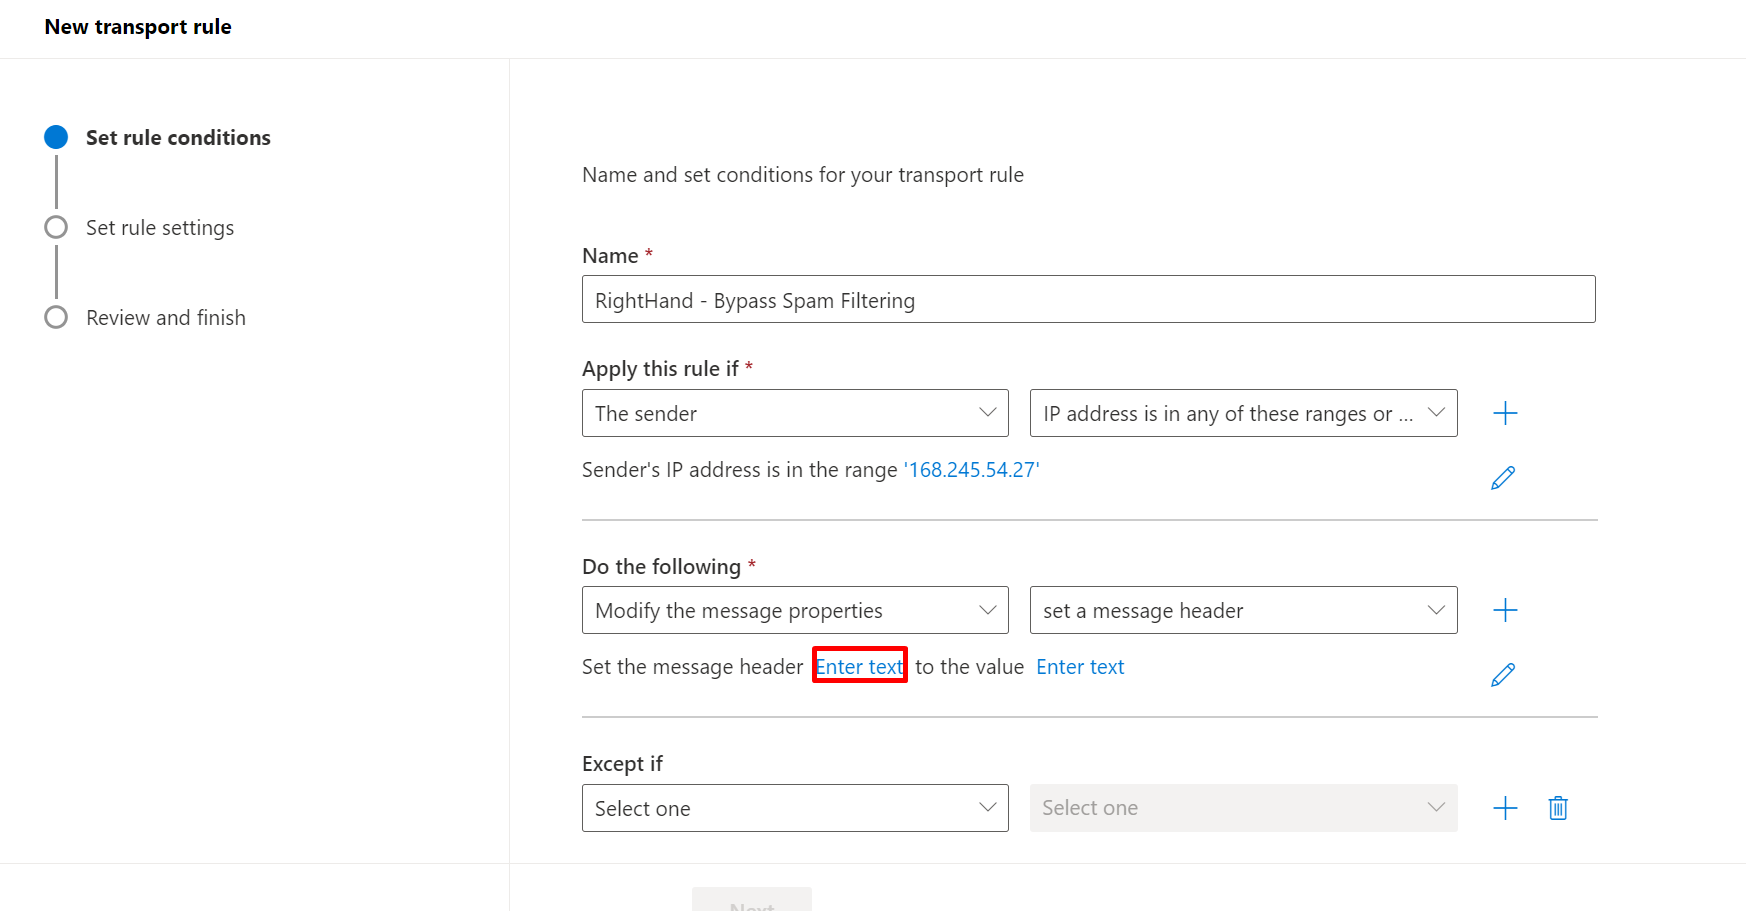
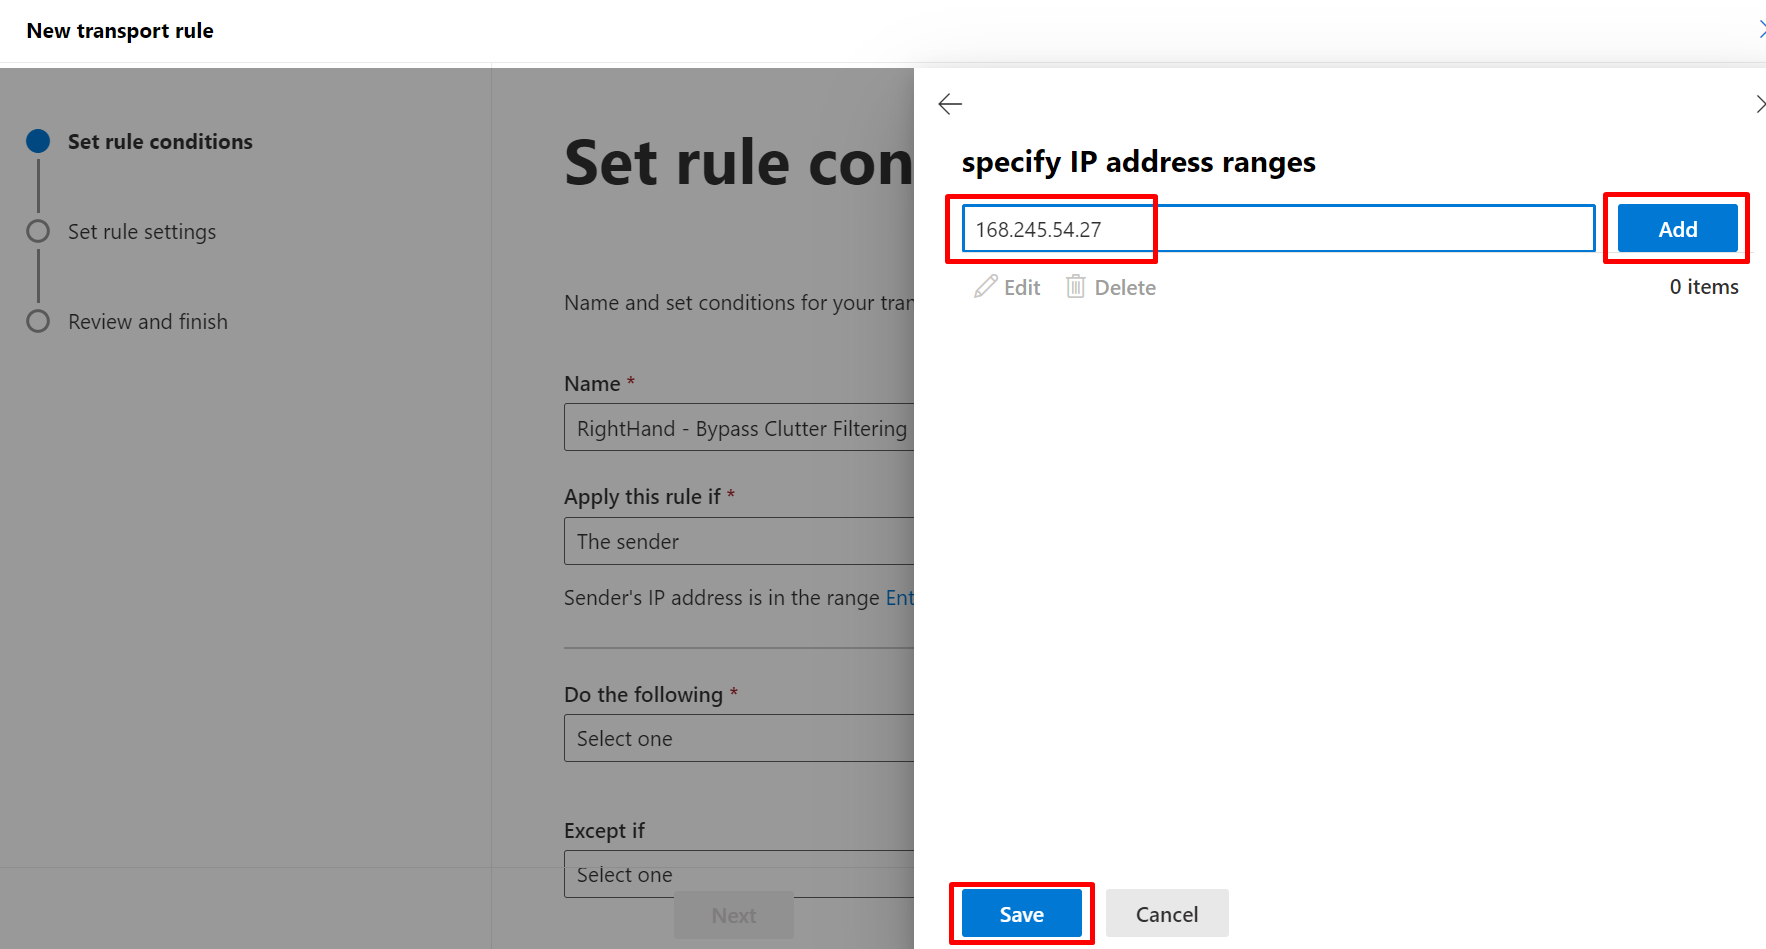
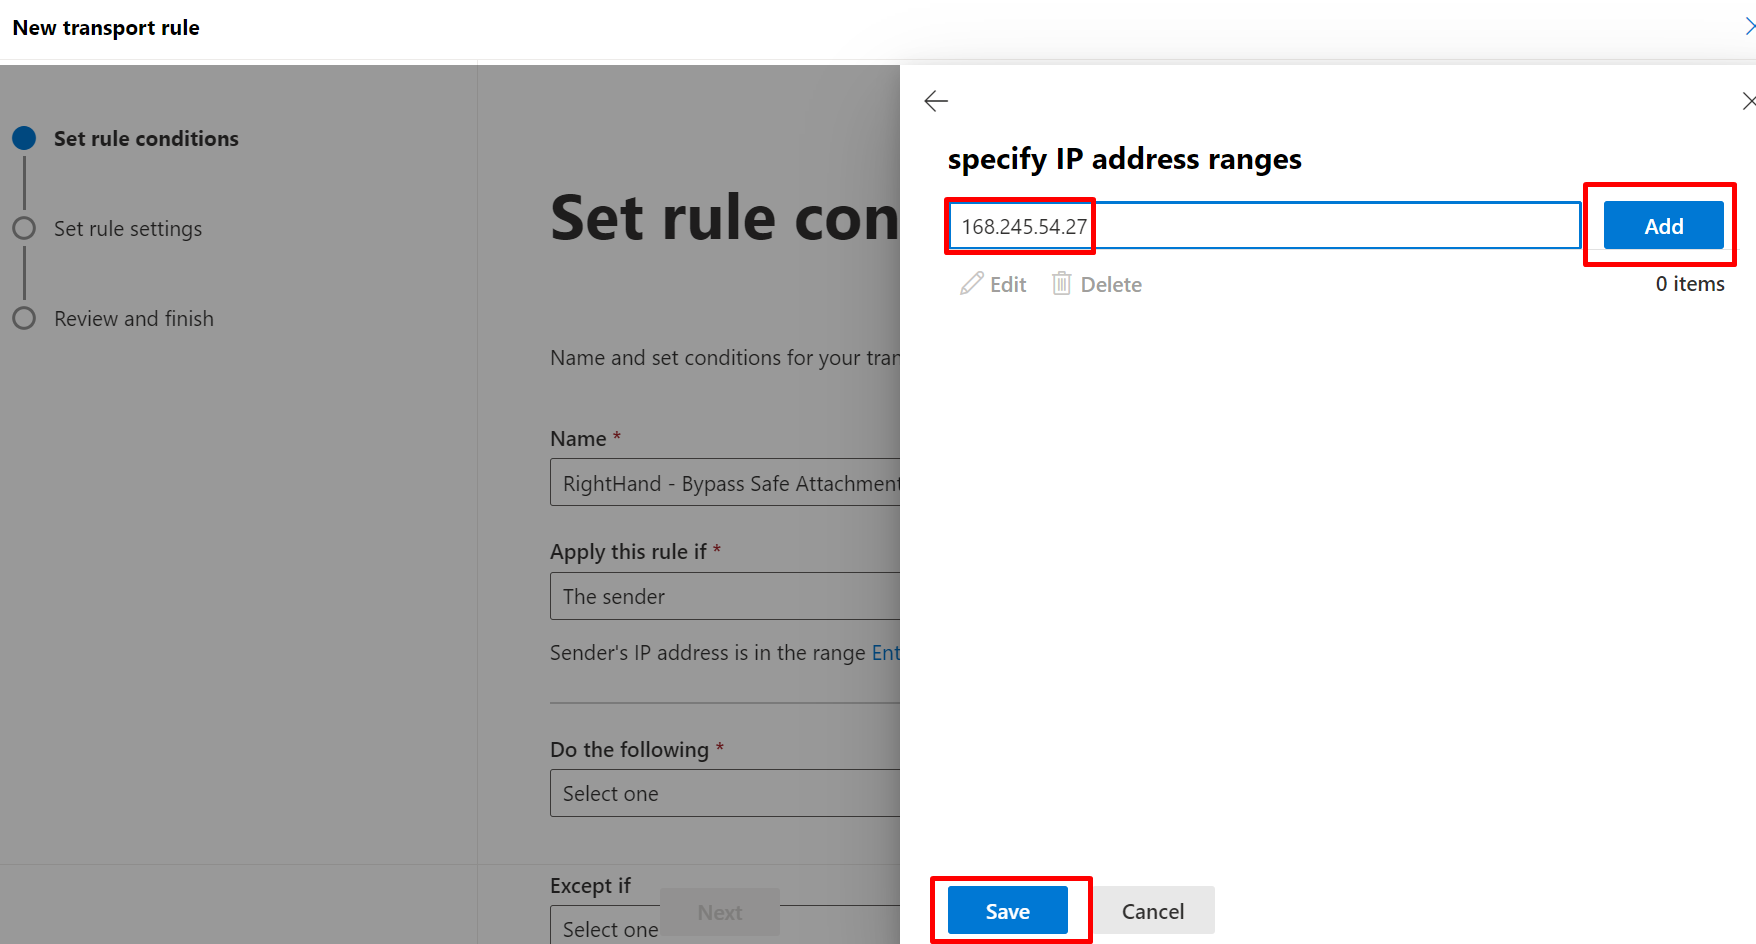
SolCyber - Right-Hand - Bypass Spam Filtering. - Under Apply this rule if, choose The sender → IP address is in any of these ranges or exactly matches, then enter the three Right-Hand IPs listed above.
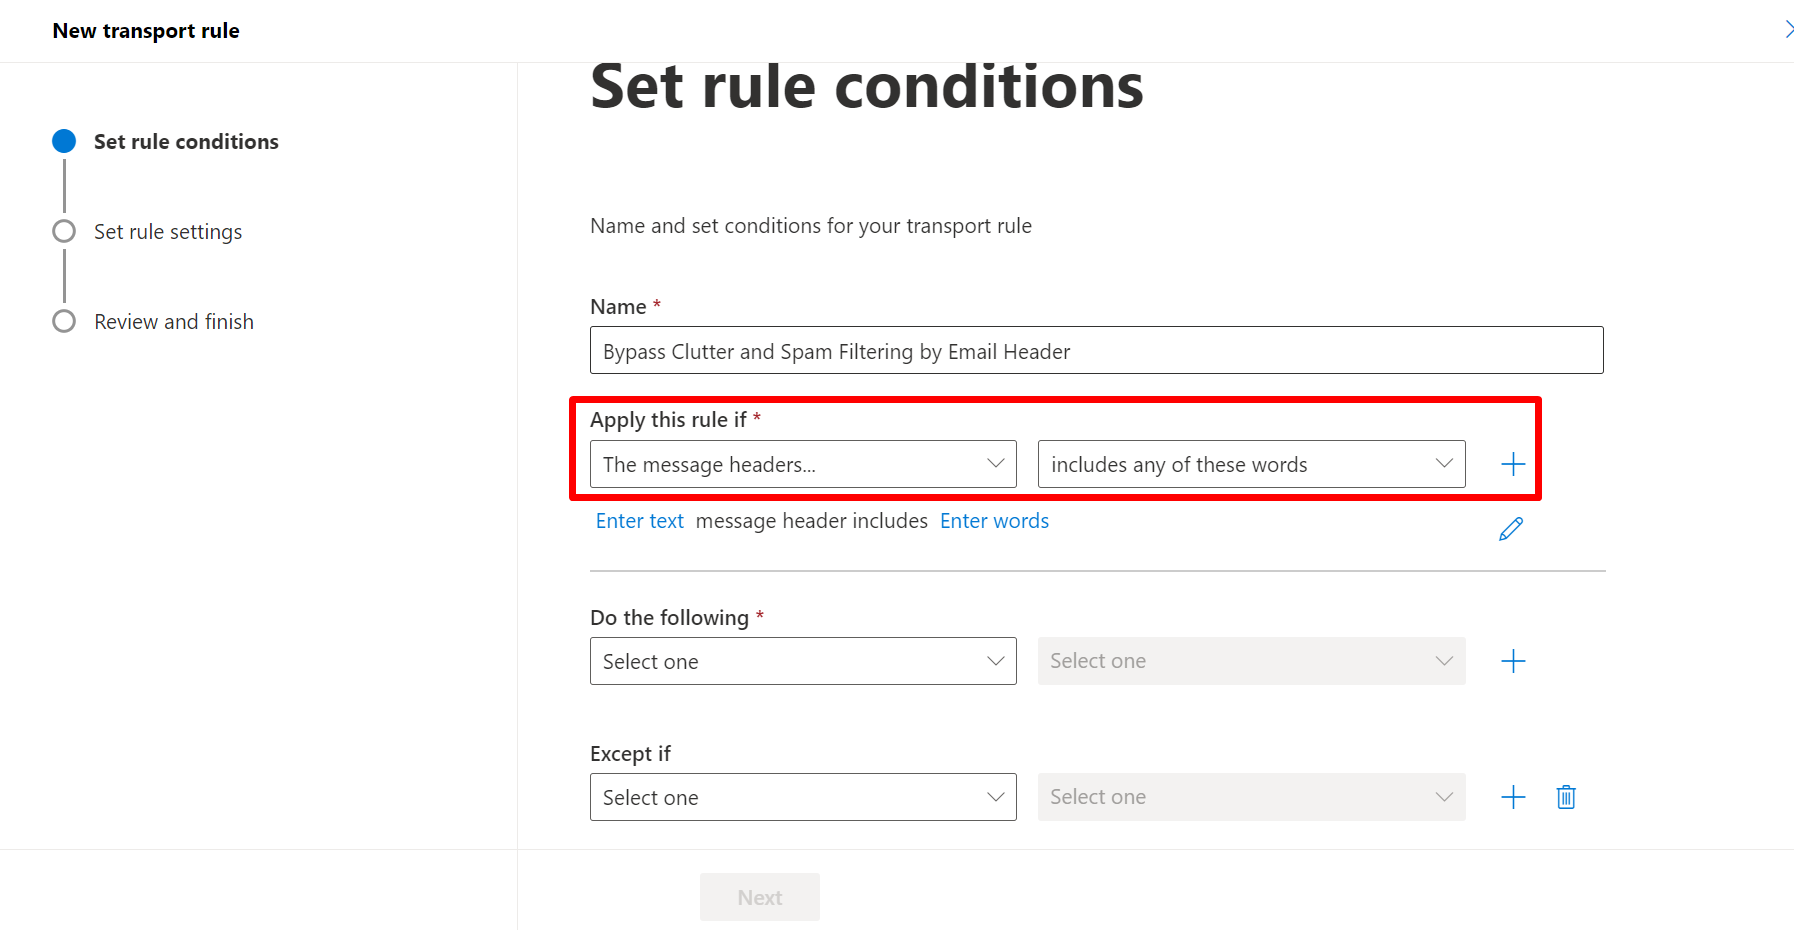
- Click the + under the first condition to add AND: choose The message headers → includes any of these words.
- For header name, enter the
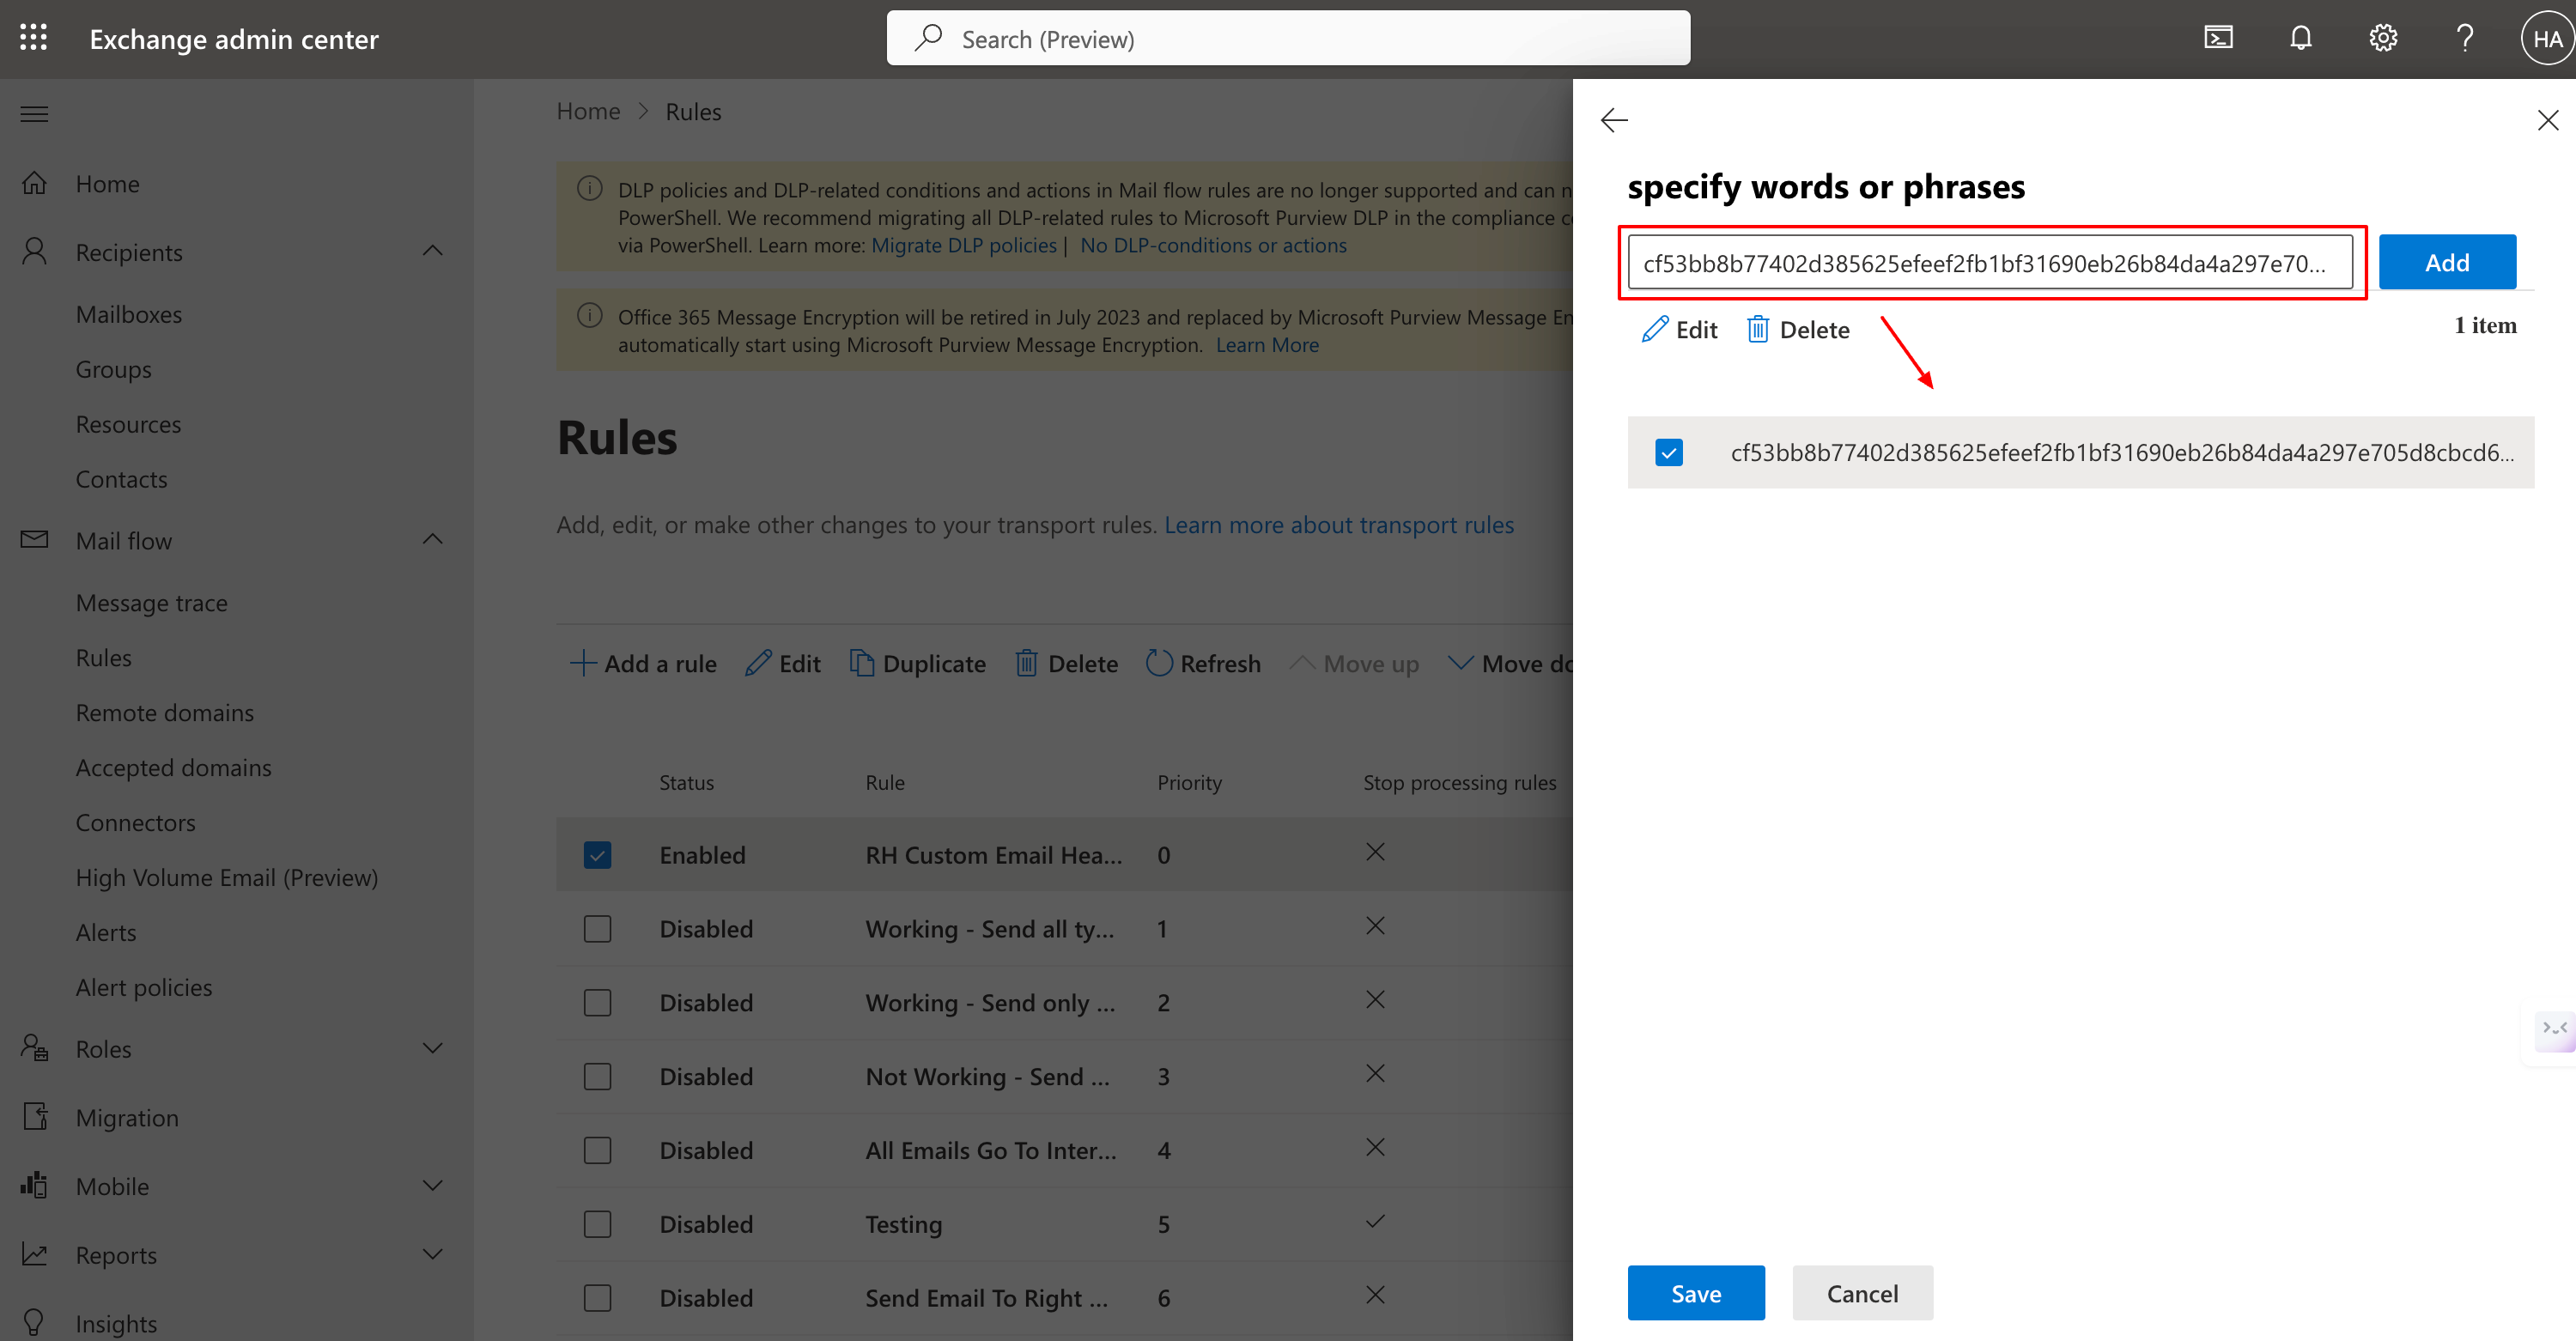
X-RHS-TID-<hash>header name supplied by SolCyber. - For words, enter the hash value supplied by SolCyber.
- For header name, enter the
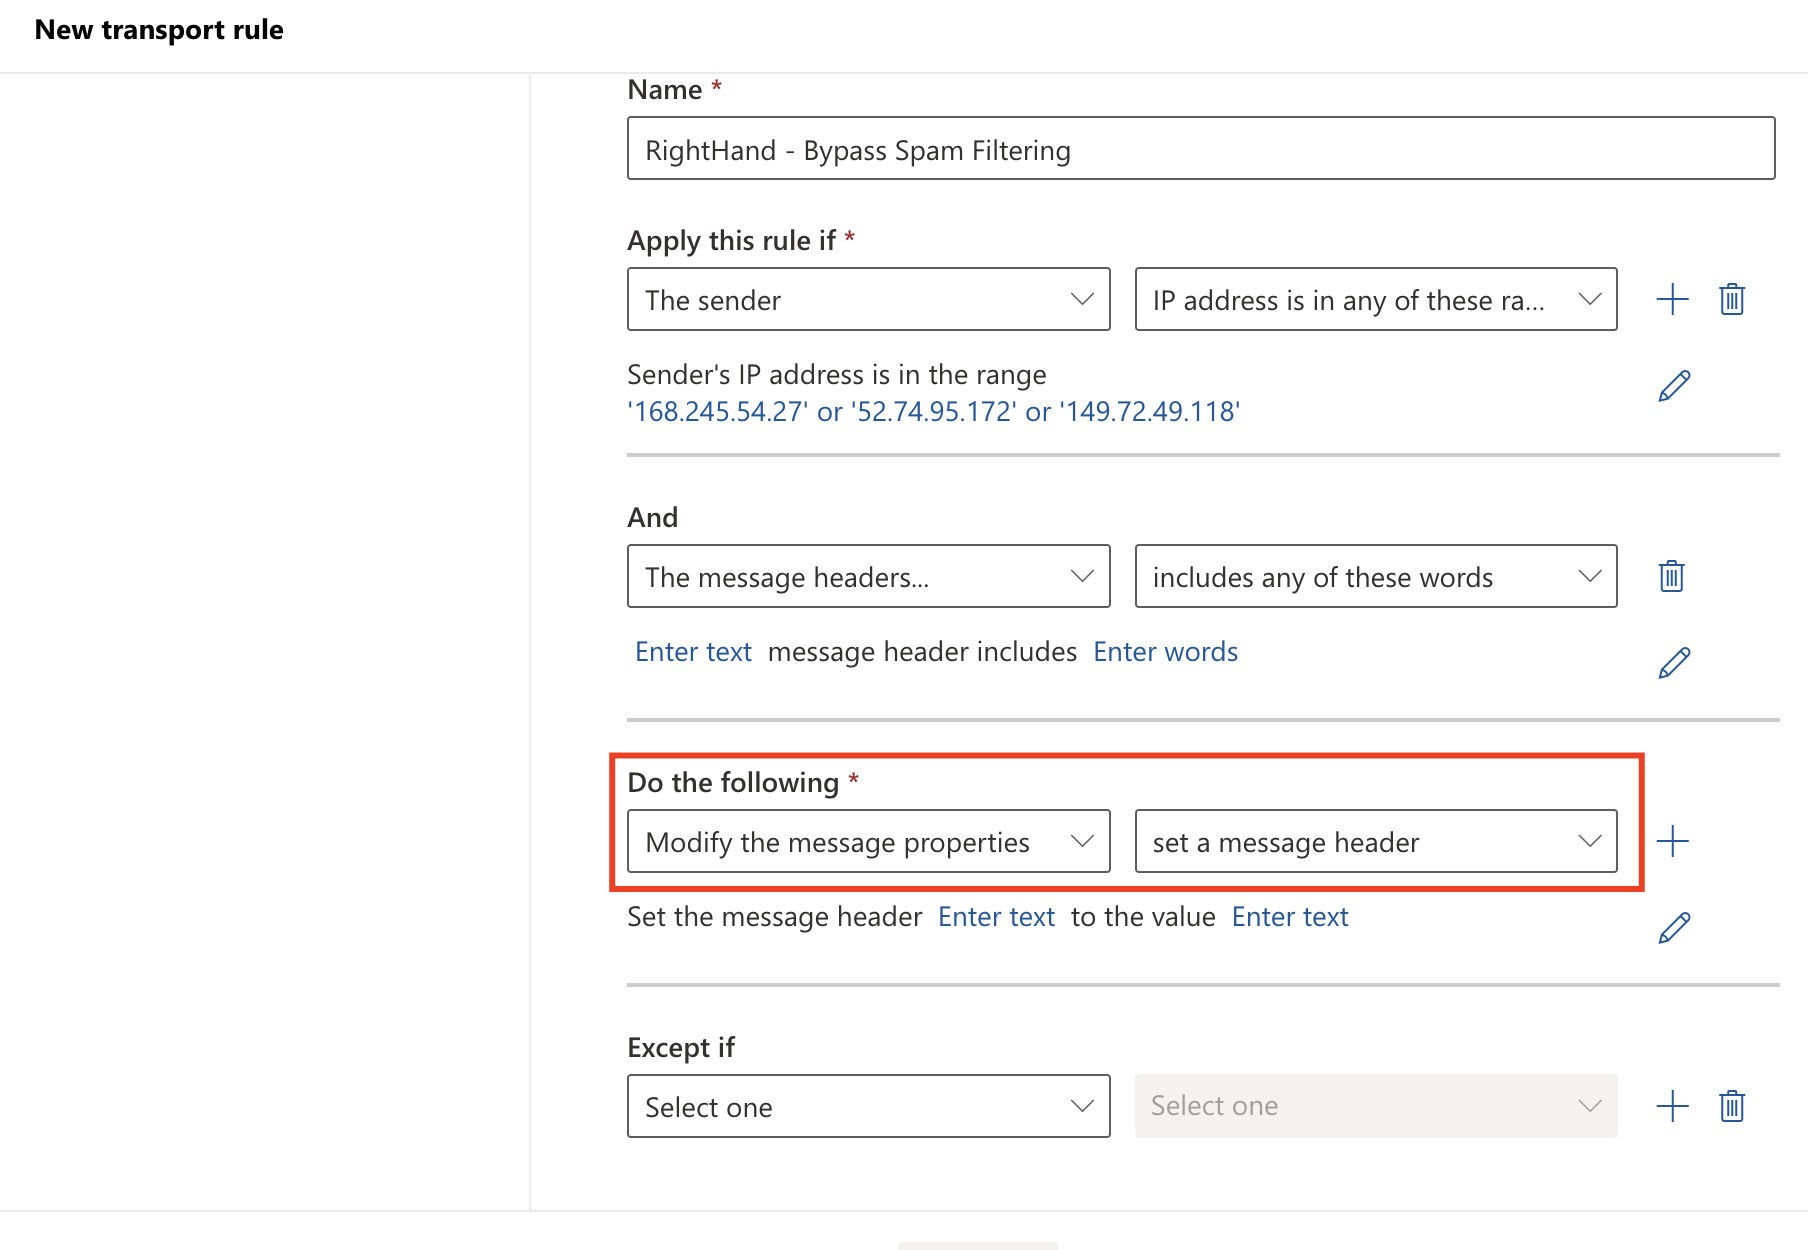
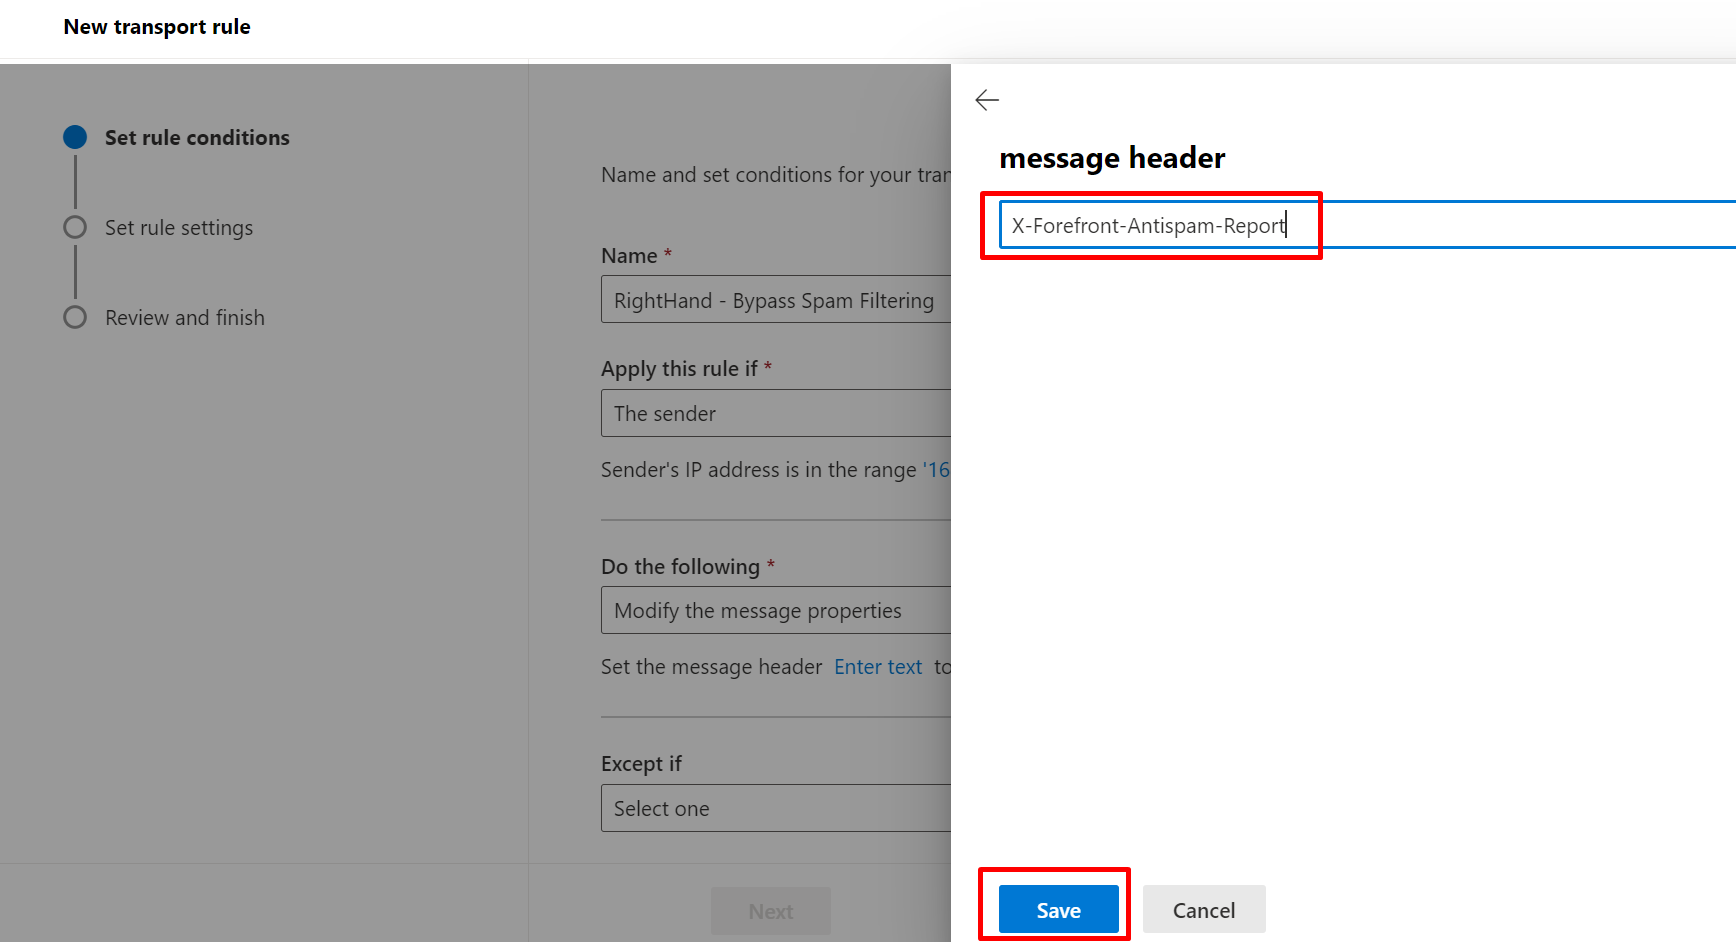
- Under Do the following, choose Modify the message properties → set a message header.
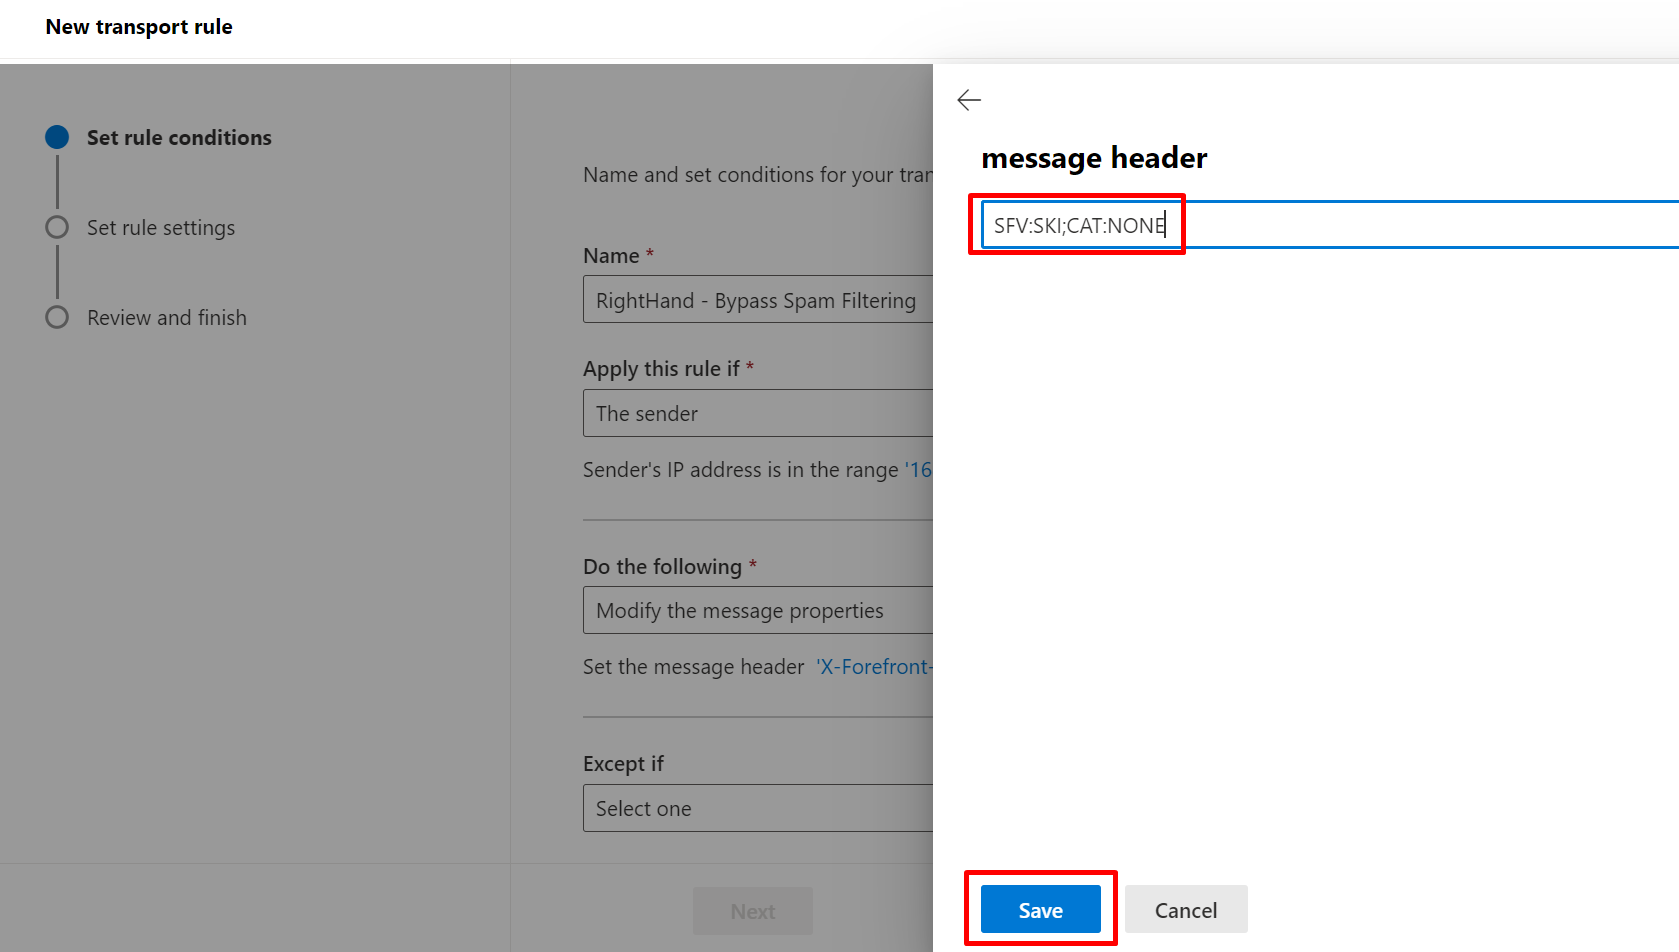
- Header name:
X-Forefront-Antispam-Report - Value:
SFV:SKI;CAT:NONE
- Header name:
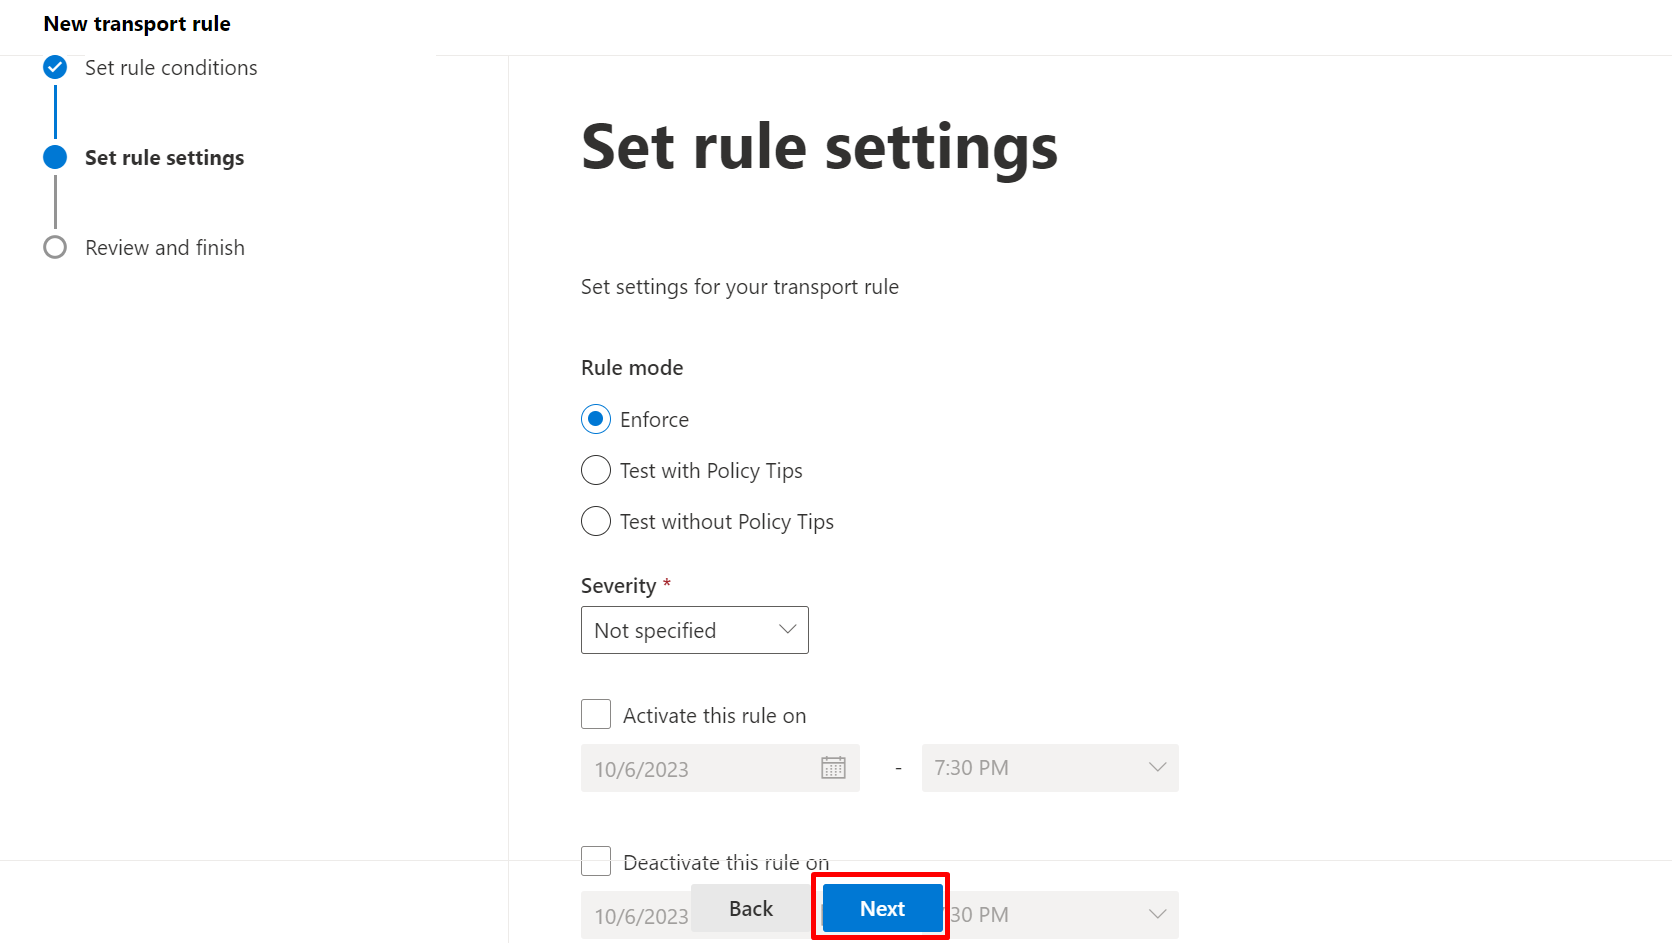
- Click Next. On the Set rule settings screen, leave Stop processing more rules unchecked.
- Click Next → Finish.


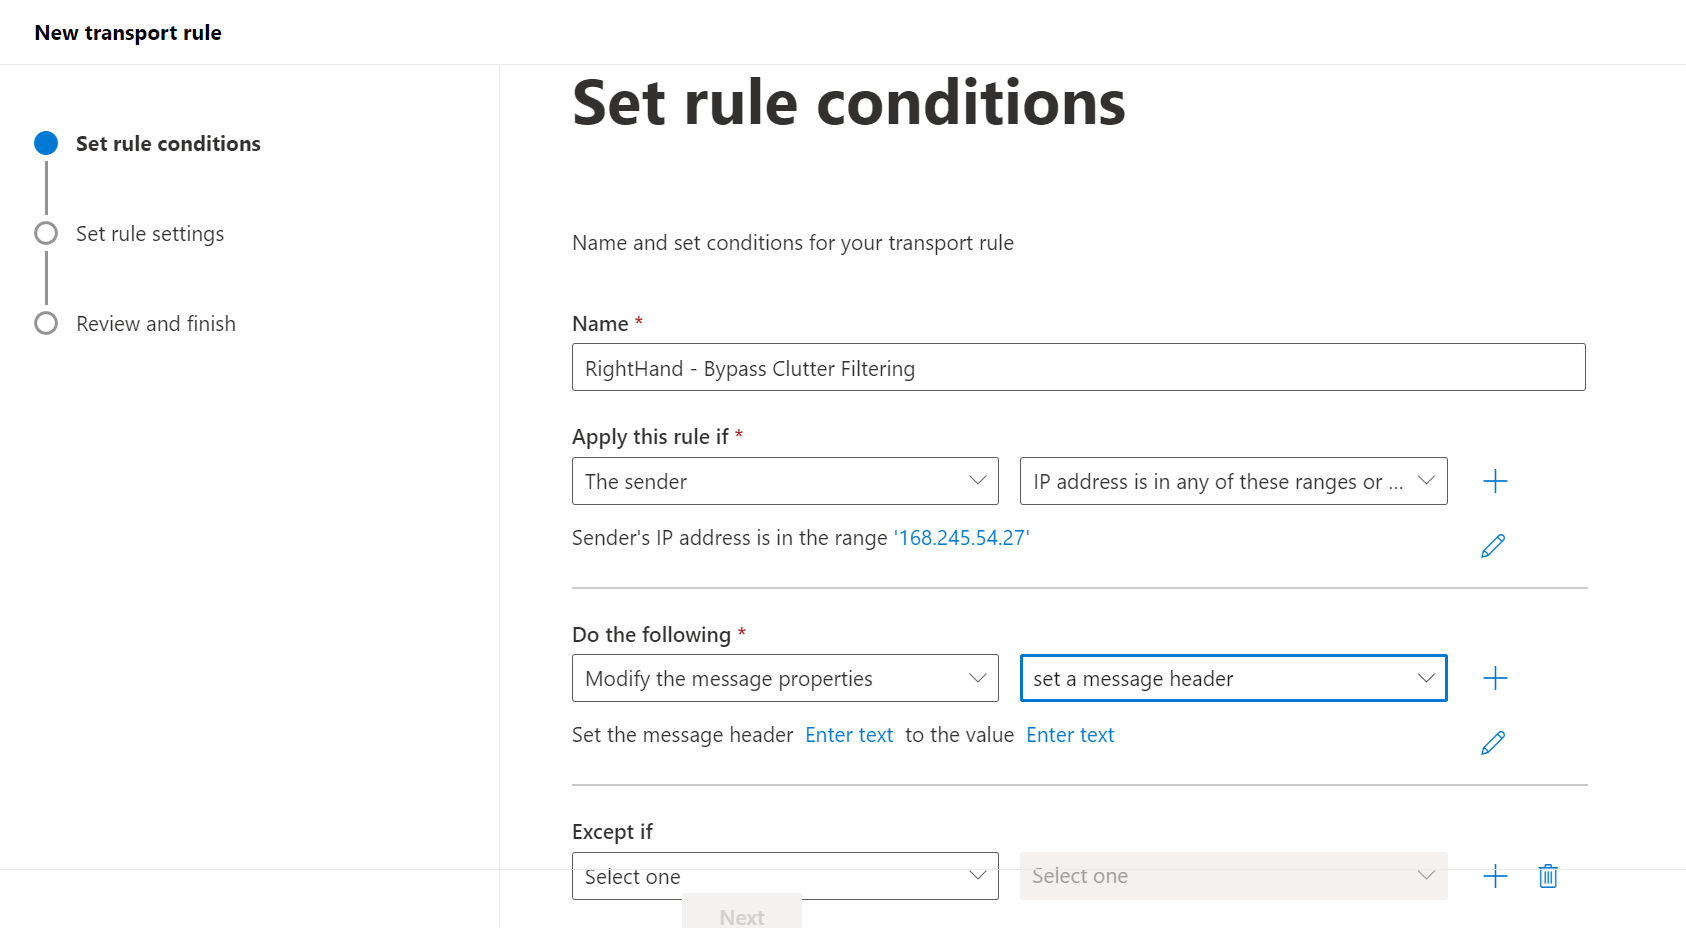
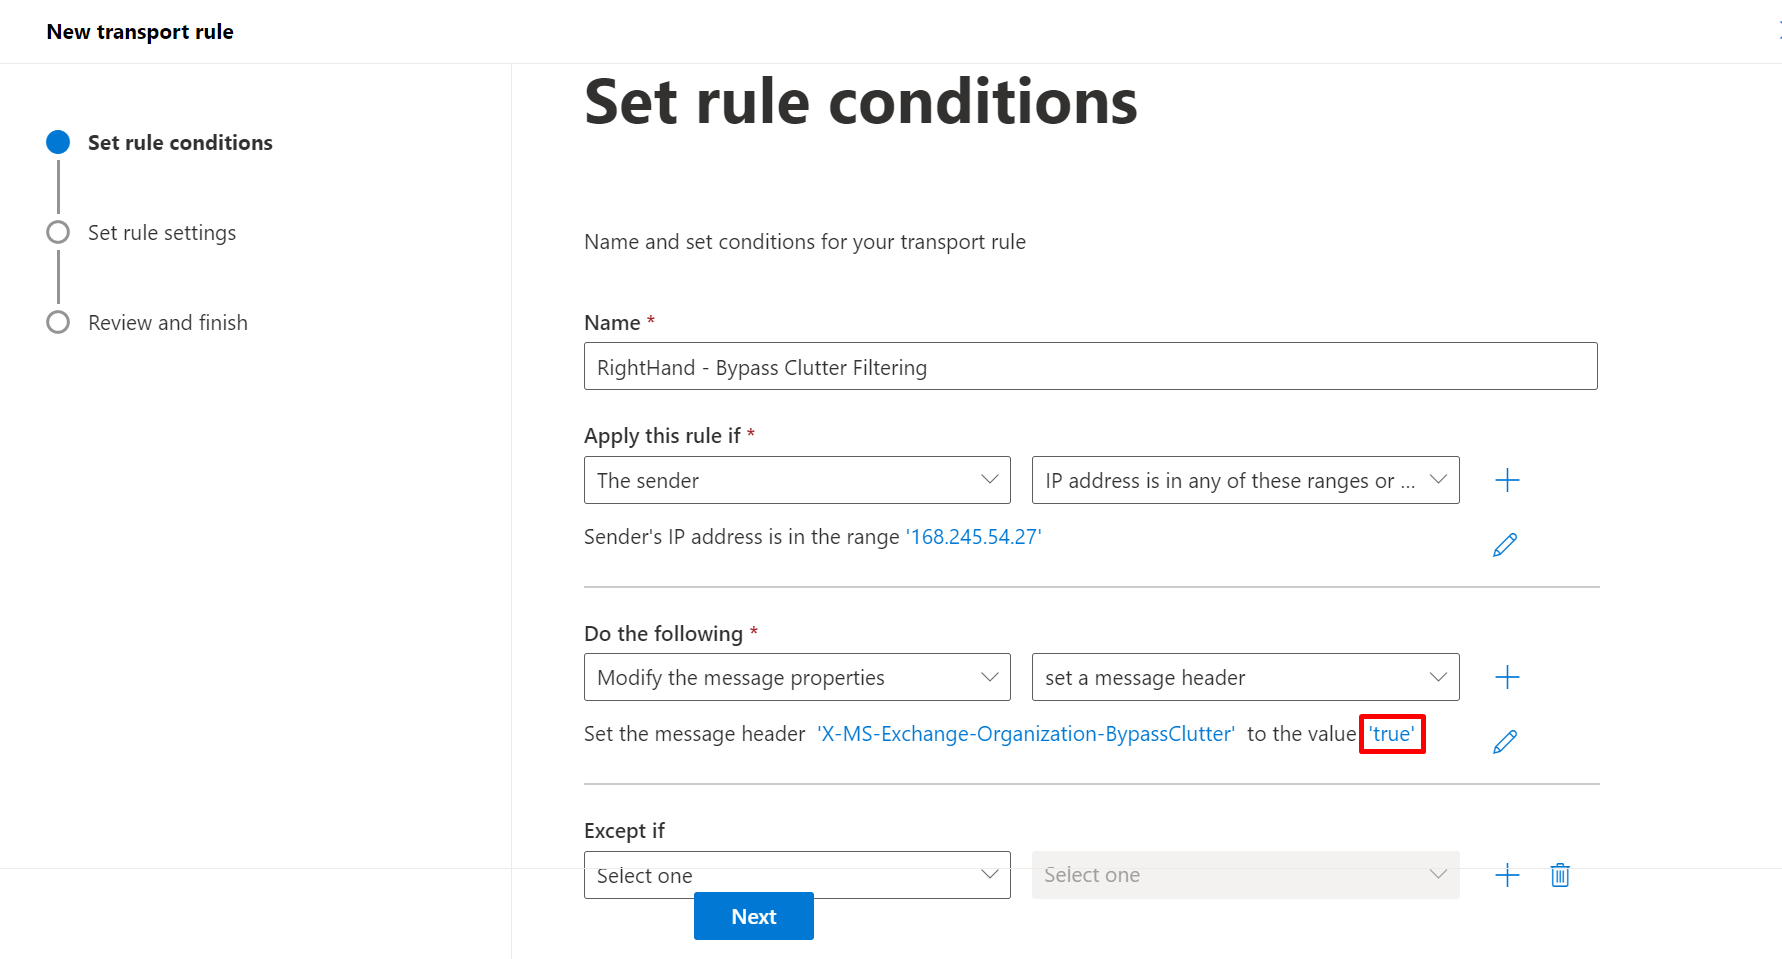
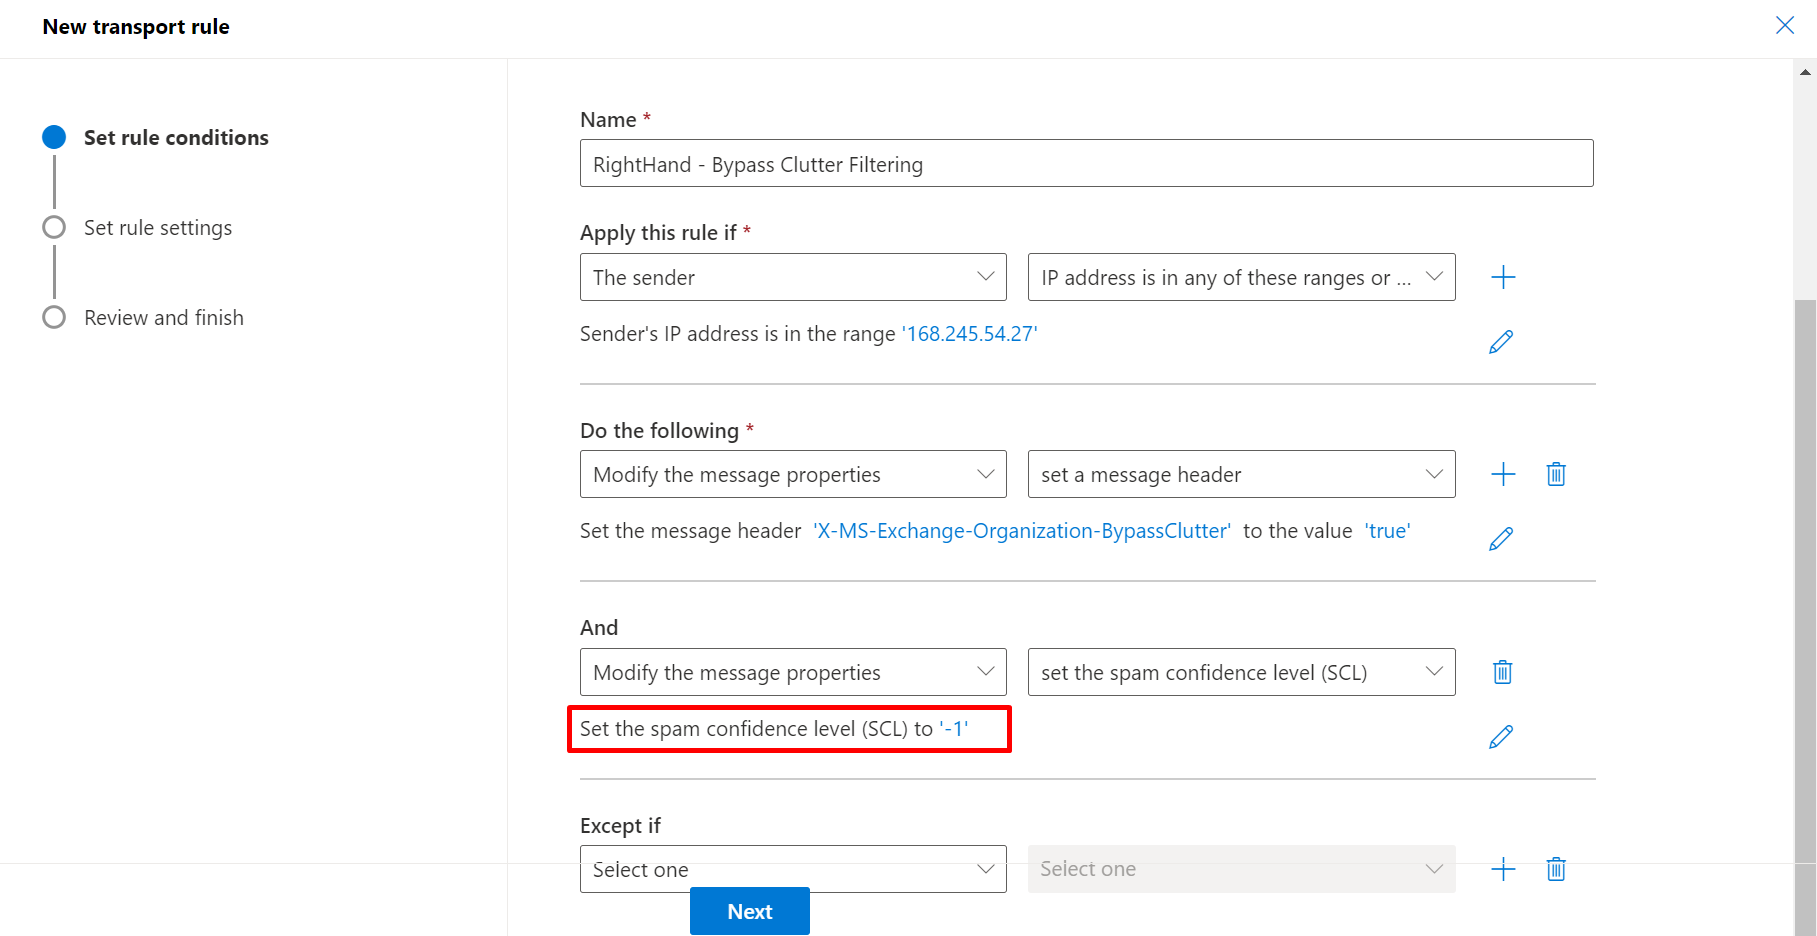
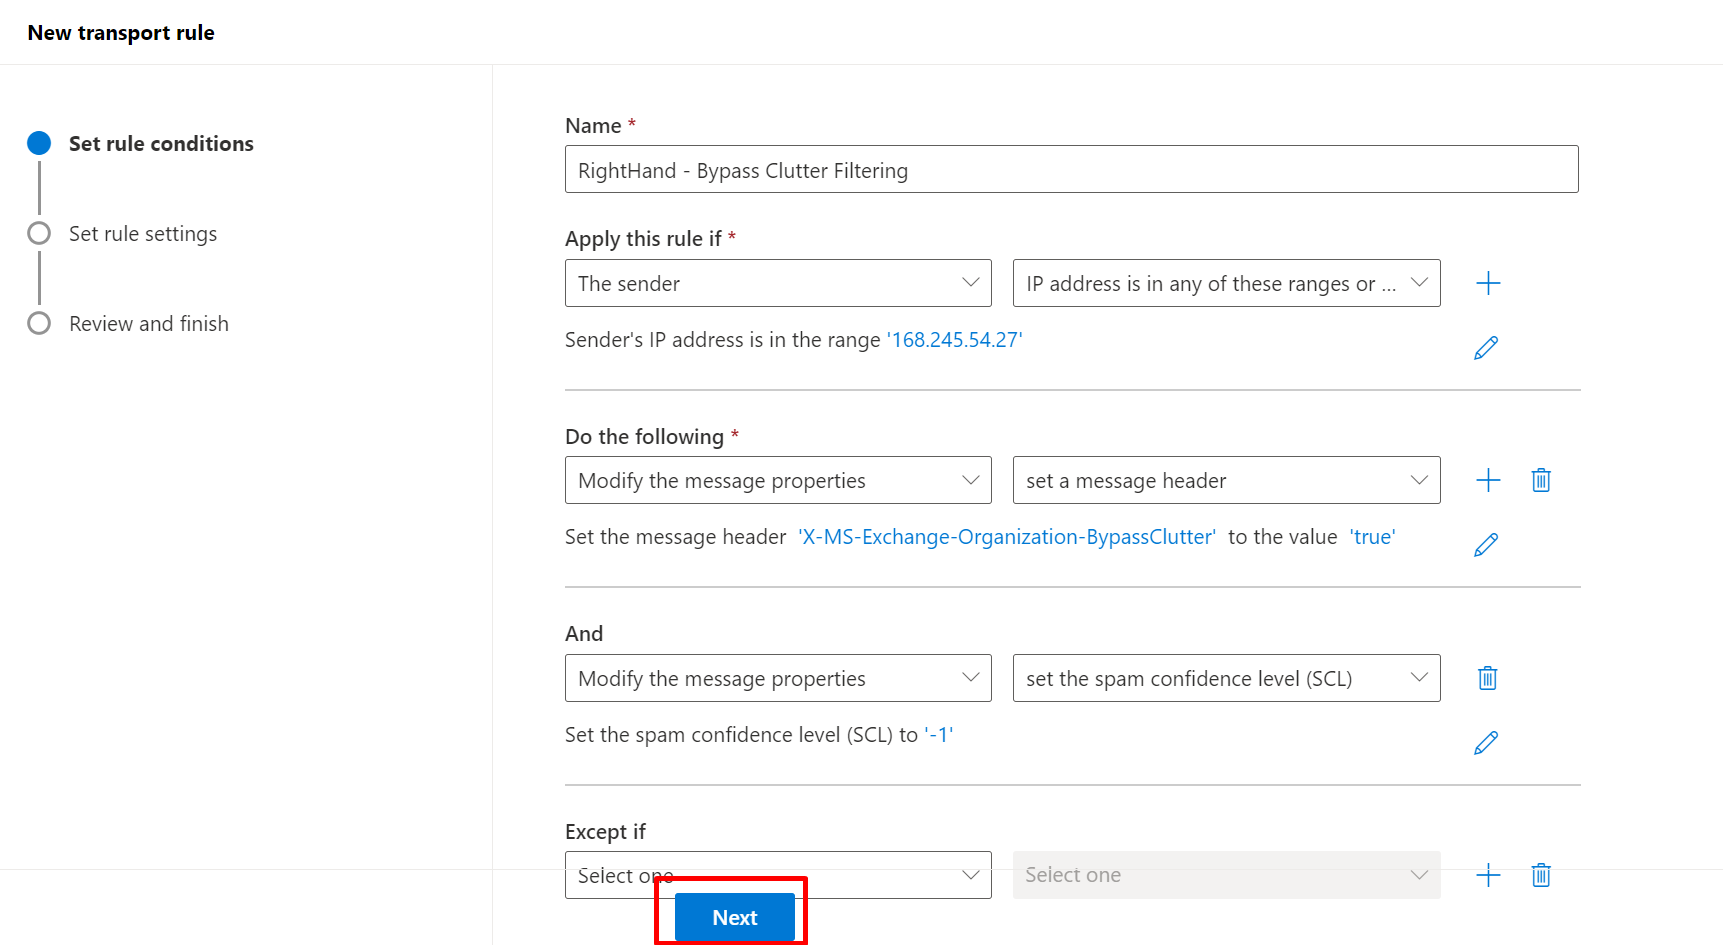
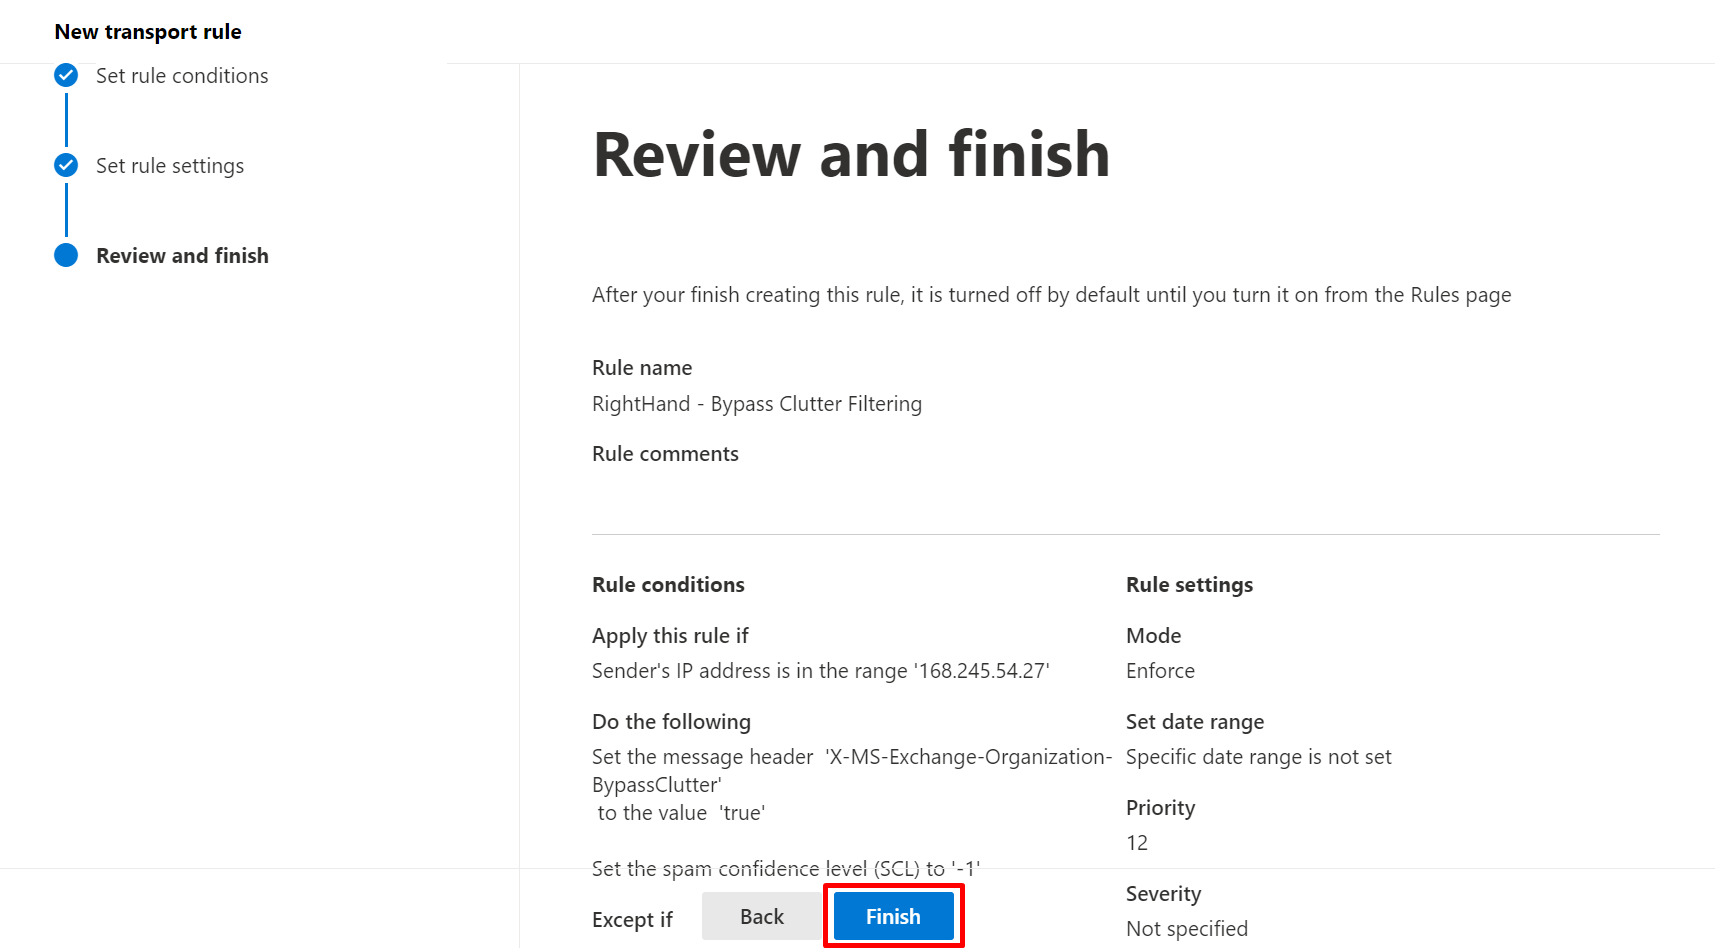
Step 2: Mail flow rule - Bypass clutter filtering#
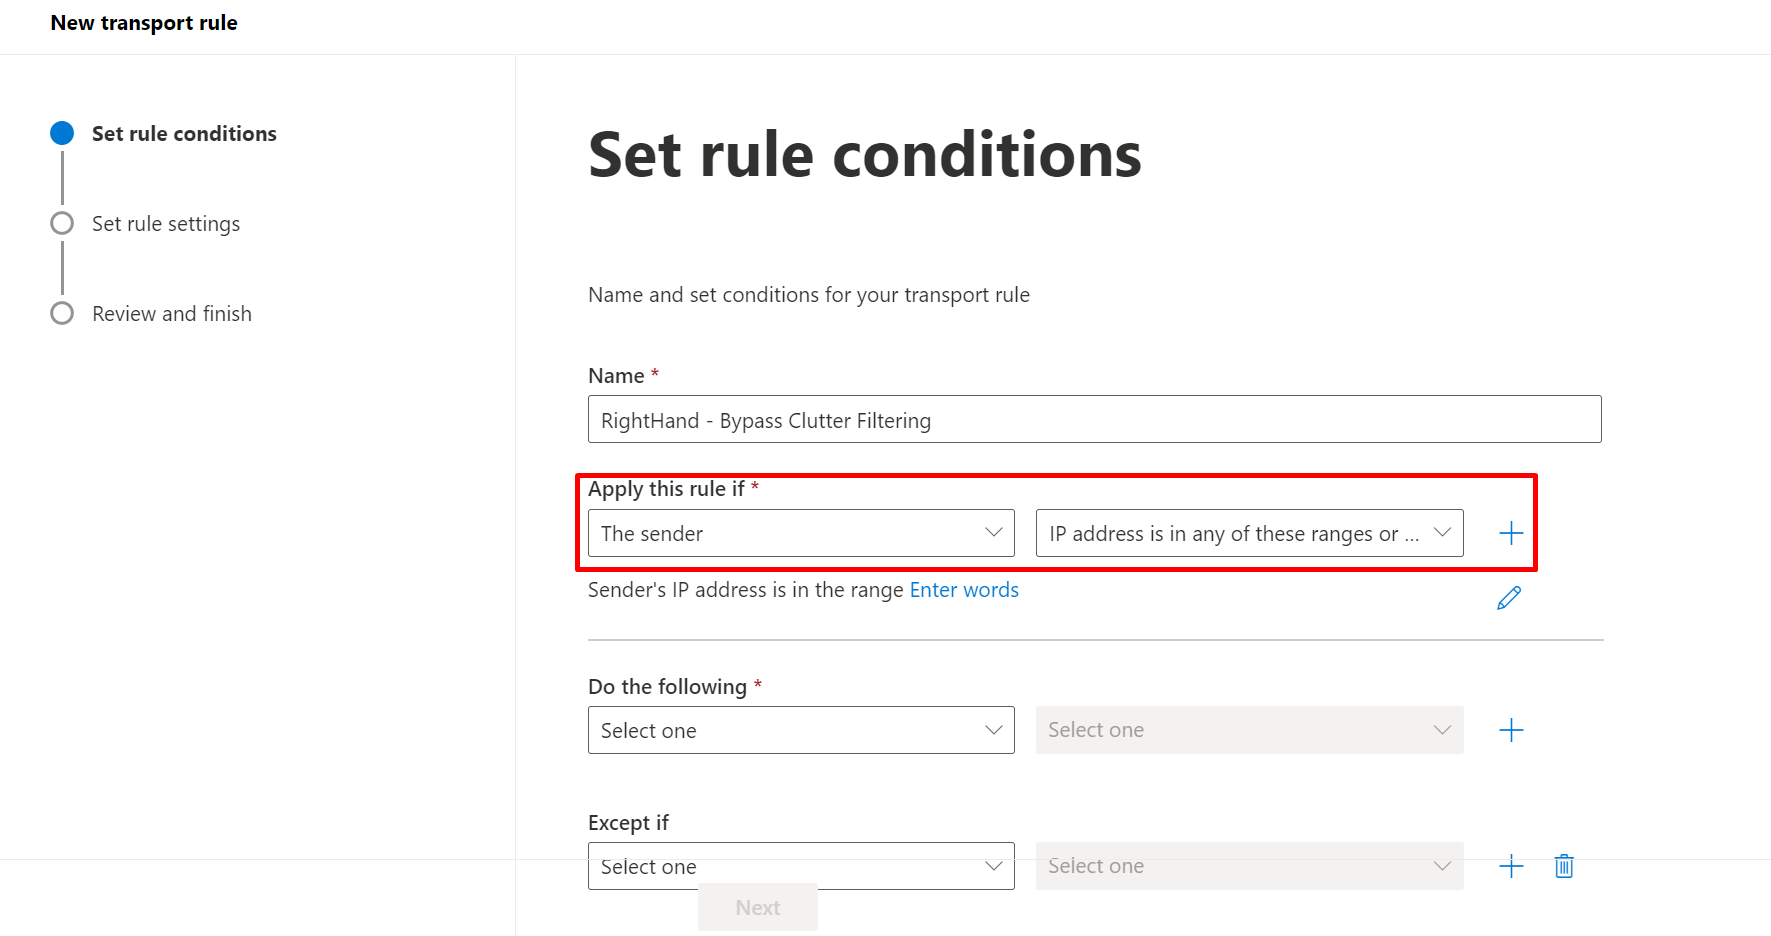
- Create a new mail flow rule named
SolCyber - Right-Hand - Bypass Clutter Filtering. - Condition 1: The sender → IP address is in any of these ranges or exactly matches → enter the three Right-Hand IPs.
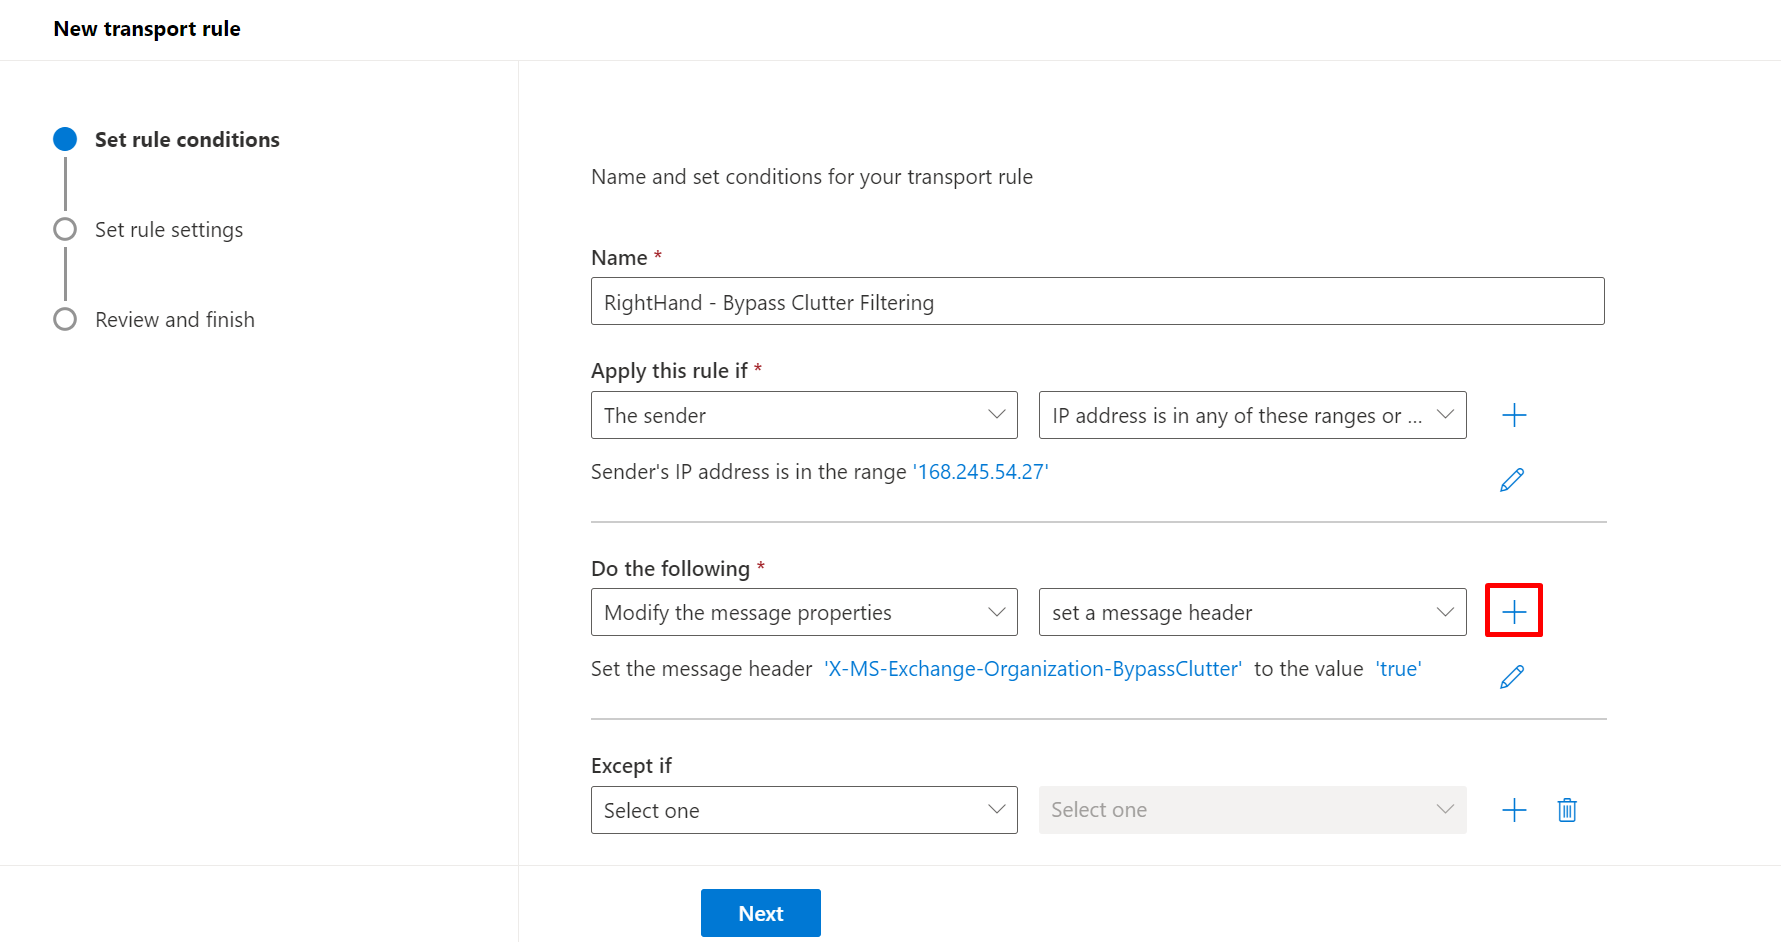
- Condition 2 (AND): The message headers → includes any of these words → enter the
X-RHS-TID-<hash>header name and hash value supplied by SolCyber. - Action 1: Modify the message properties → set a message header.
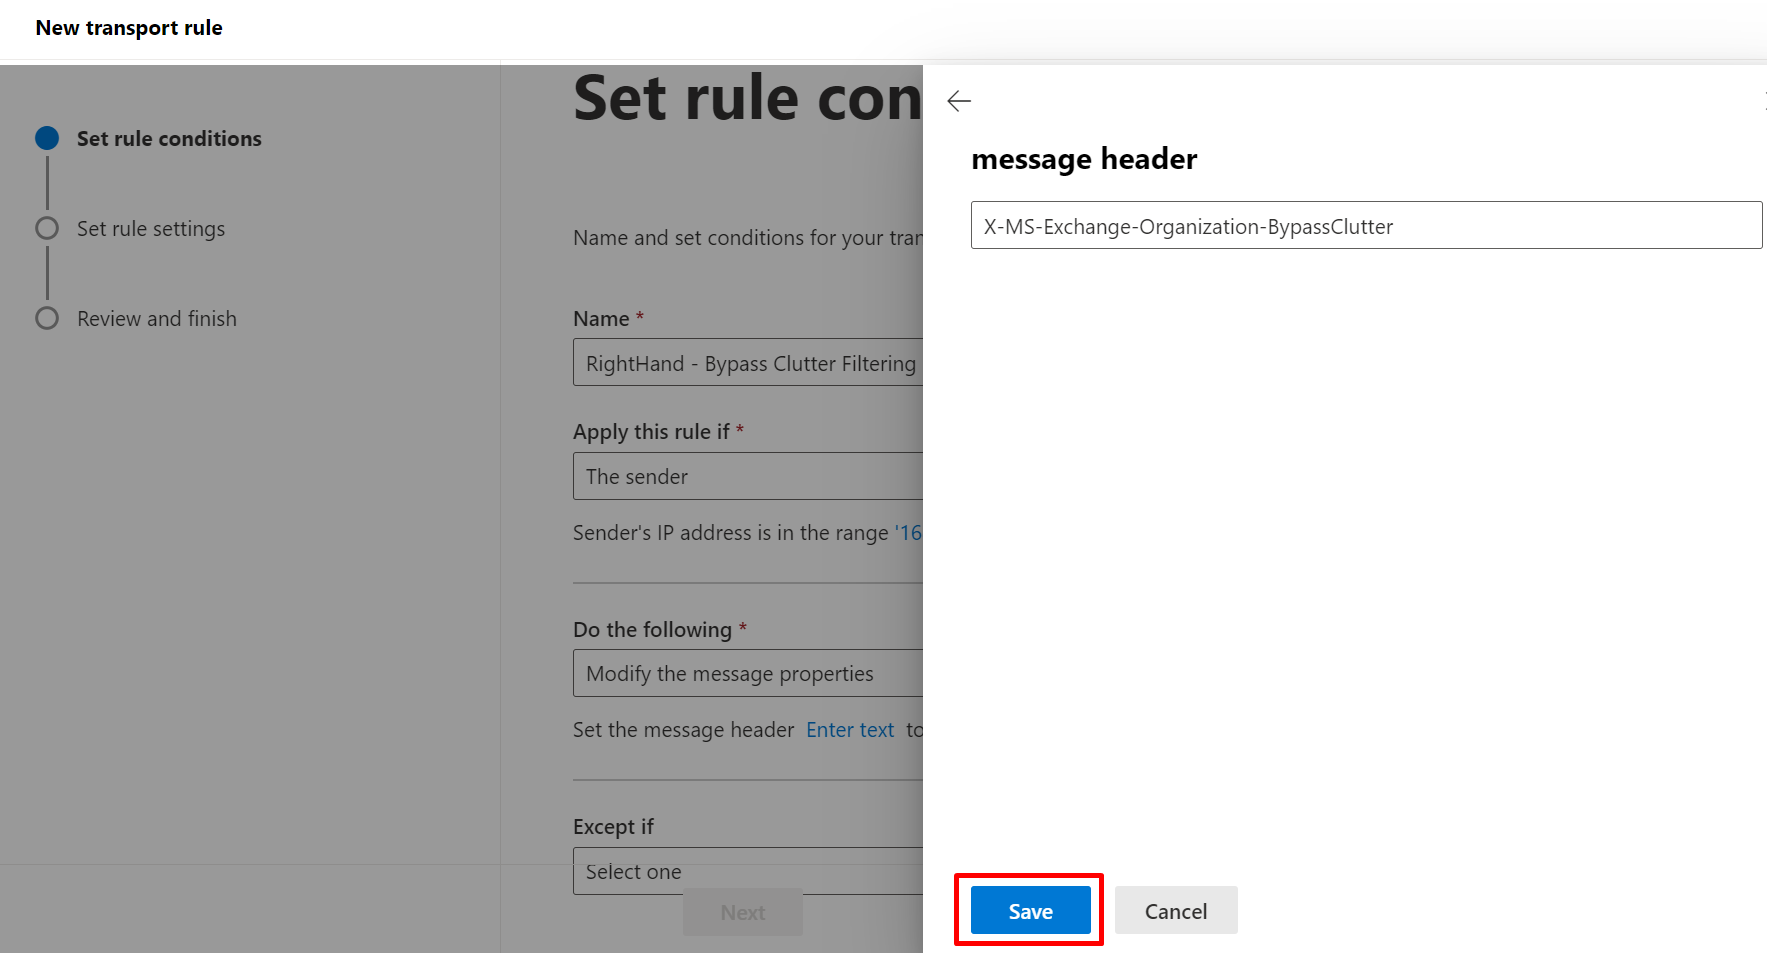
- Header name:
X-MS-Exchange-Organization-BypassClutter - Value:
true(lower case)
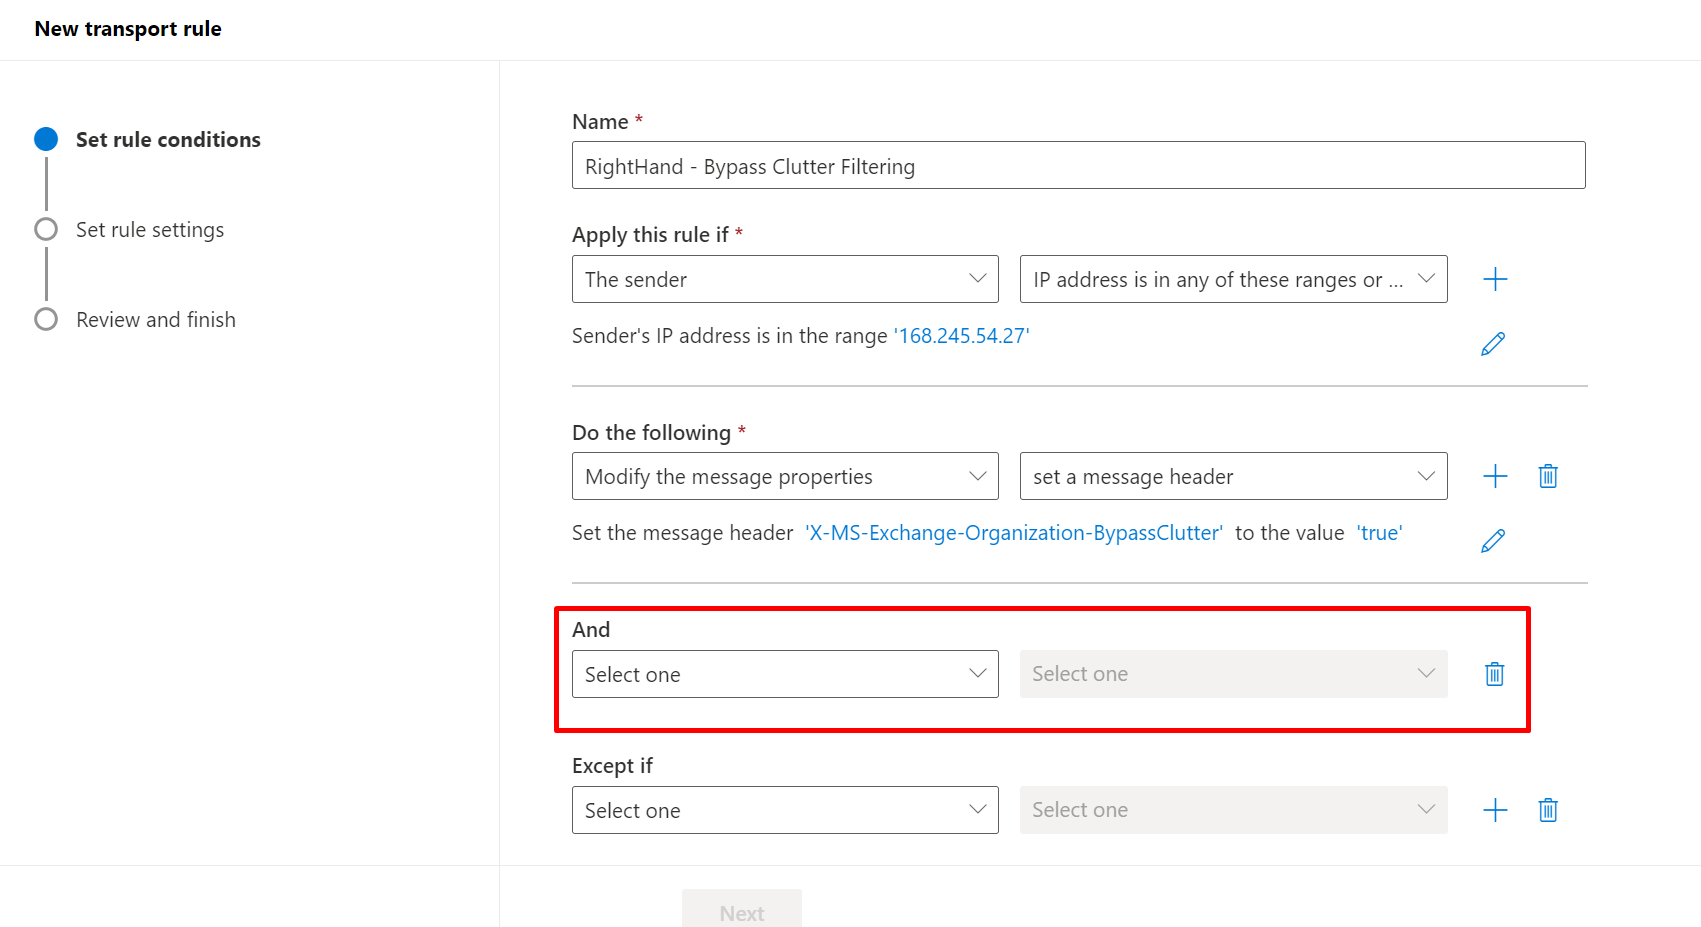
- Header name:
- Action 2 (+ on the action row): Modify the message properties → Set the spam confidence level (SCL) → select Bypass spam filtering (this sets SCL to
-1). - Click Next. Leave Stop processing more rules unchecked.
- Click Next → Finish.


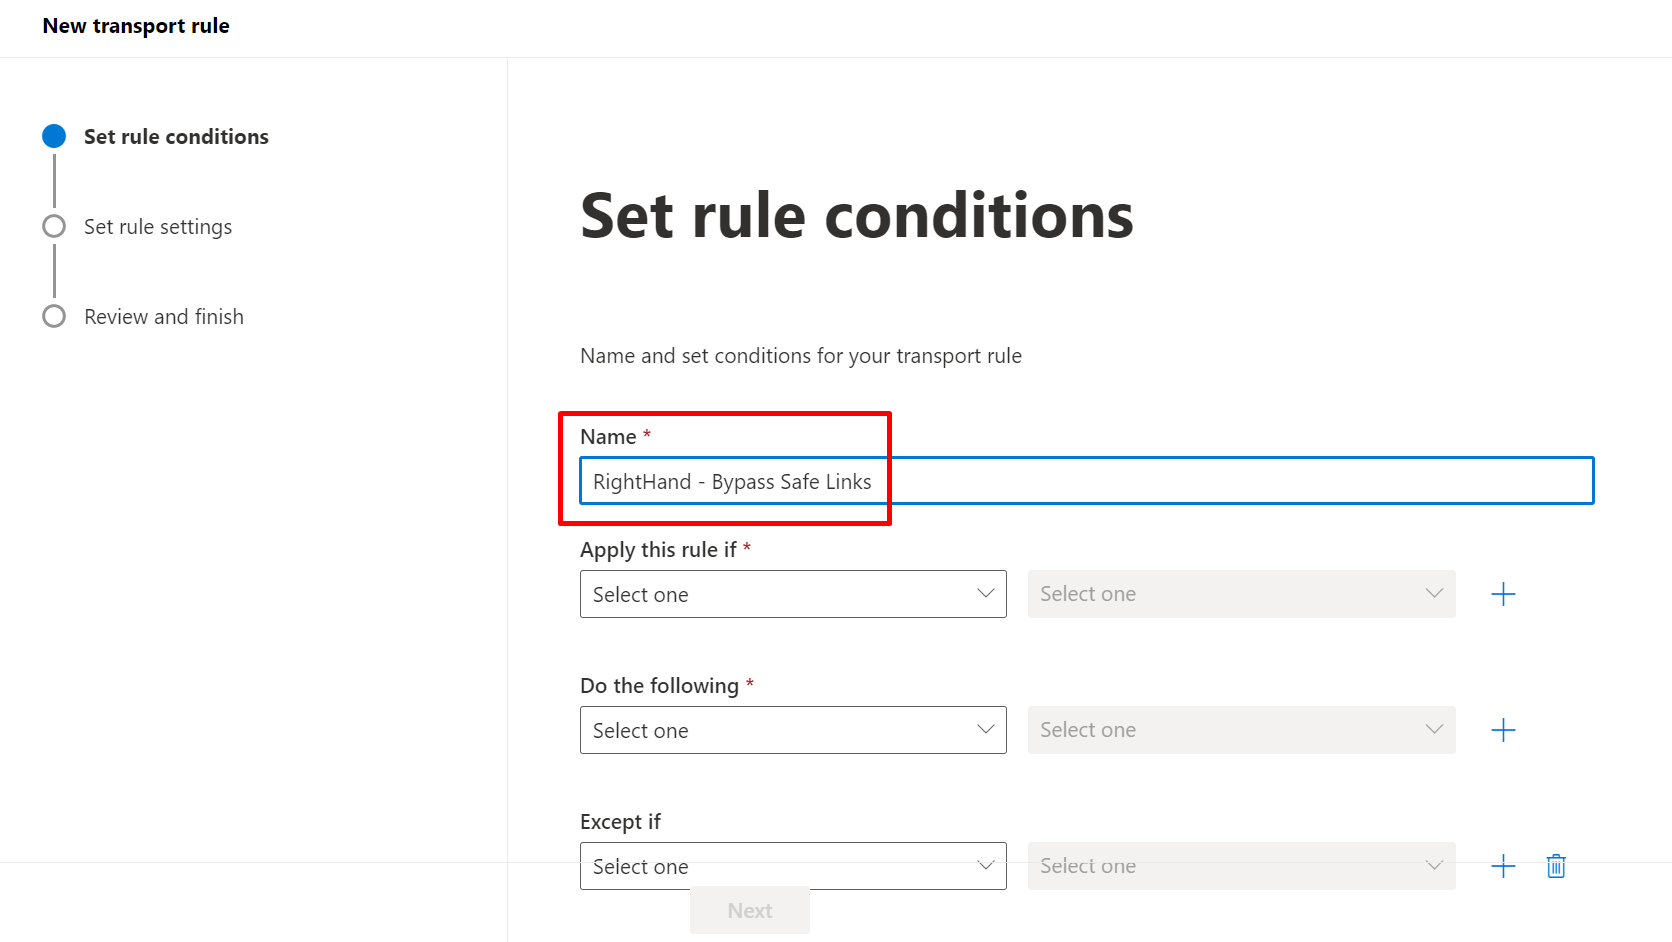
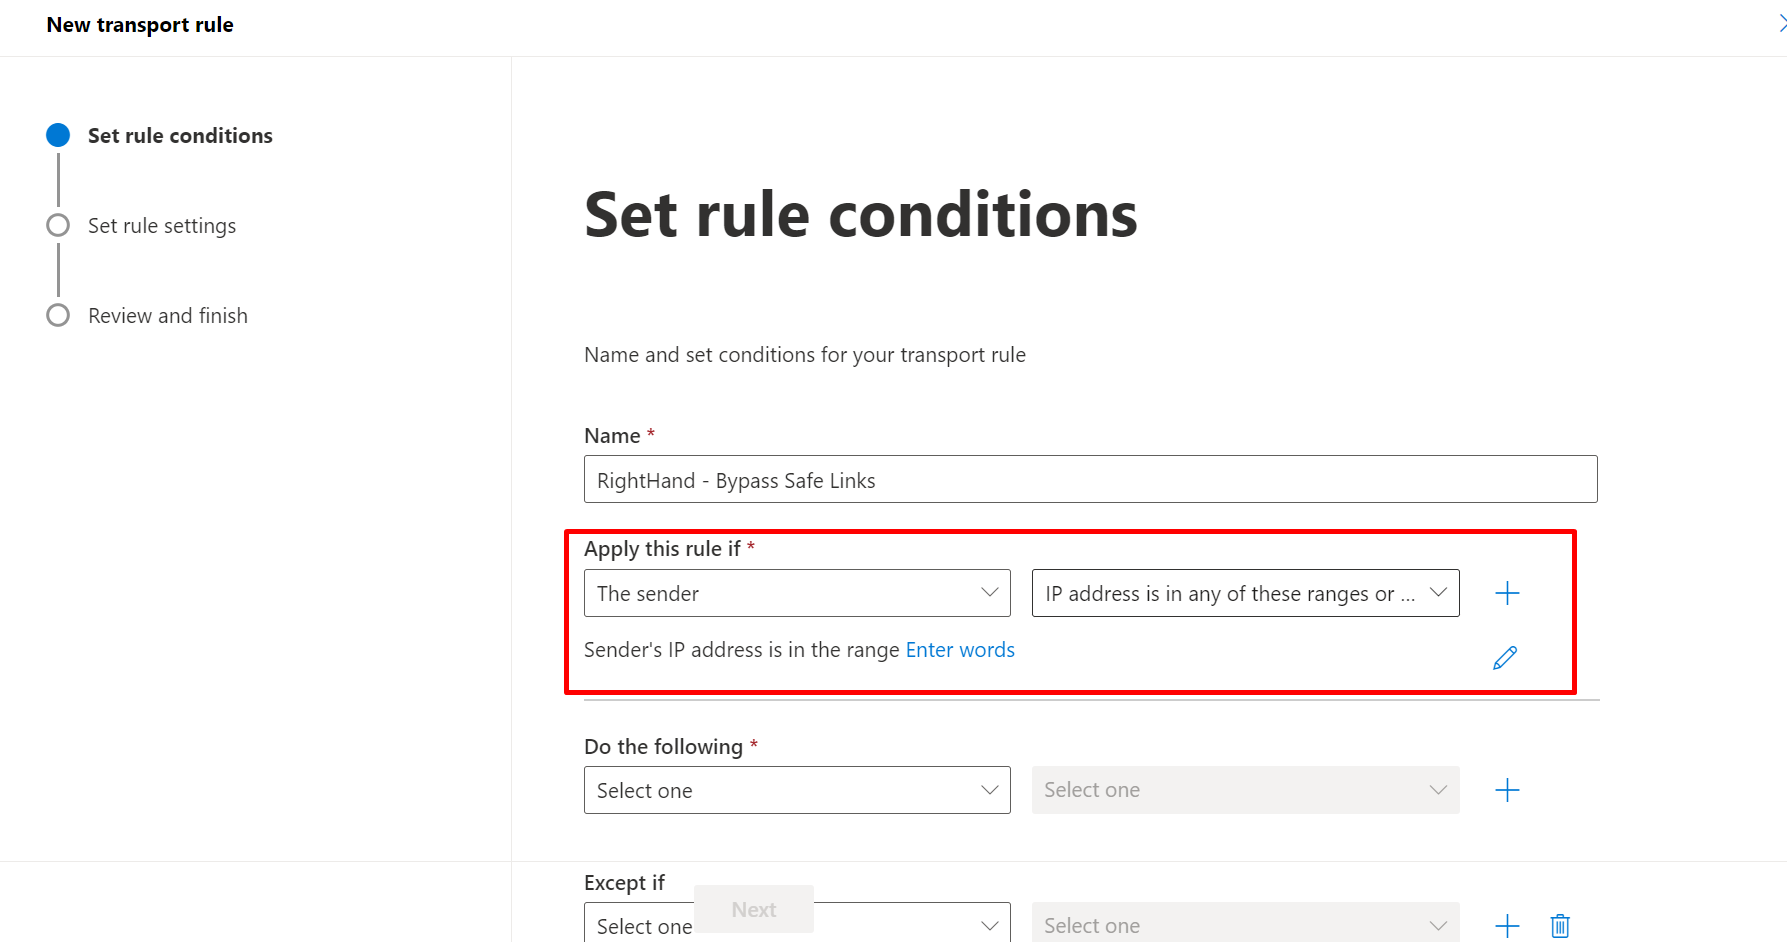
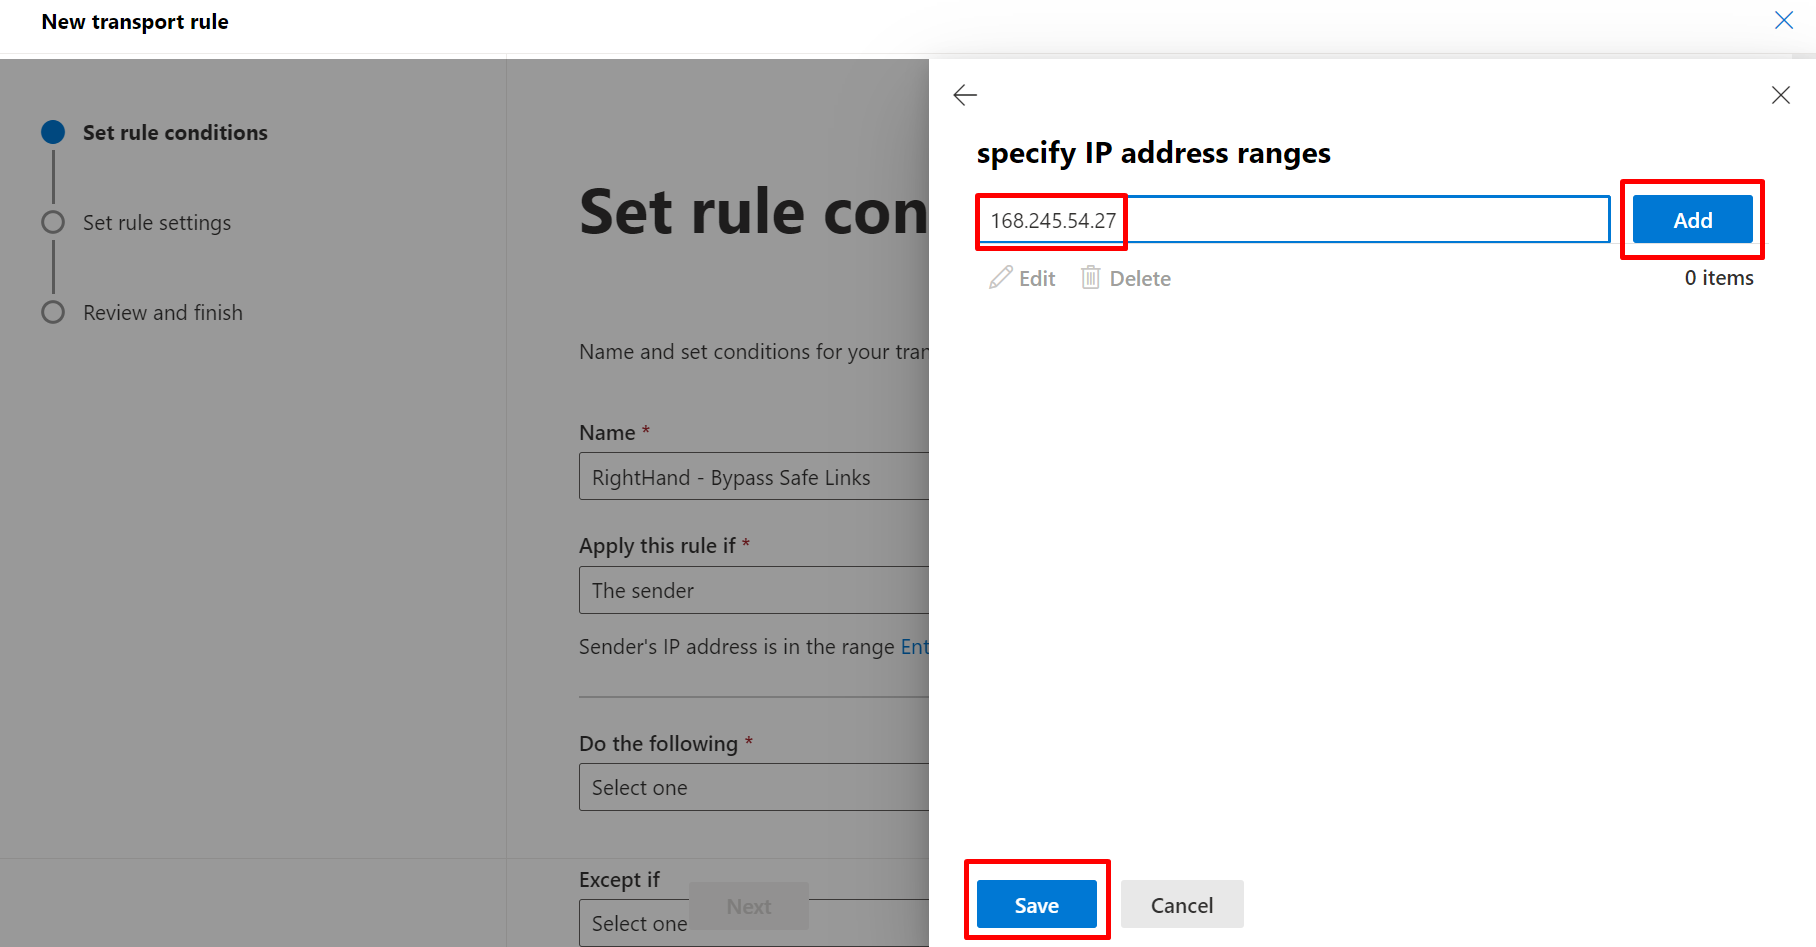
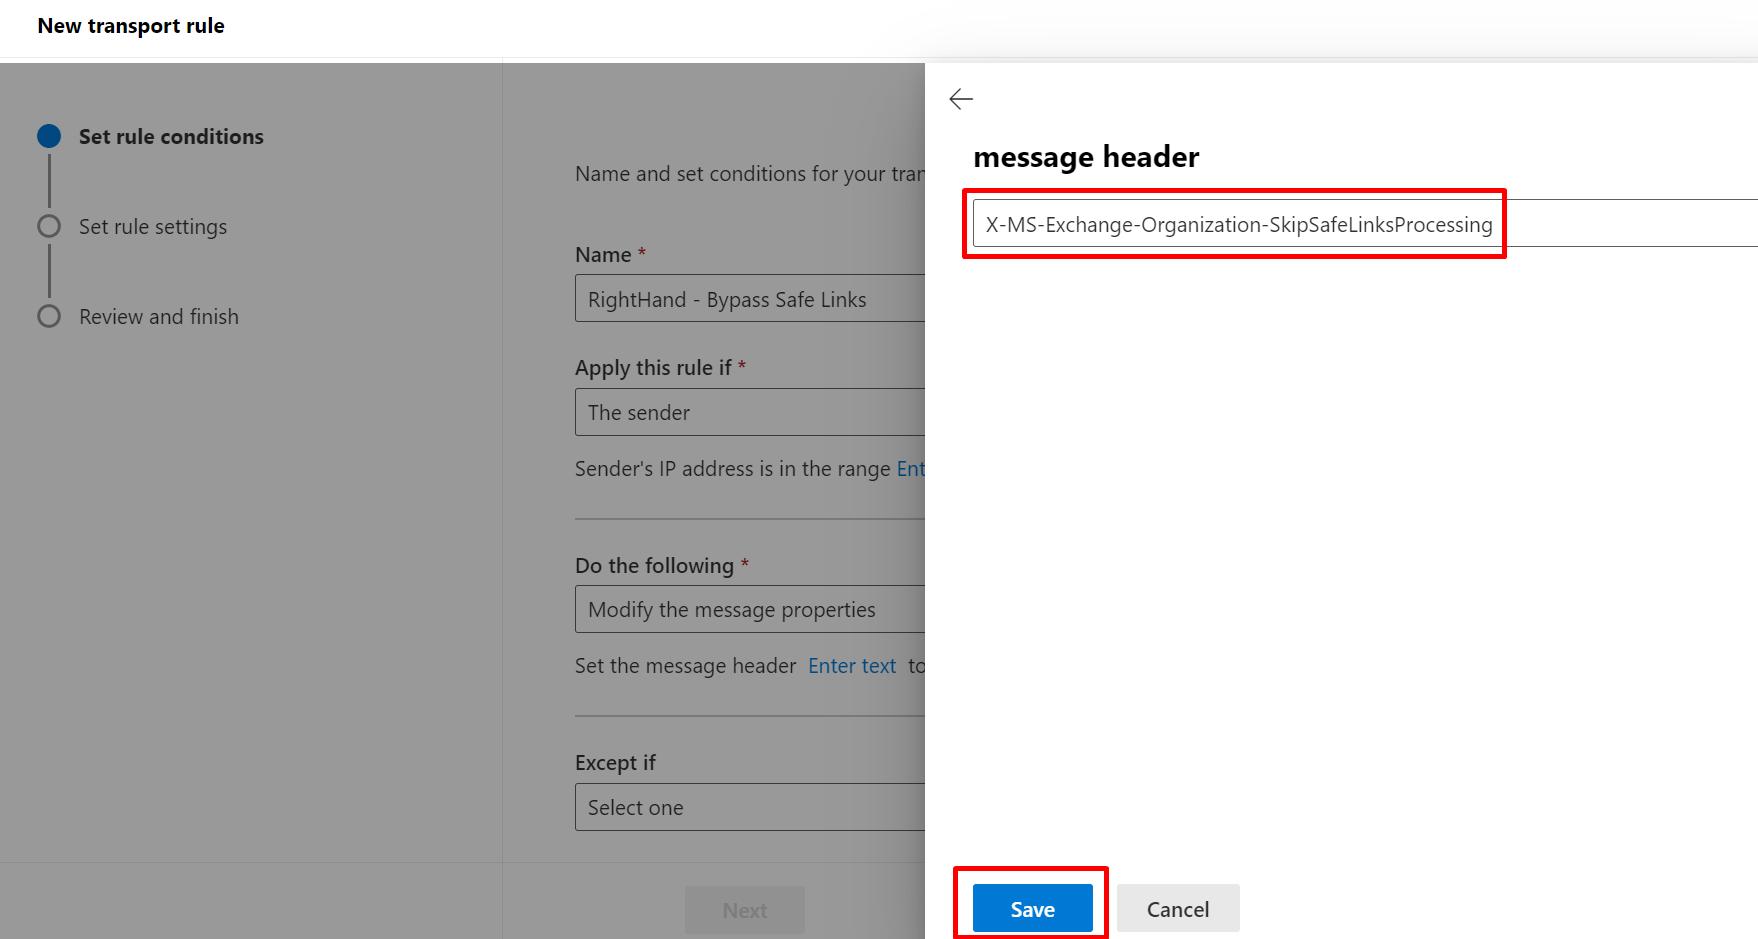
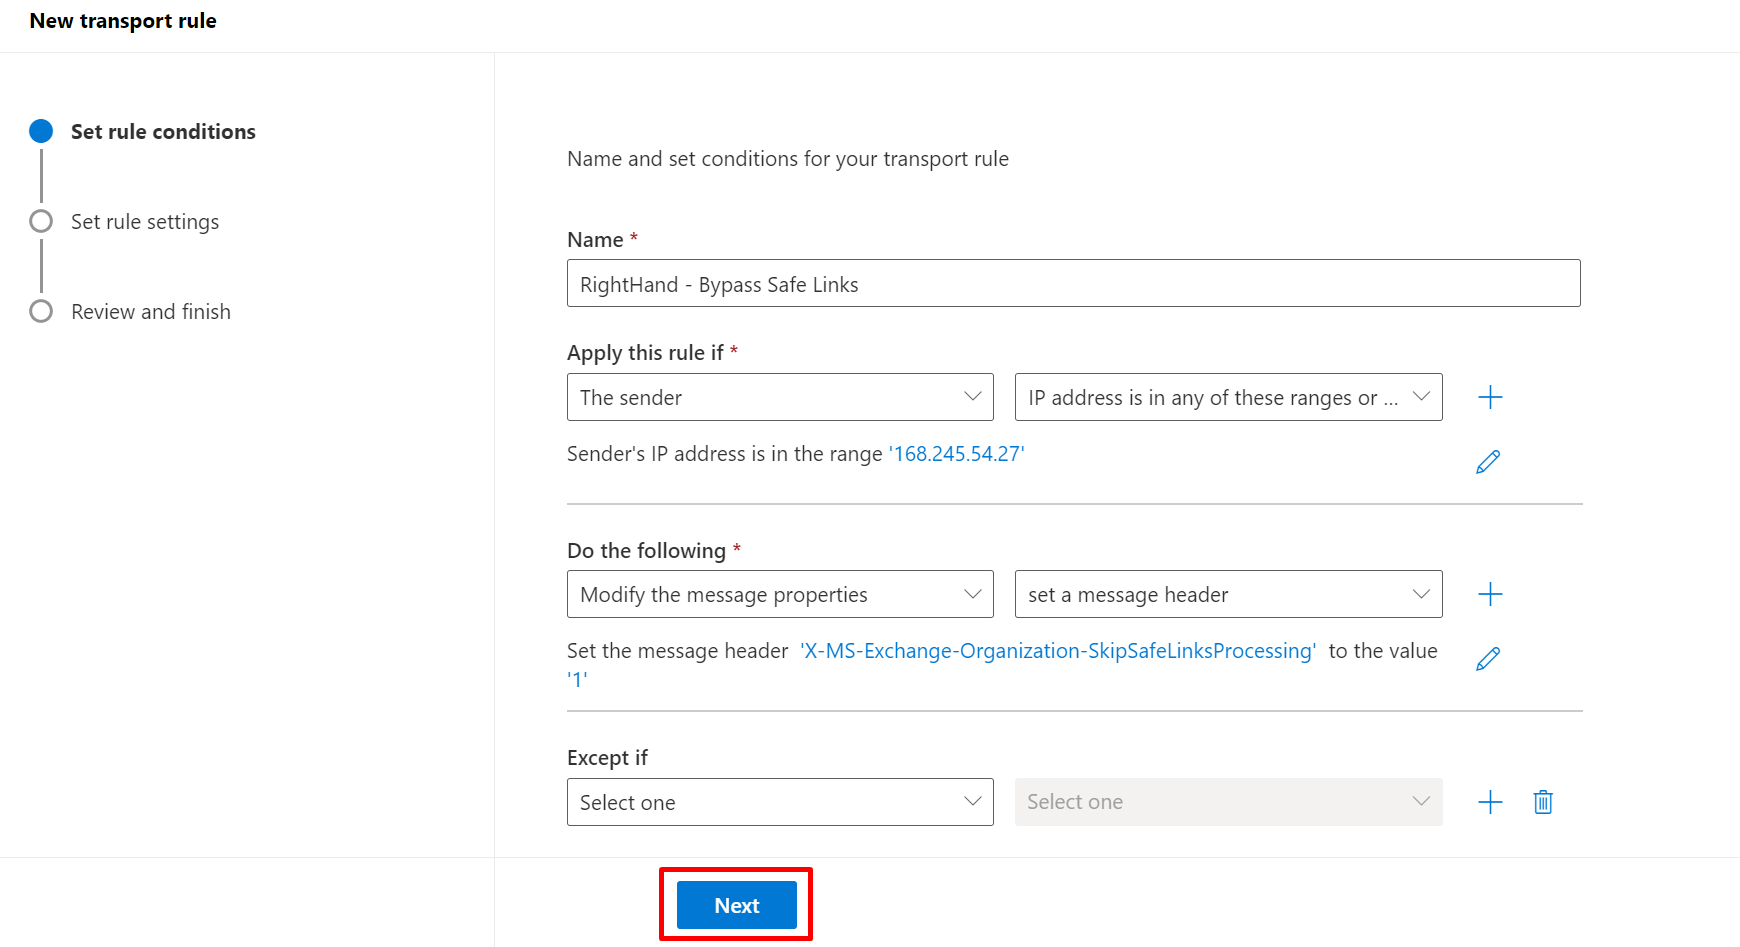
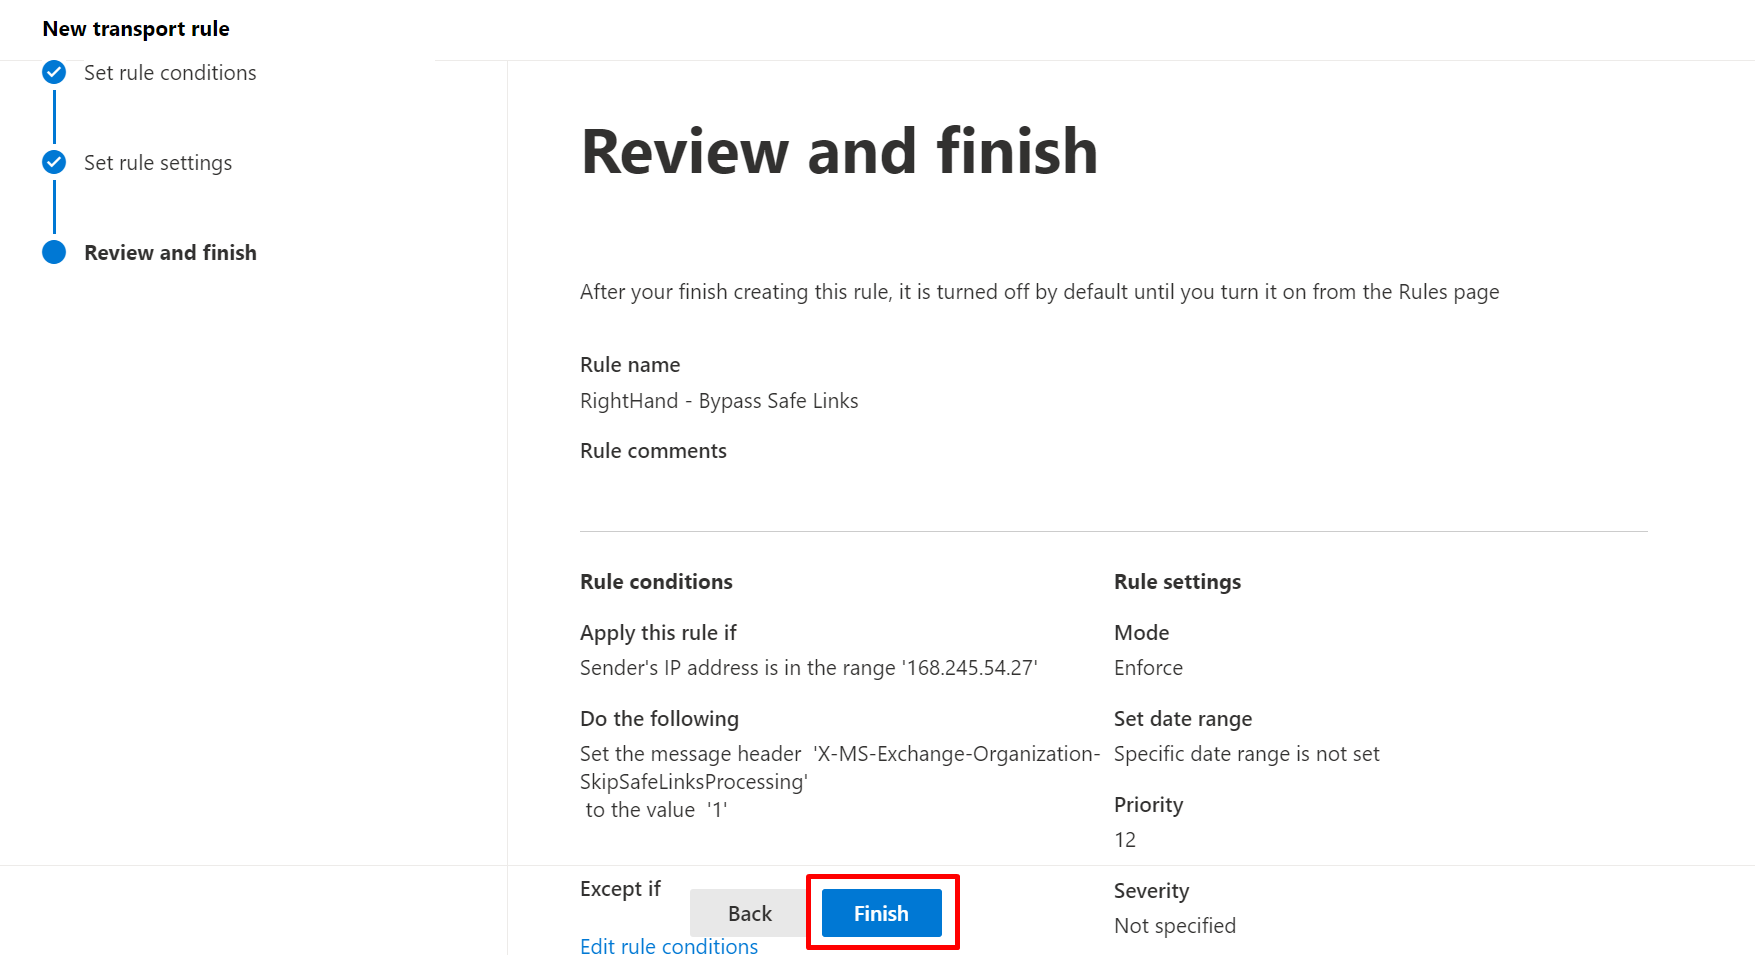
Step 3: Mail flow rule - Bypass Safe Links#
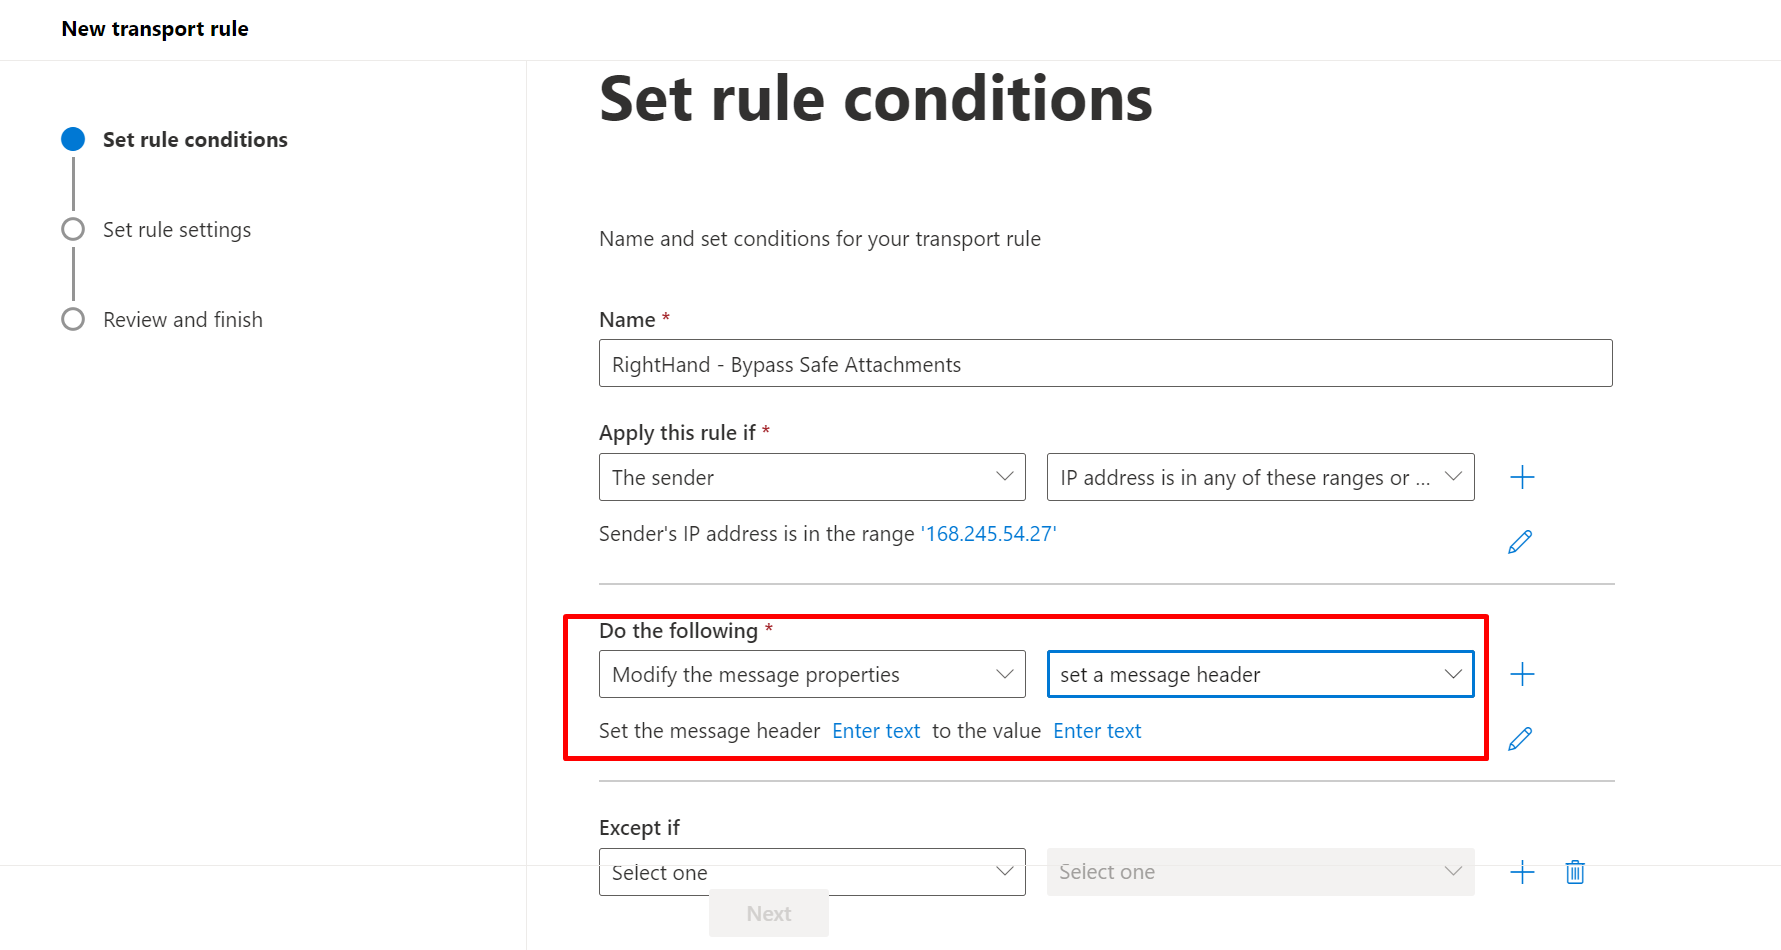
- Create a new mail flow rule named
SolCyber - Right-Hand - Bypass Safe Links. - Condition 1: The sender → IP address is in any of these ranges or exactly matches → enter the three Right-Hand IPs.
- Condition 2 (AND): The message headers → includes any of these words → enter the
X-RHS-TID-<hash>header name and hash value. - Action: Modify the message properties → set a message header.
- Header name:
X-MS-Exchange-Organization-SkipSafeLinksProcessing - Value:
1
- Header name:
- Click Next. Leave Stop processing more rules unchecked.
- Click Next → Finish.


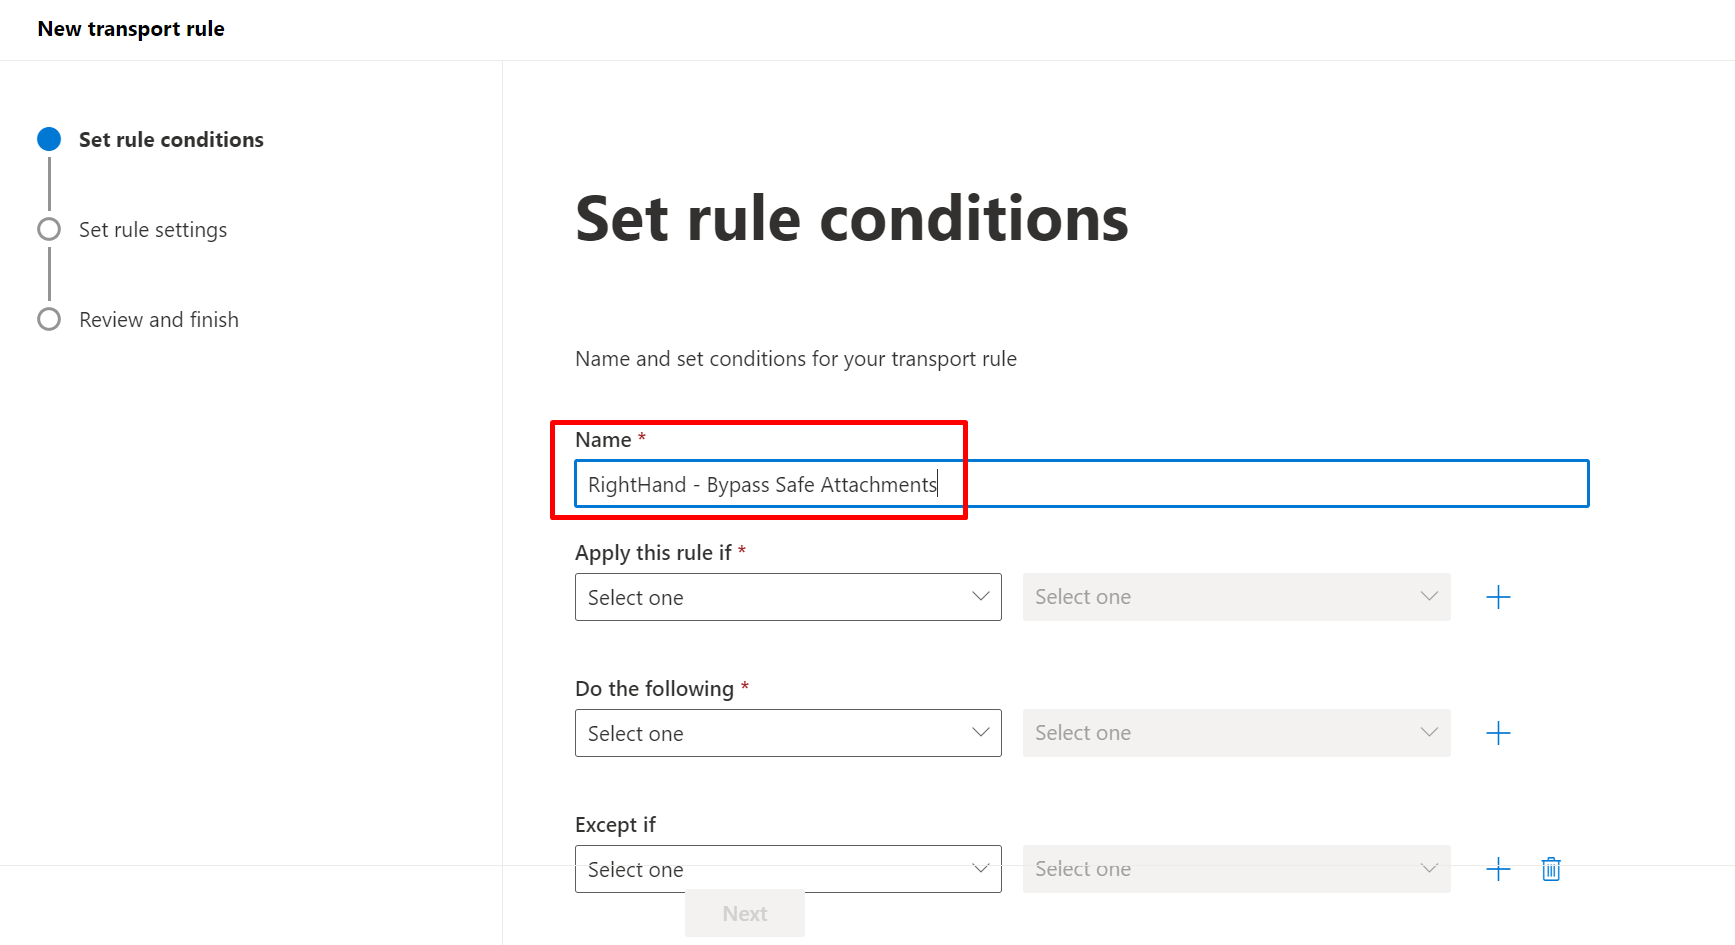
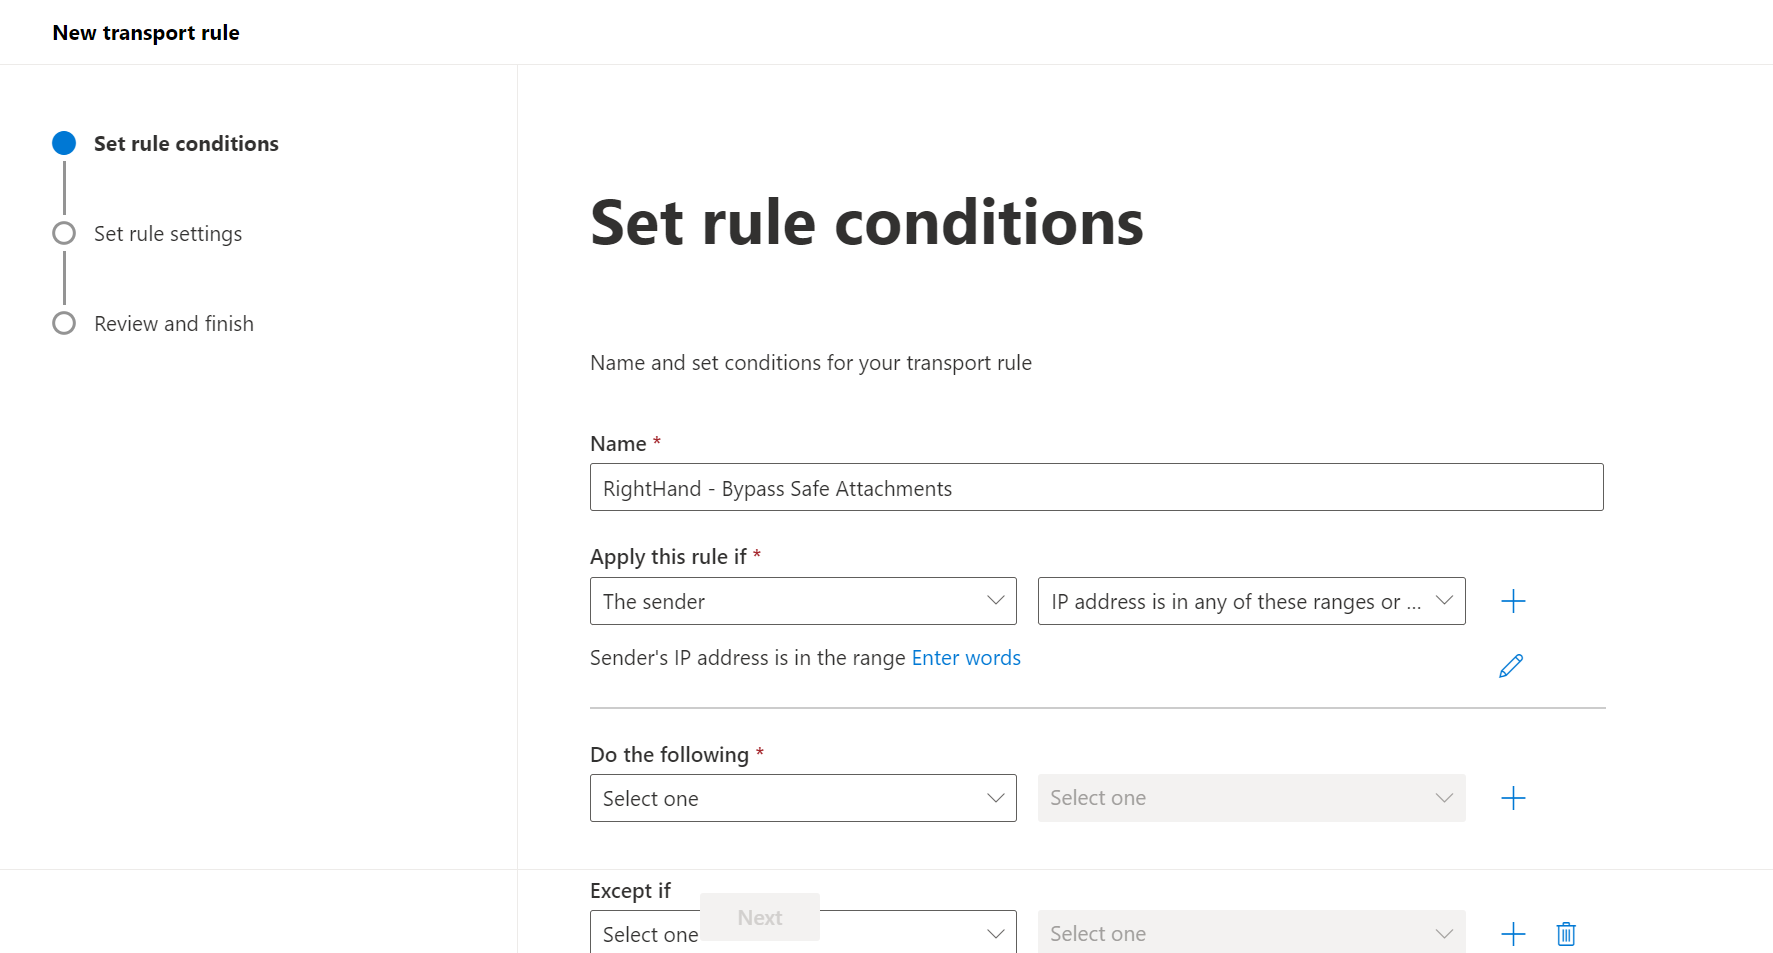
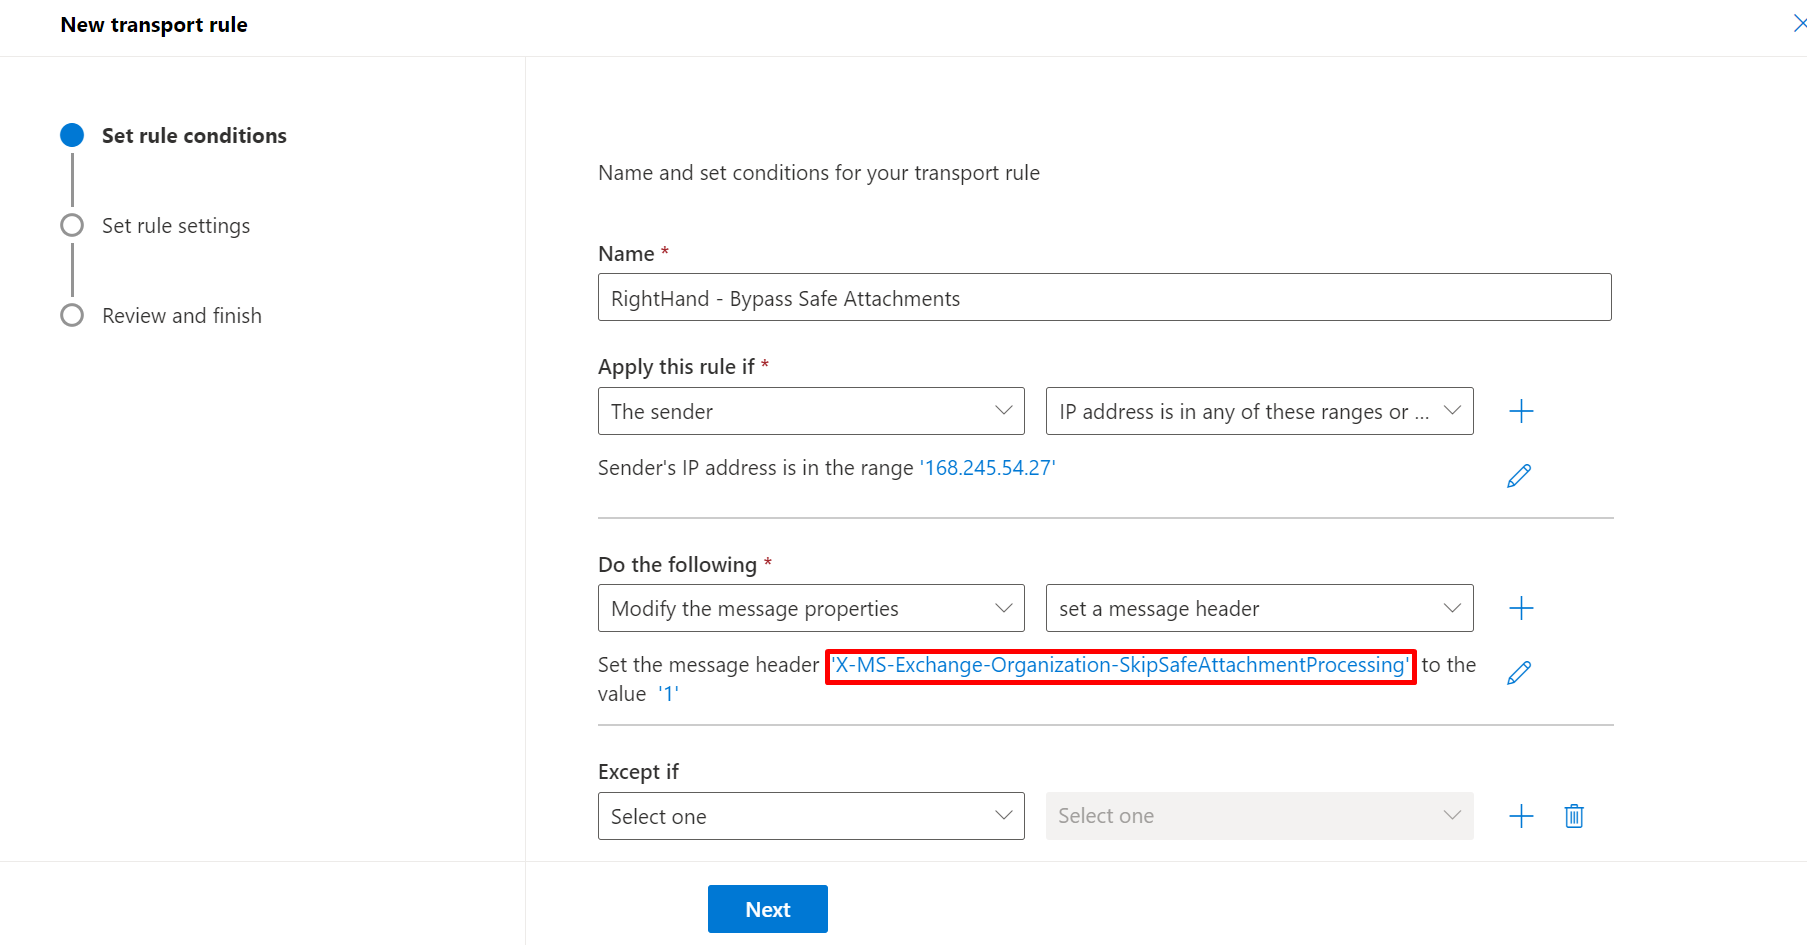
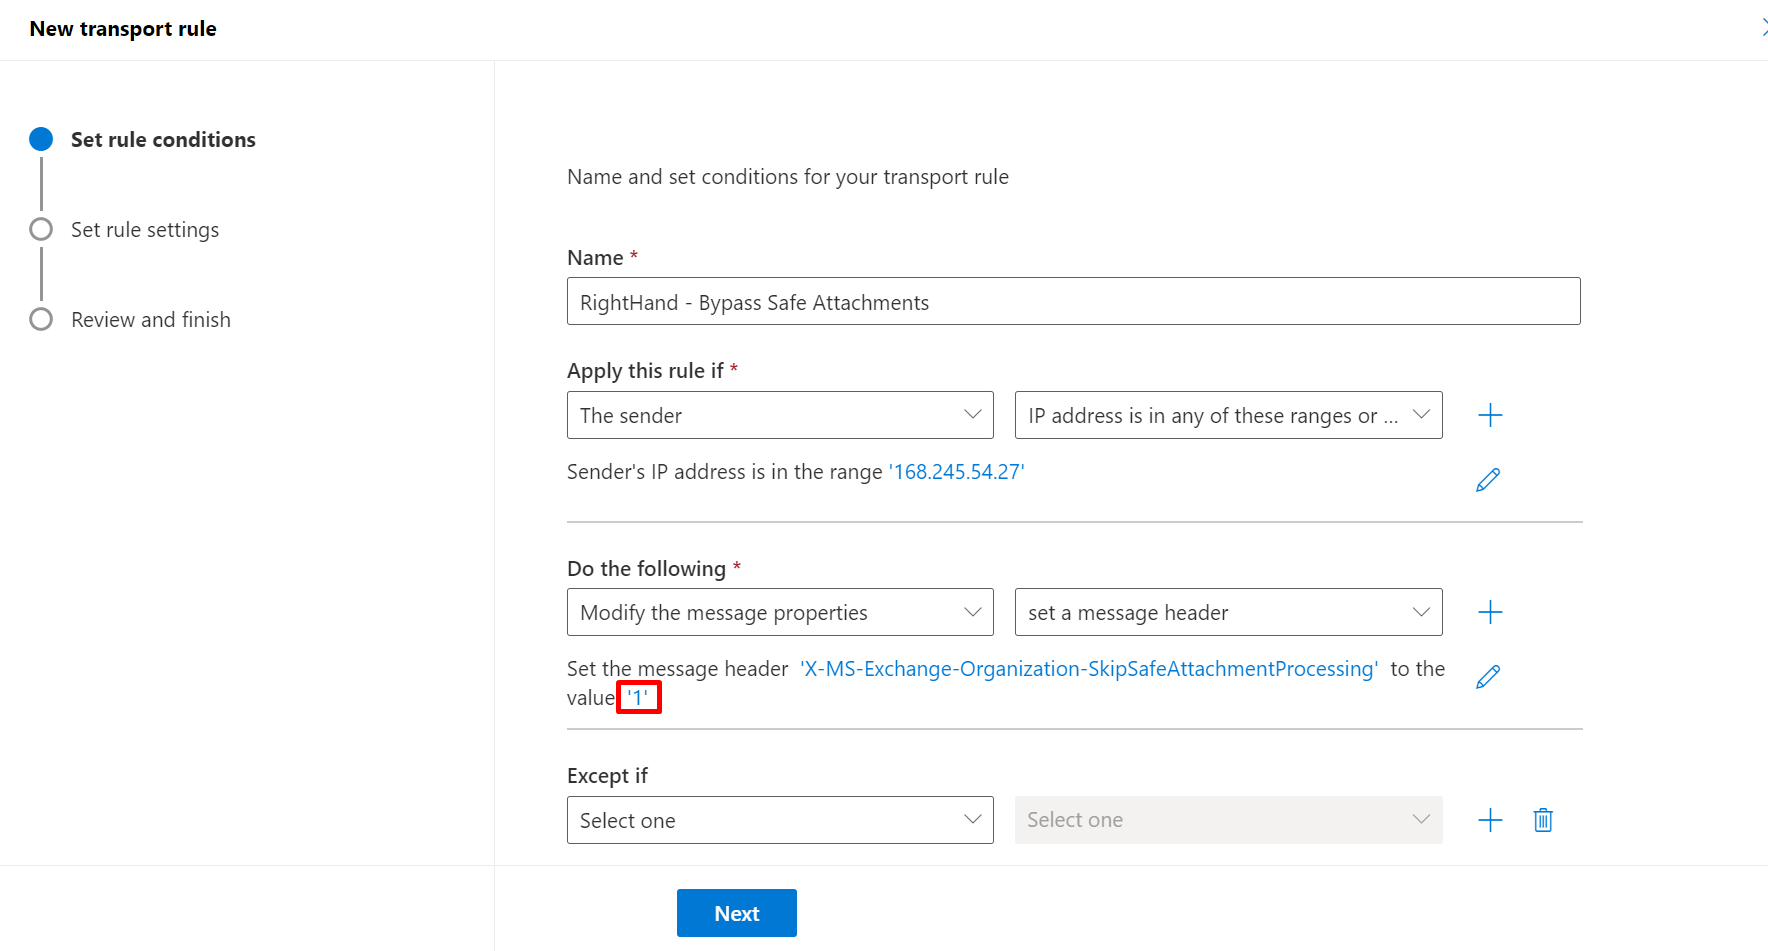
Step 4: Mail flow rule - Bypass Safe Attachments#
- Create a new mail flow rule named
SolCyber - Right-Hand - Bypass Safe Attachments. - Condition 1: The sender → IP address is in any of these ranges or exactly matches → enter the three Right-Hand IPs.
- Condition 2 (AND): The message headers → includes any of these words → enter the
X-RHS-TID-<hash>header name and hash value. - Action: Modify the message properties → set a message header.
- Header name:
X-MS-Exchange-Organization-SkipSafeAttachmentProcessing - Value:
1
- Header name:
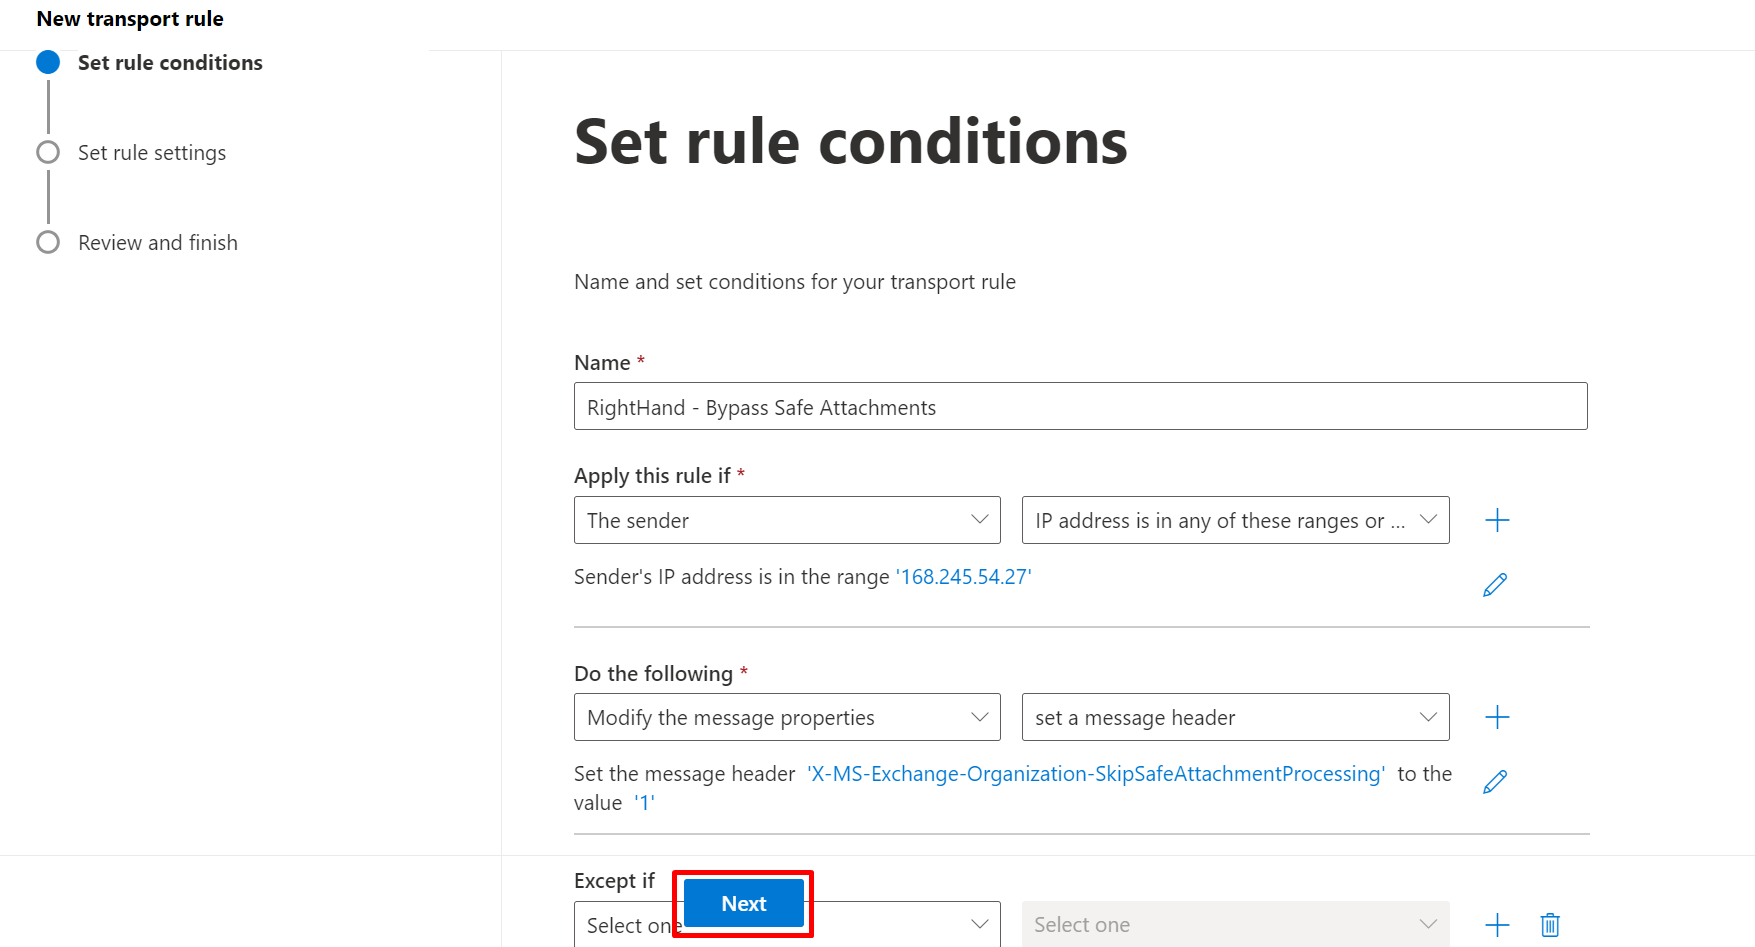
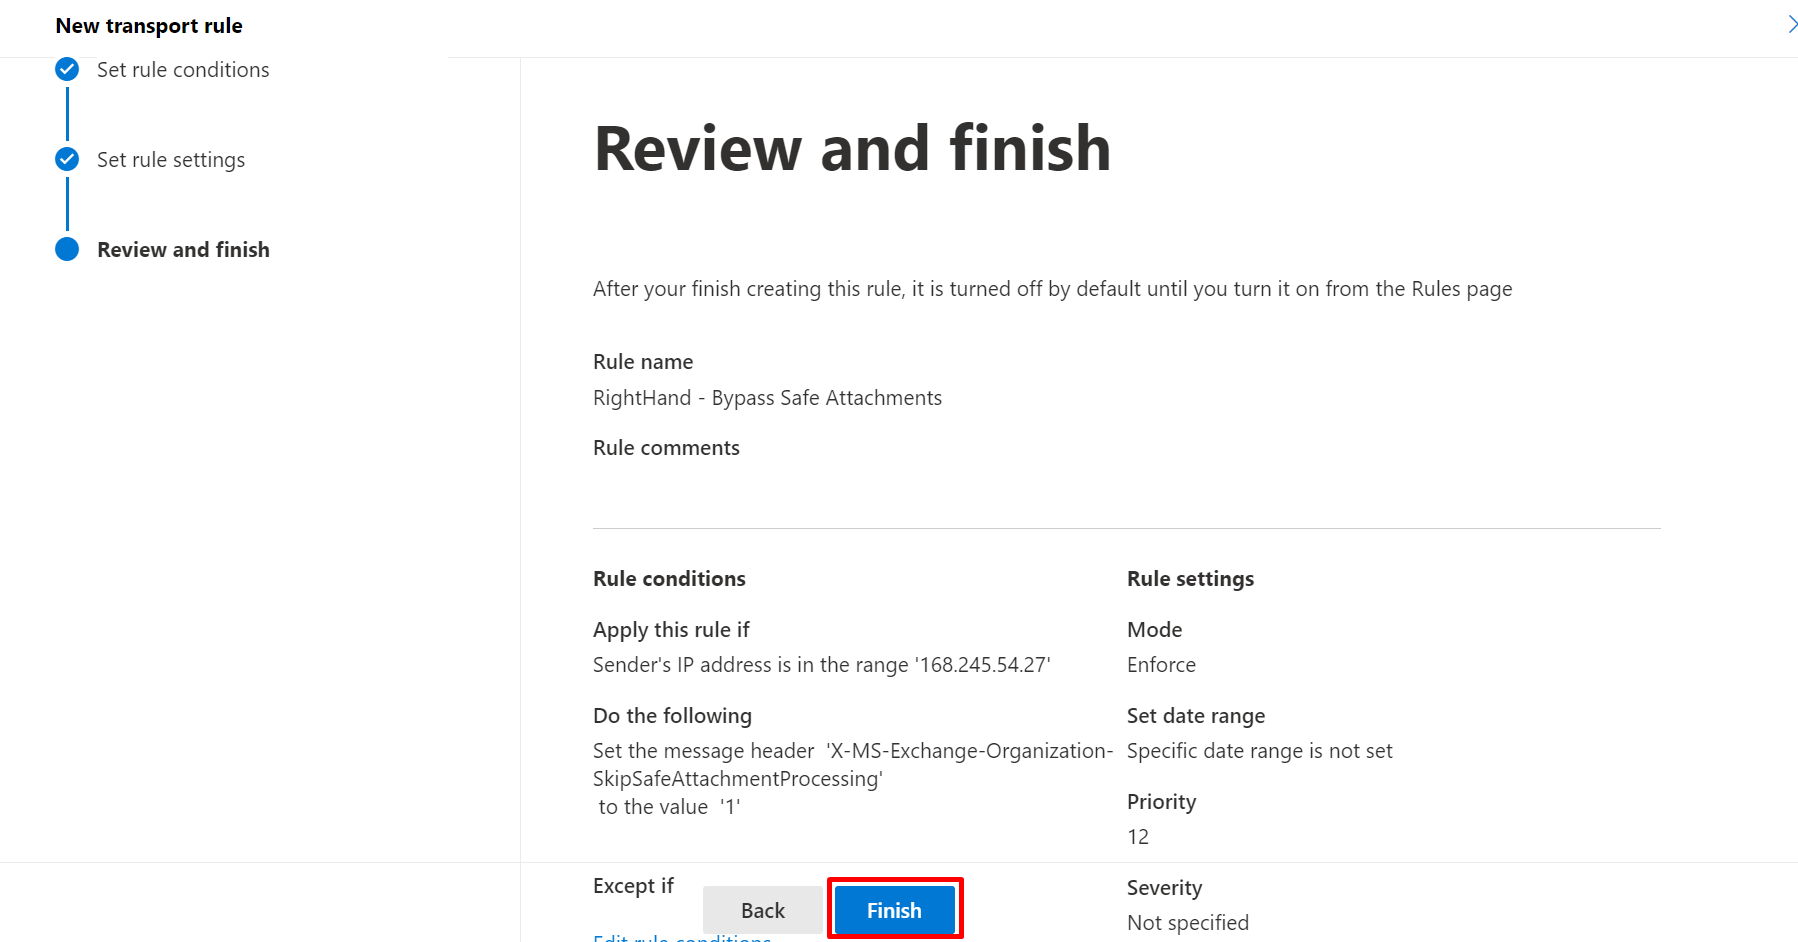
- Click Next. On the Set rule settings screen, tick Stop processing more rules so this final rule short-circuits any downstream rule that could re-process attachments.
- Click Next → Finish.


Part 2: Microsoft 365 Defender Portal#
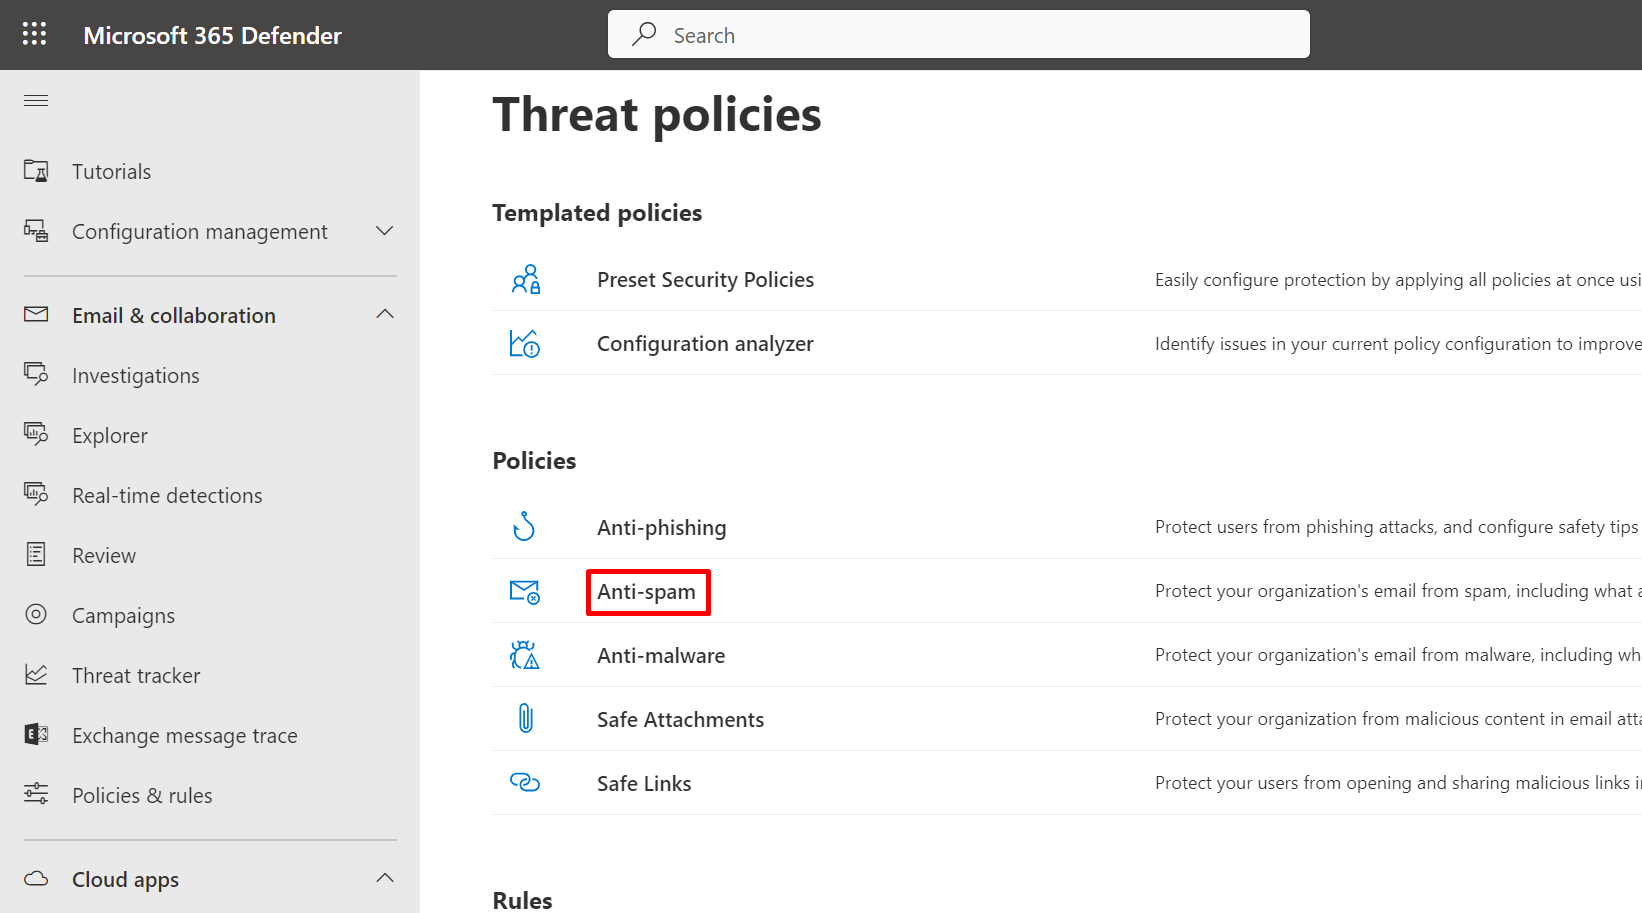
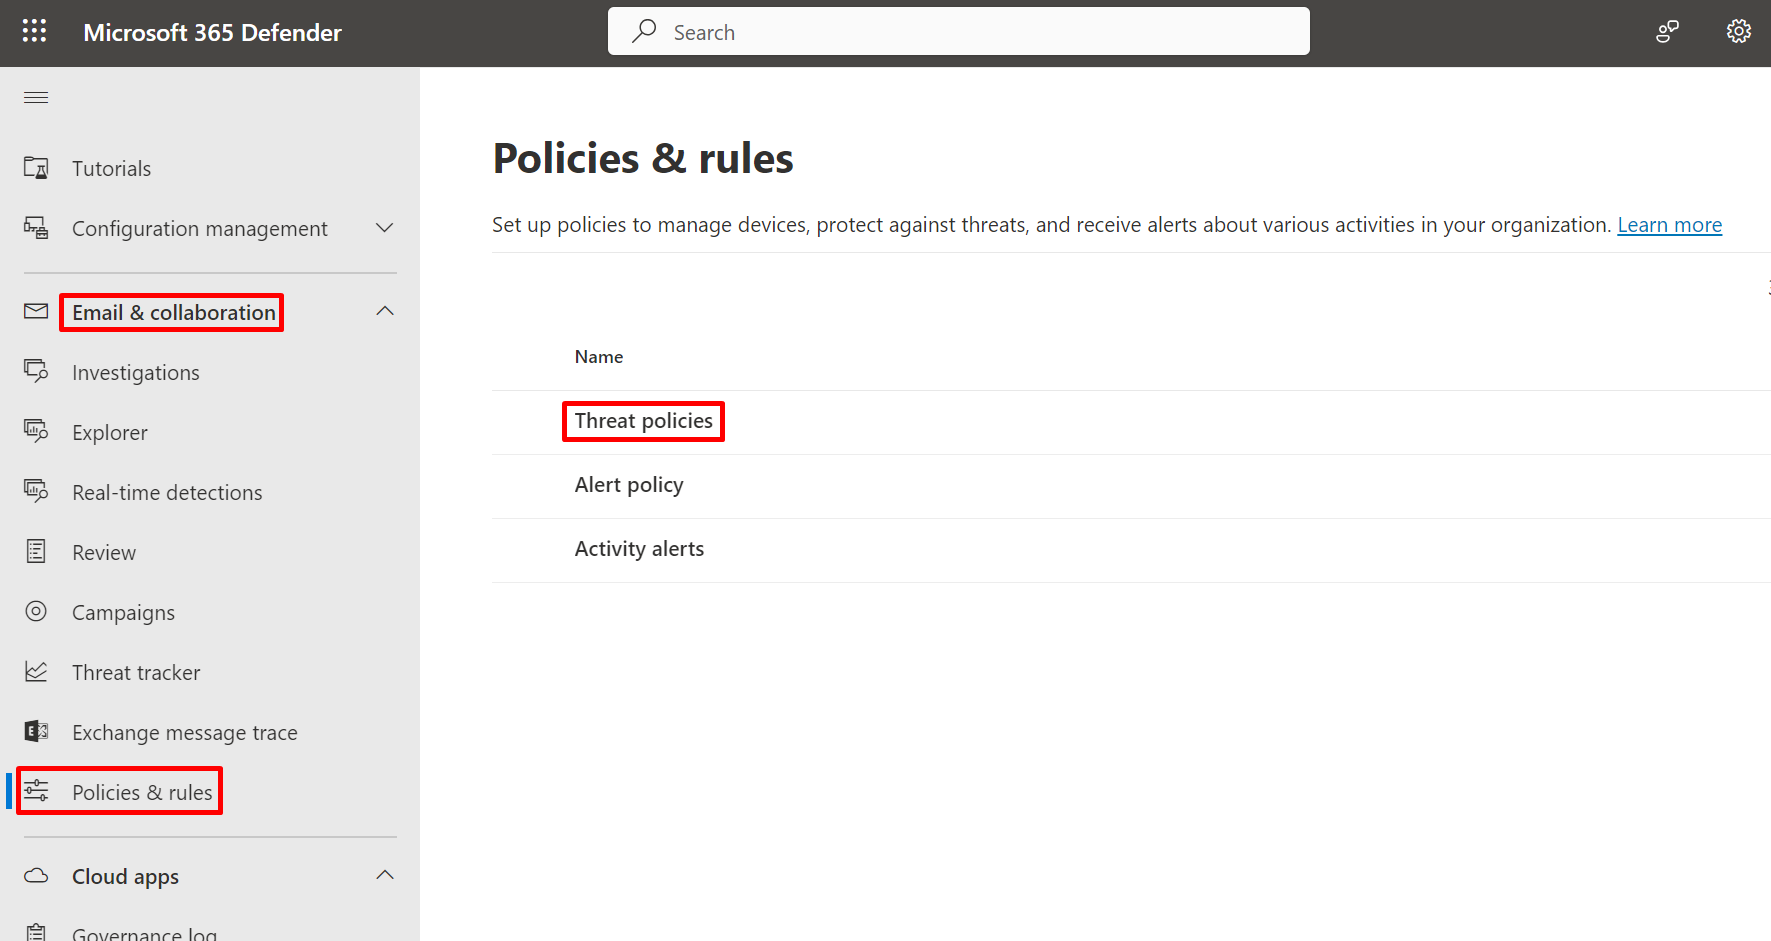
All procedures in Part 2 start from https://security.microsoft.com → Email & collaboration → Policies & rules → Threat policies.
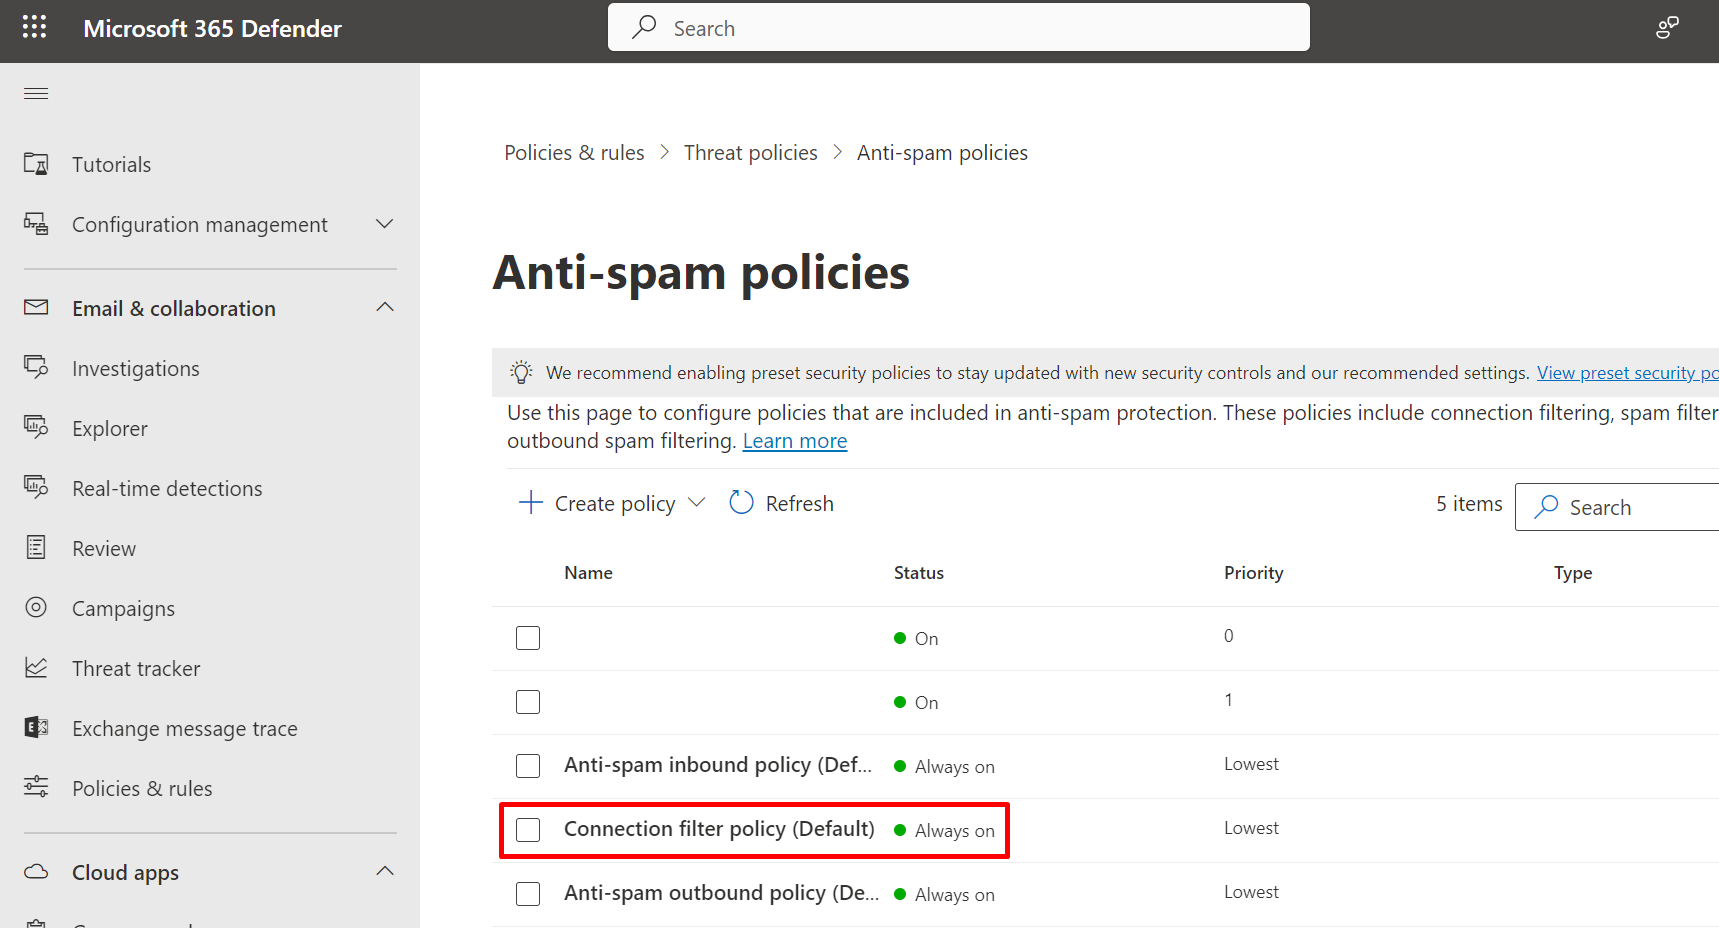
Step 5: Connection filter - IP Allow List#
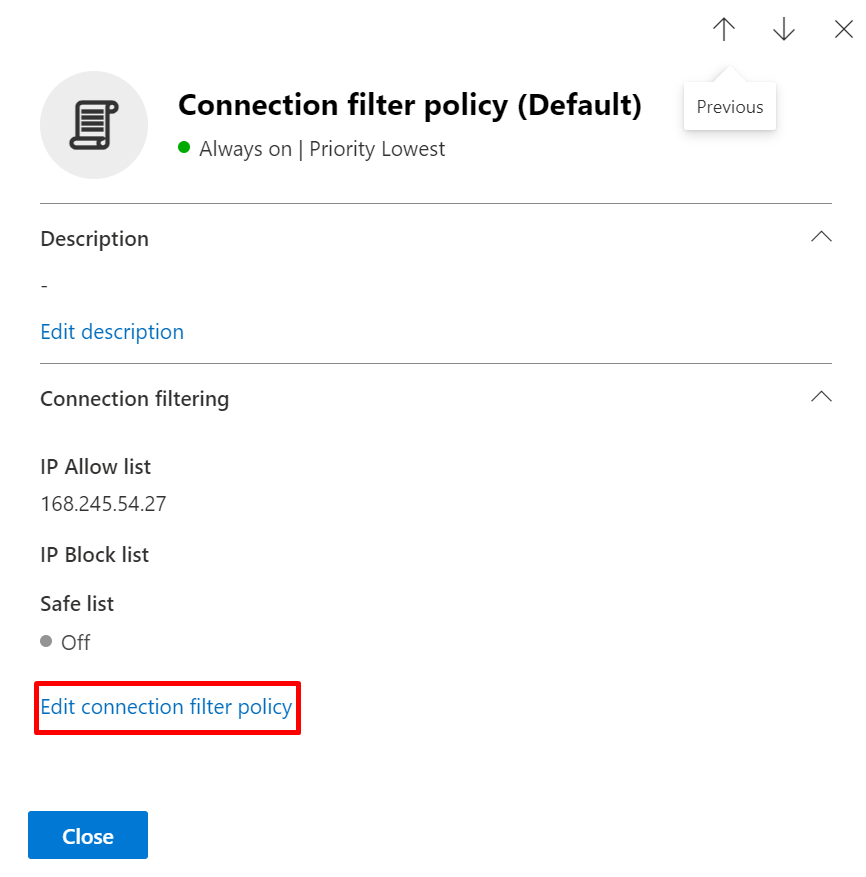
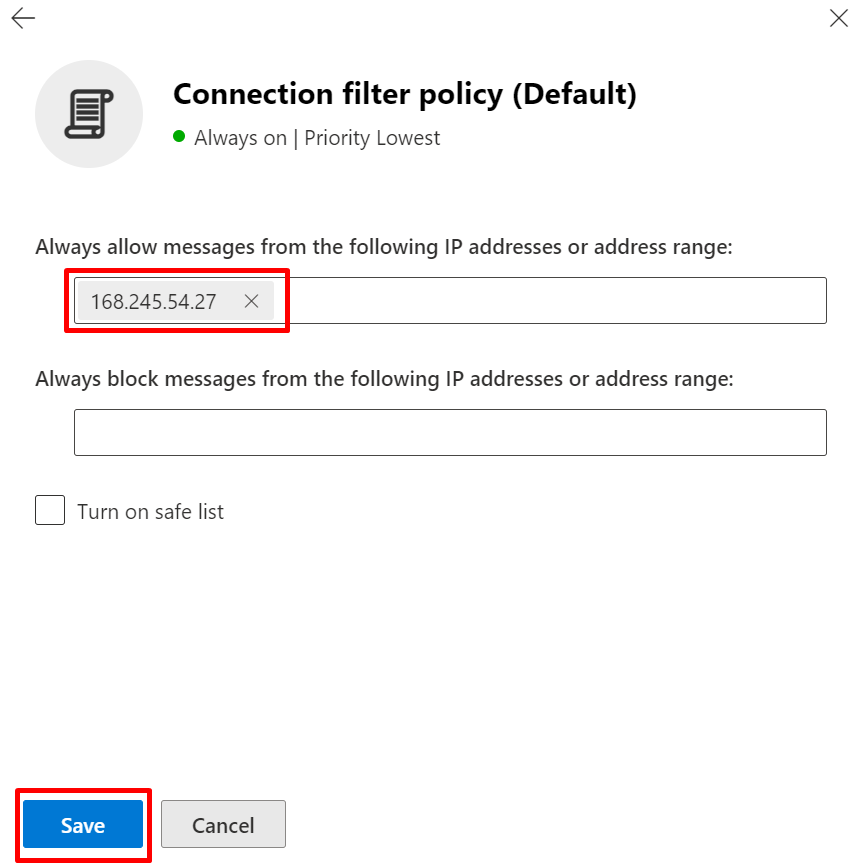
- In Threat policies → Policies → Anti-spam, open Connection filter policy (Default).
- Click Edit connection filter policy.
- Under Always allow messages from the following IP addresses or address range, add:
168.245.54.2752.74.95.172149.72.49.118
- Click Save → Close.

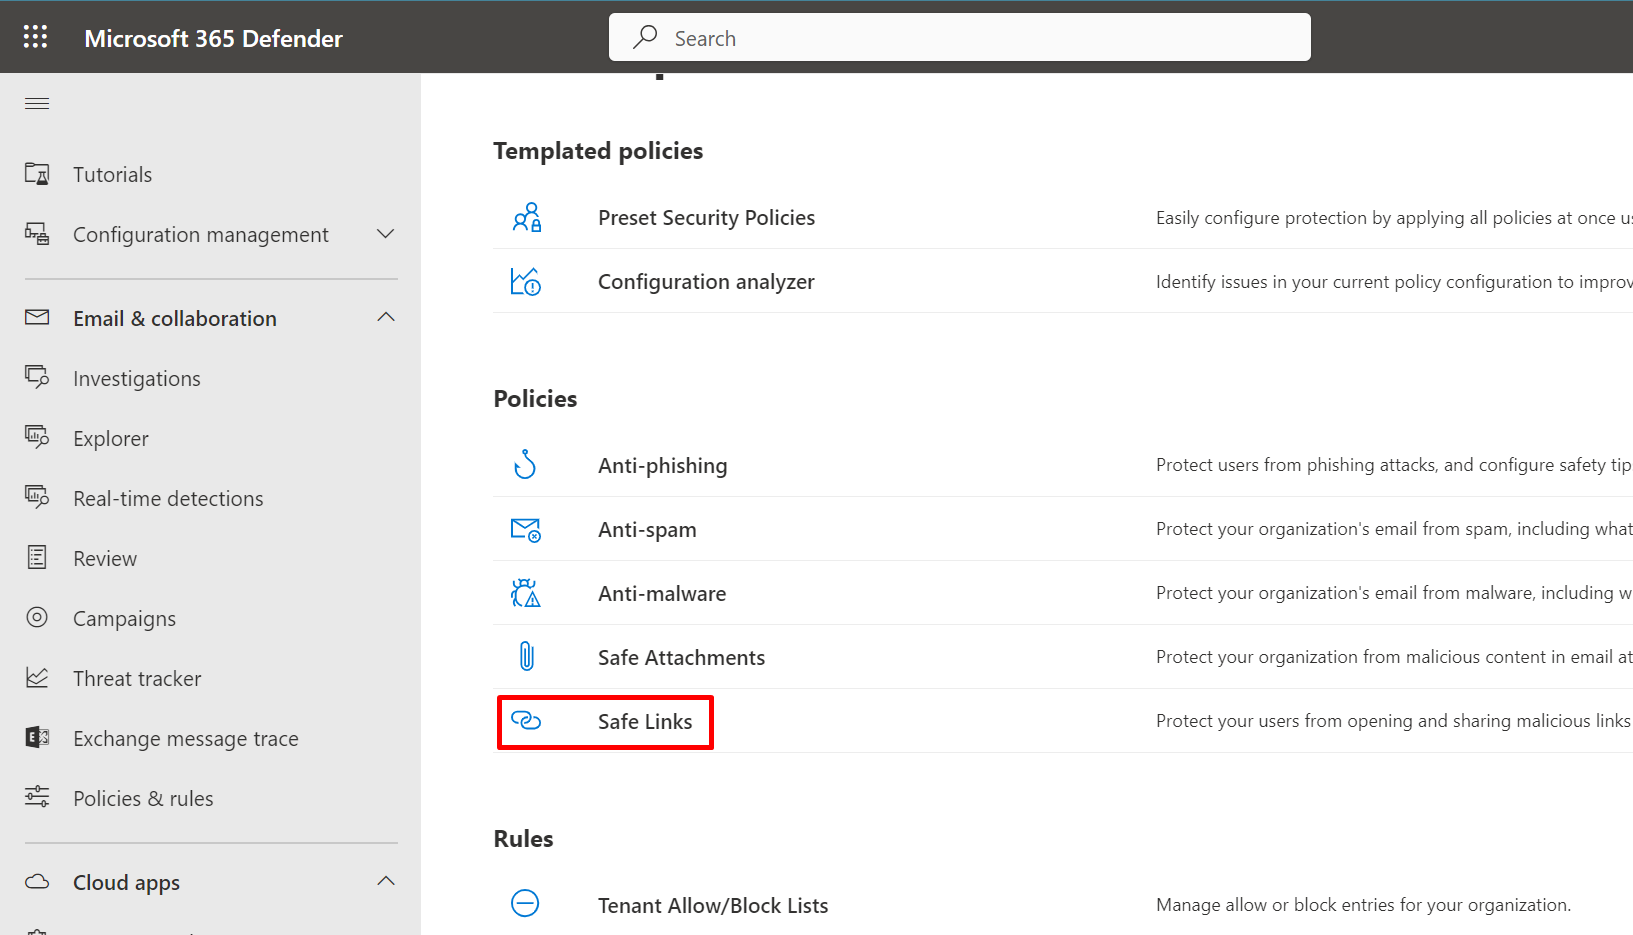
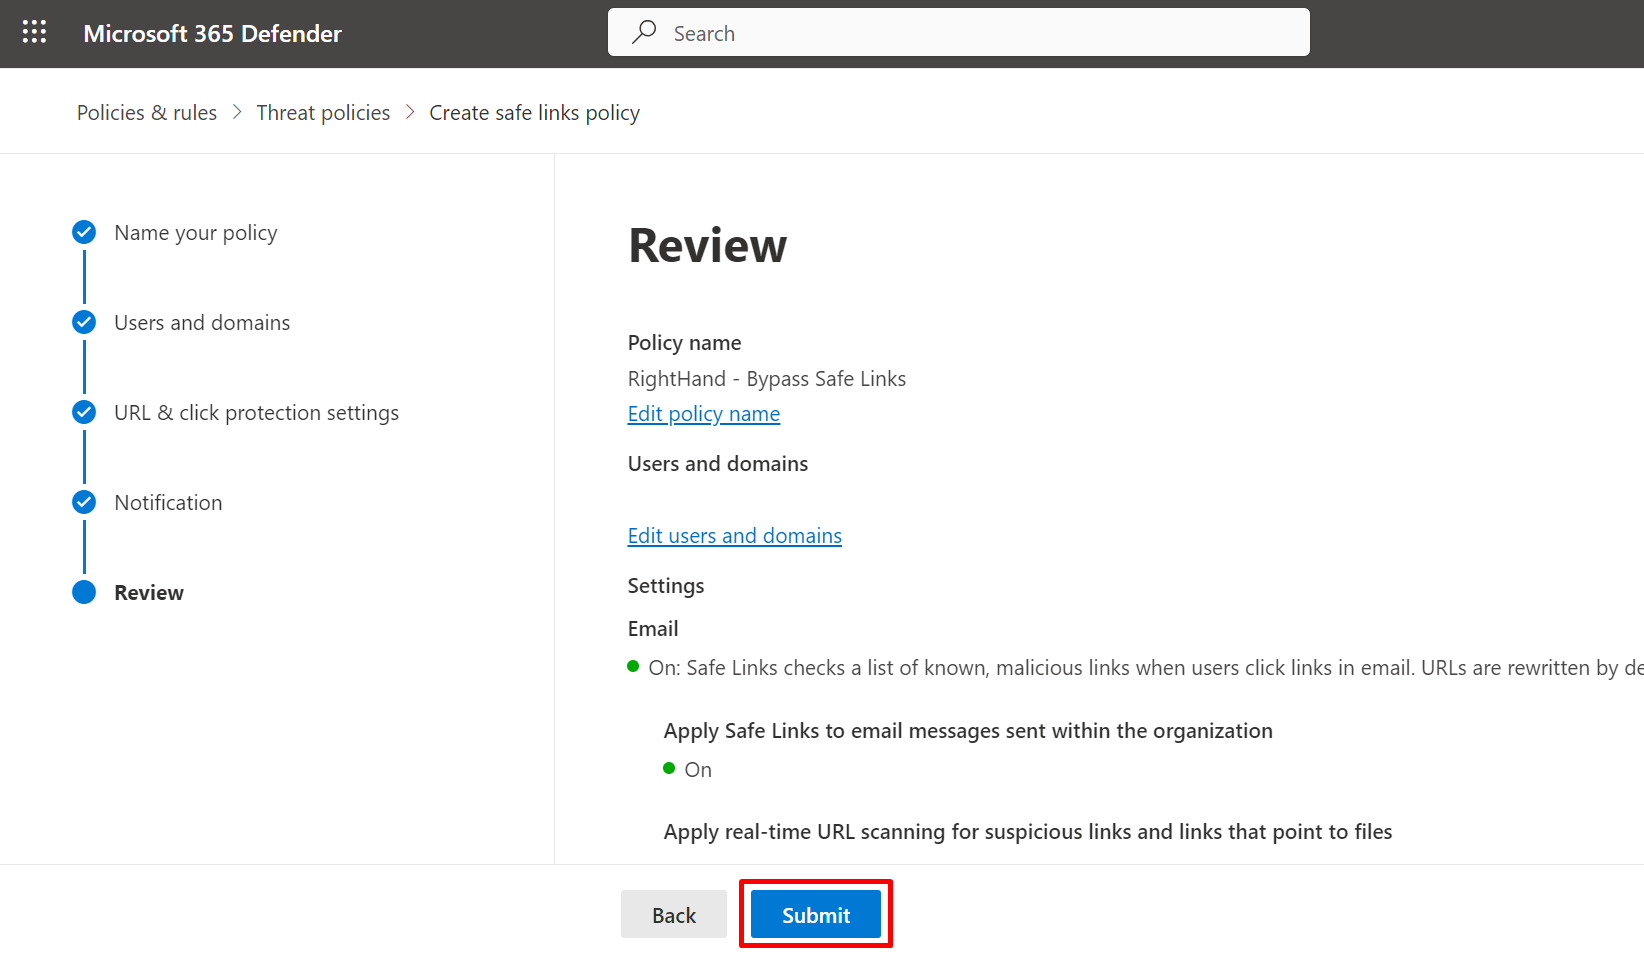
Step 6: Safe Links policy - Bypass Safe Links#
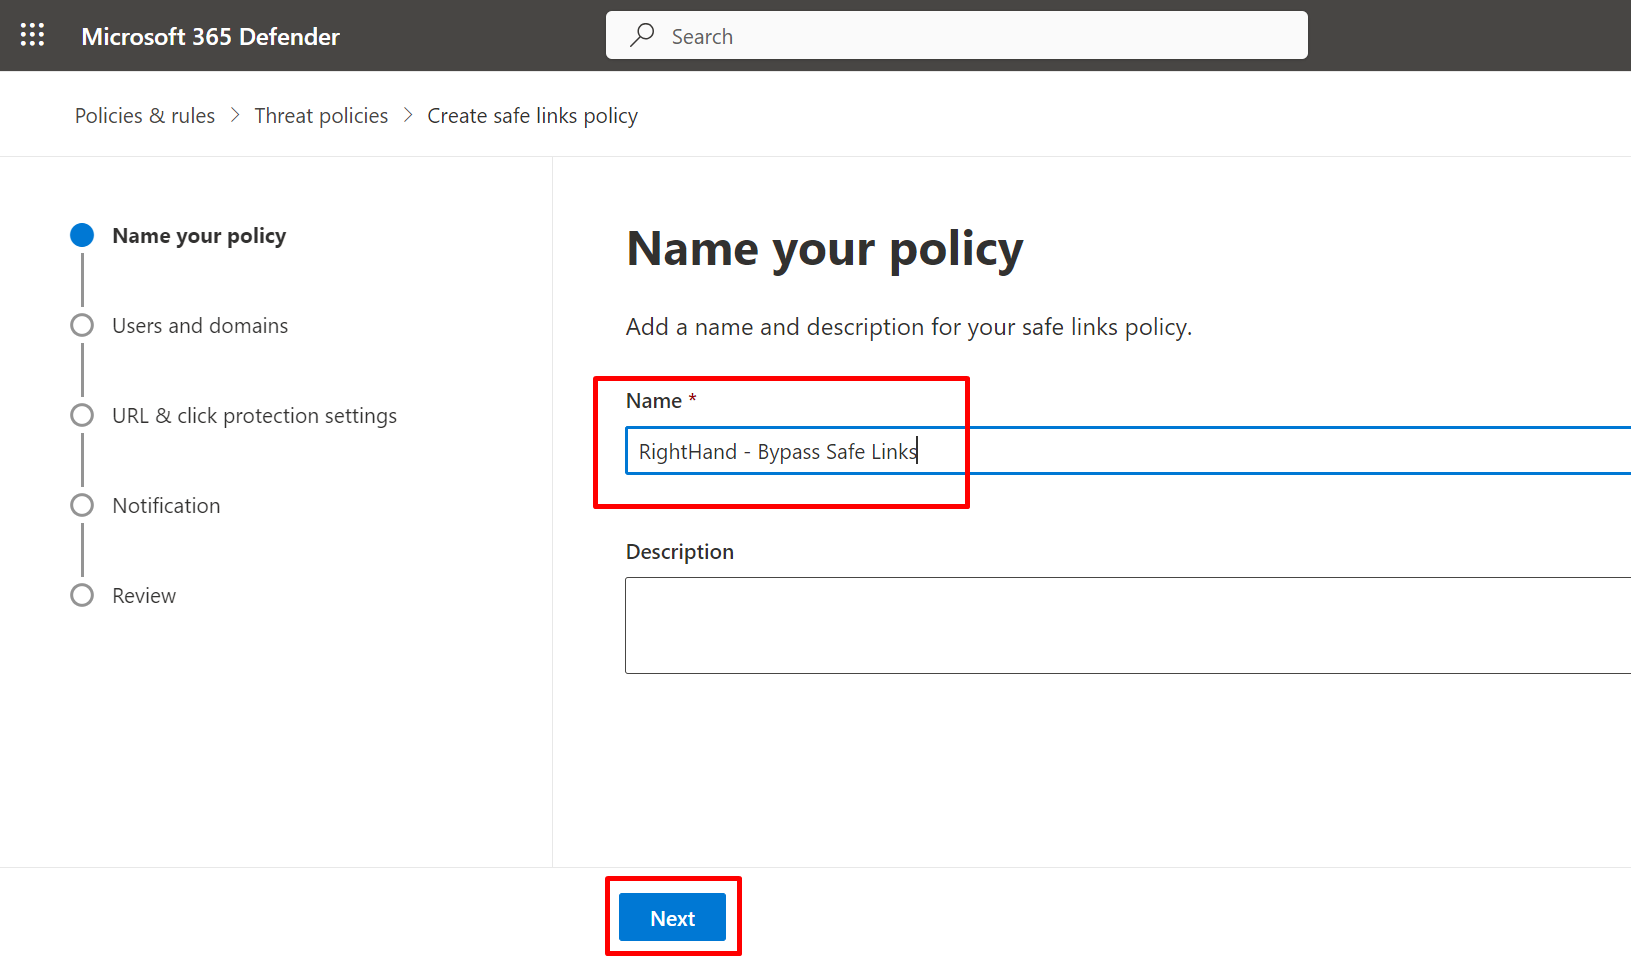
- In Threat policies → Policies → Safe Links, click + Create.
- Name:
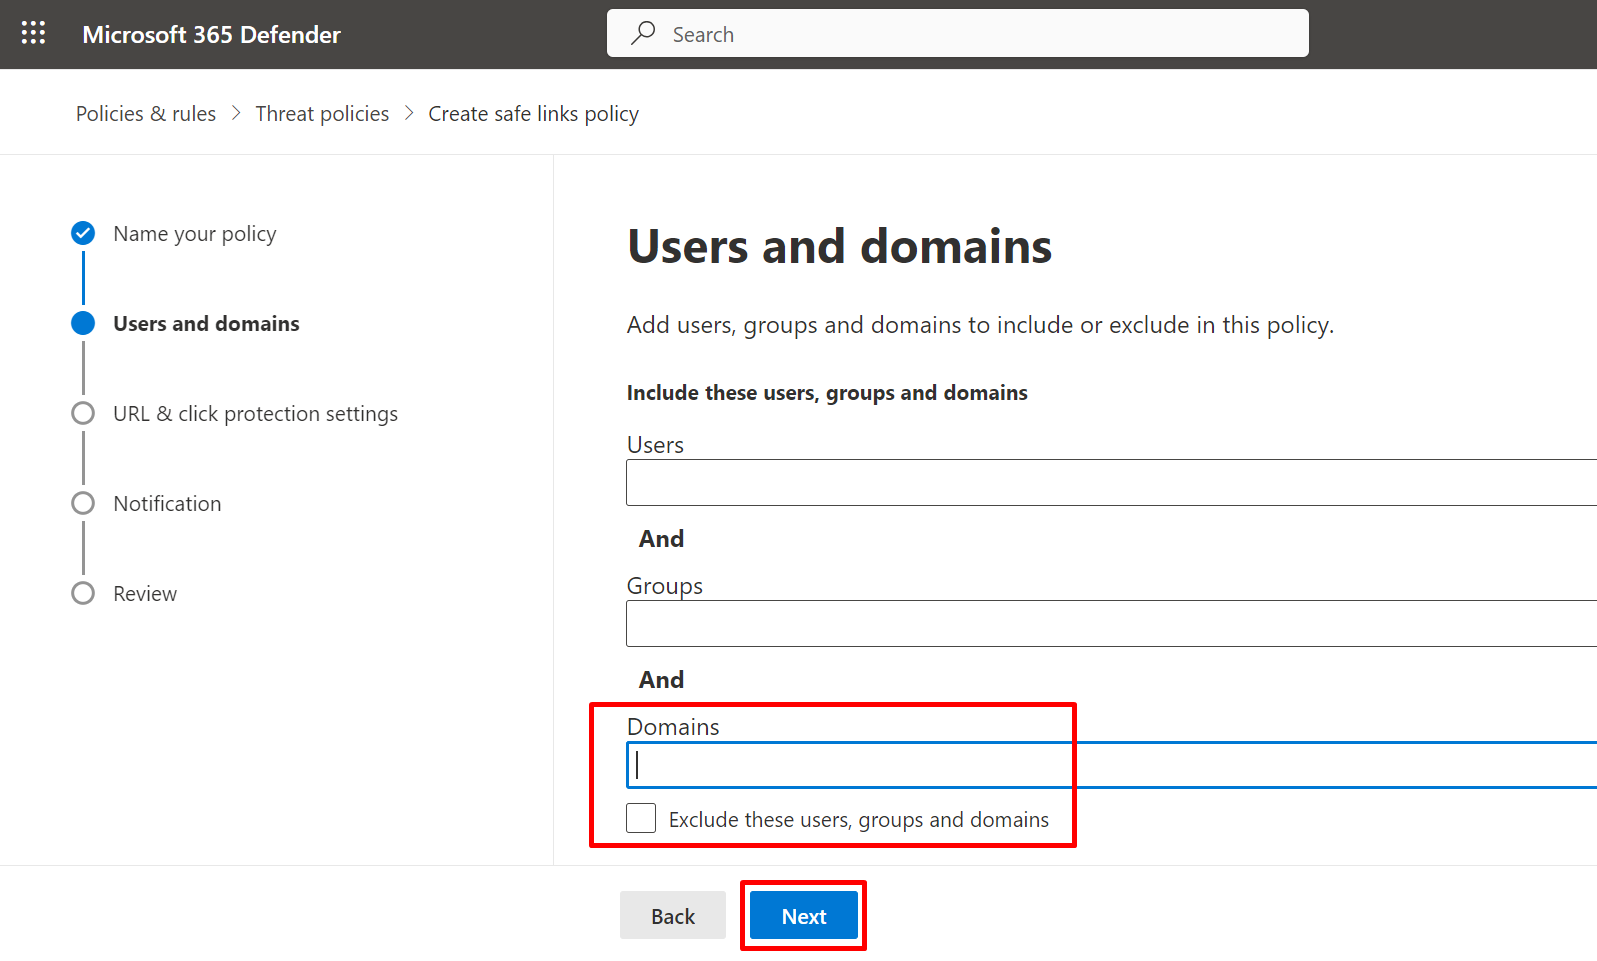
SolCyber - Right-Hand - Bypass Safe Links→ Next. - Under Users and Domains, in the Domains field, add every recipient domain at your organization that should receive Right-Hand simulations (for example
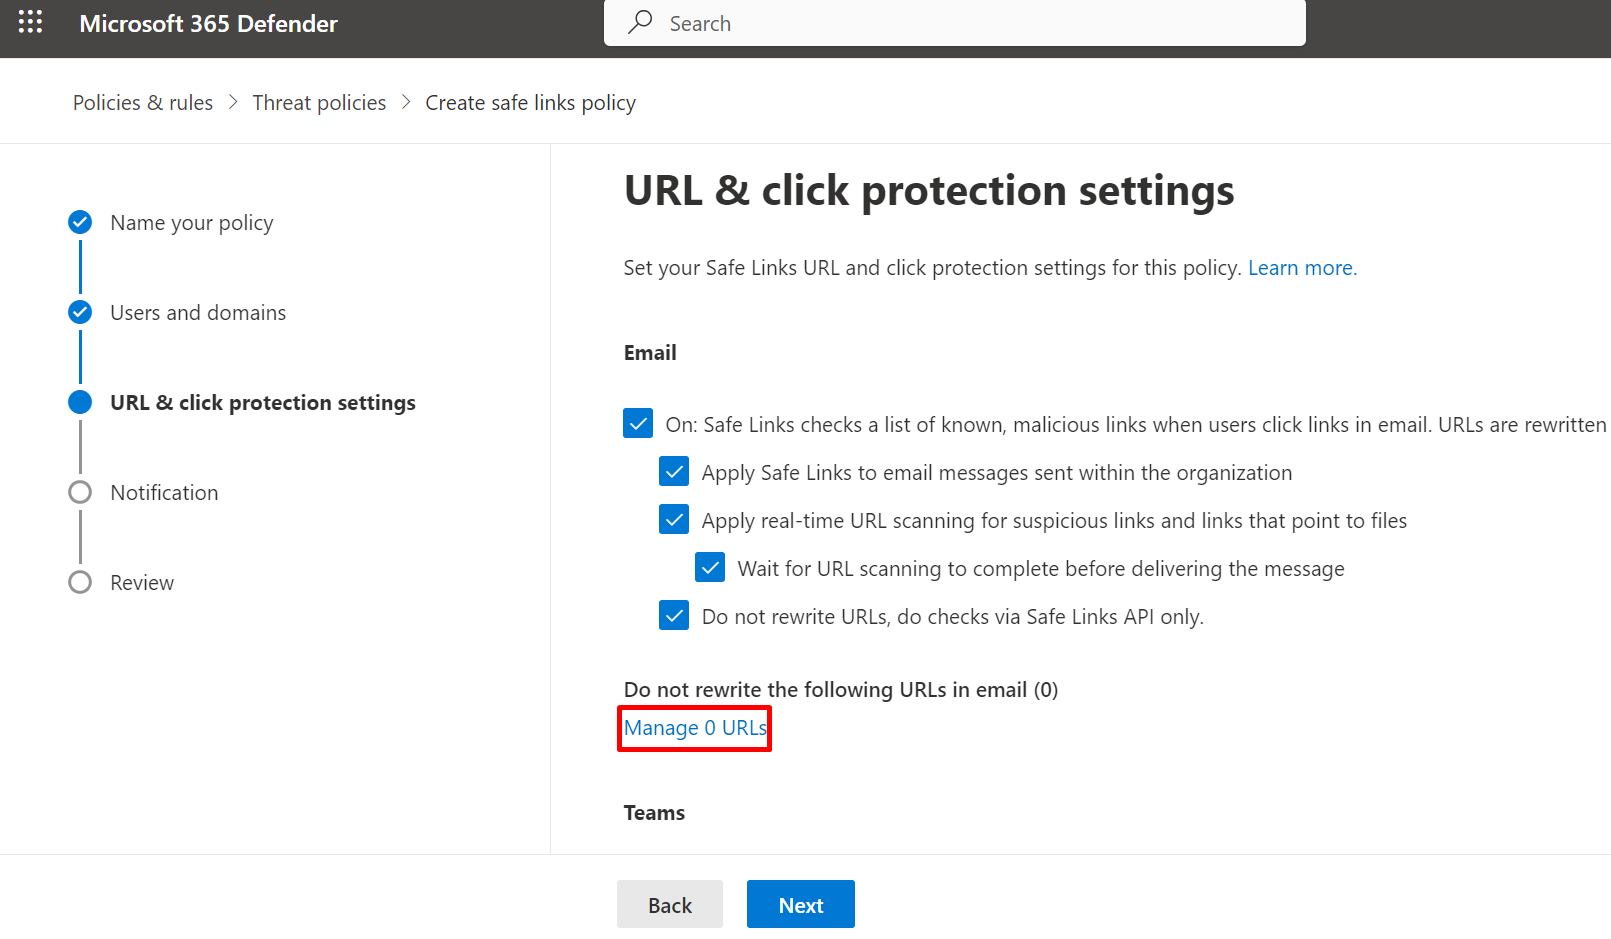
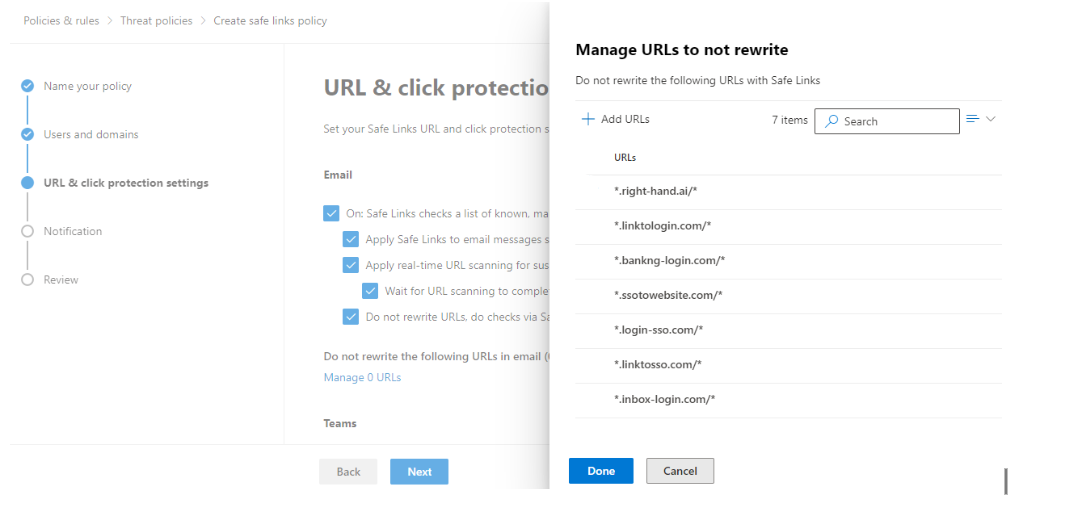
acme.onmicrosoft.com,acme.com). Click Next. - In URL & click protection settings, scroll to Do not rewrite the following URLs in email and click Manage URLs. Add each Right-Hand simulation URL (see Step 7 below for the canonical list) in the format
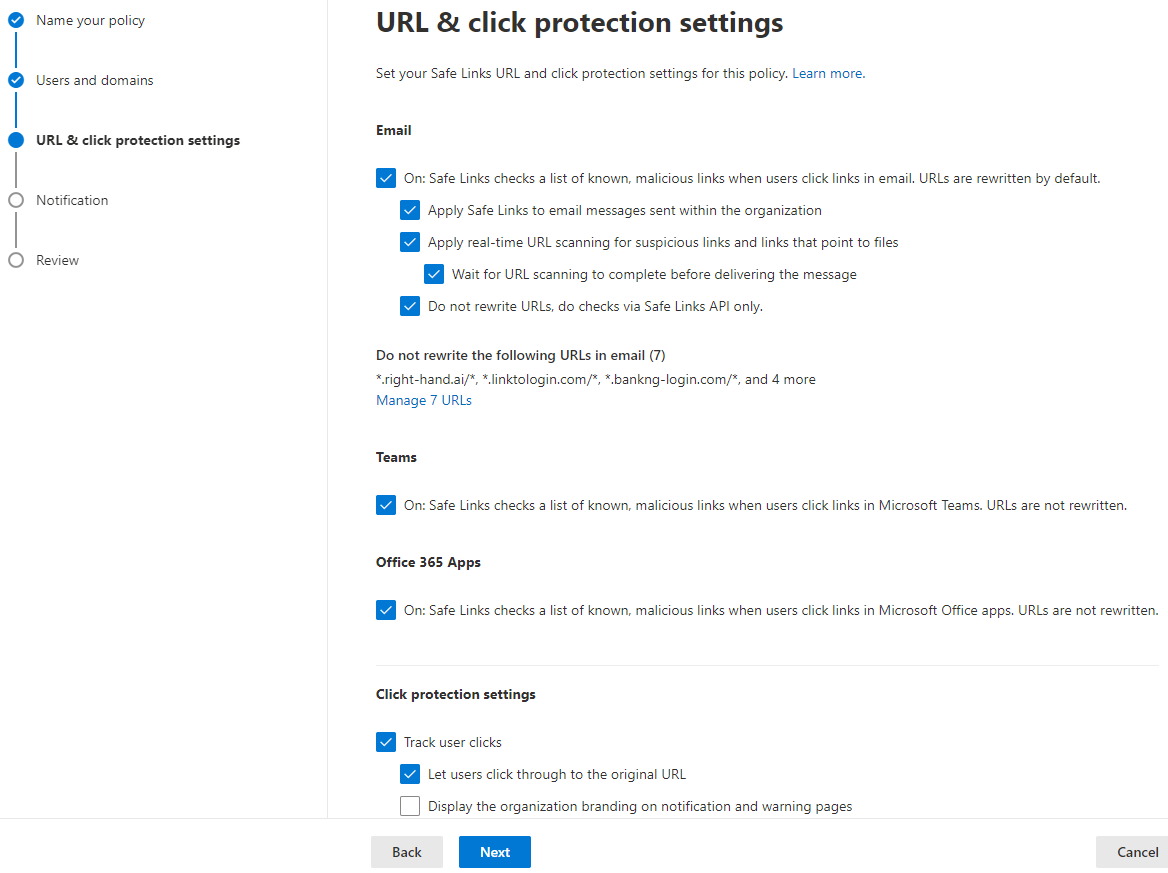
*.<domain>/*. Click Done. - Leave the protection-level checkboxes set according to your organization’s security policy and click Next.
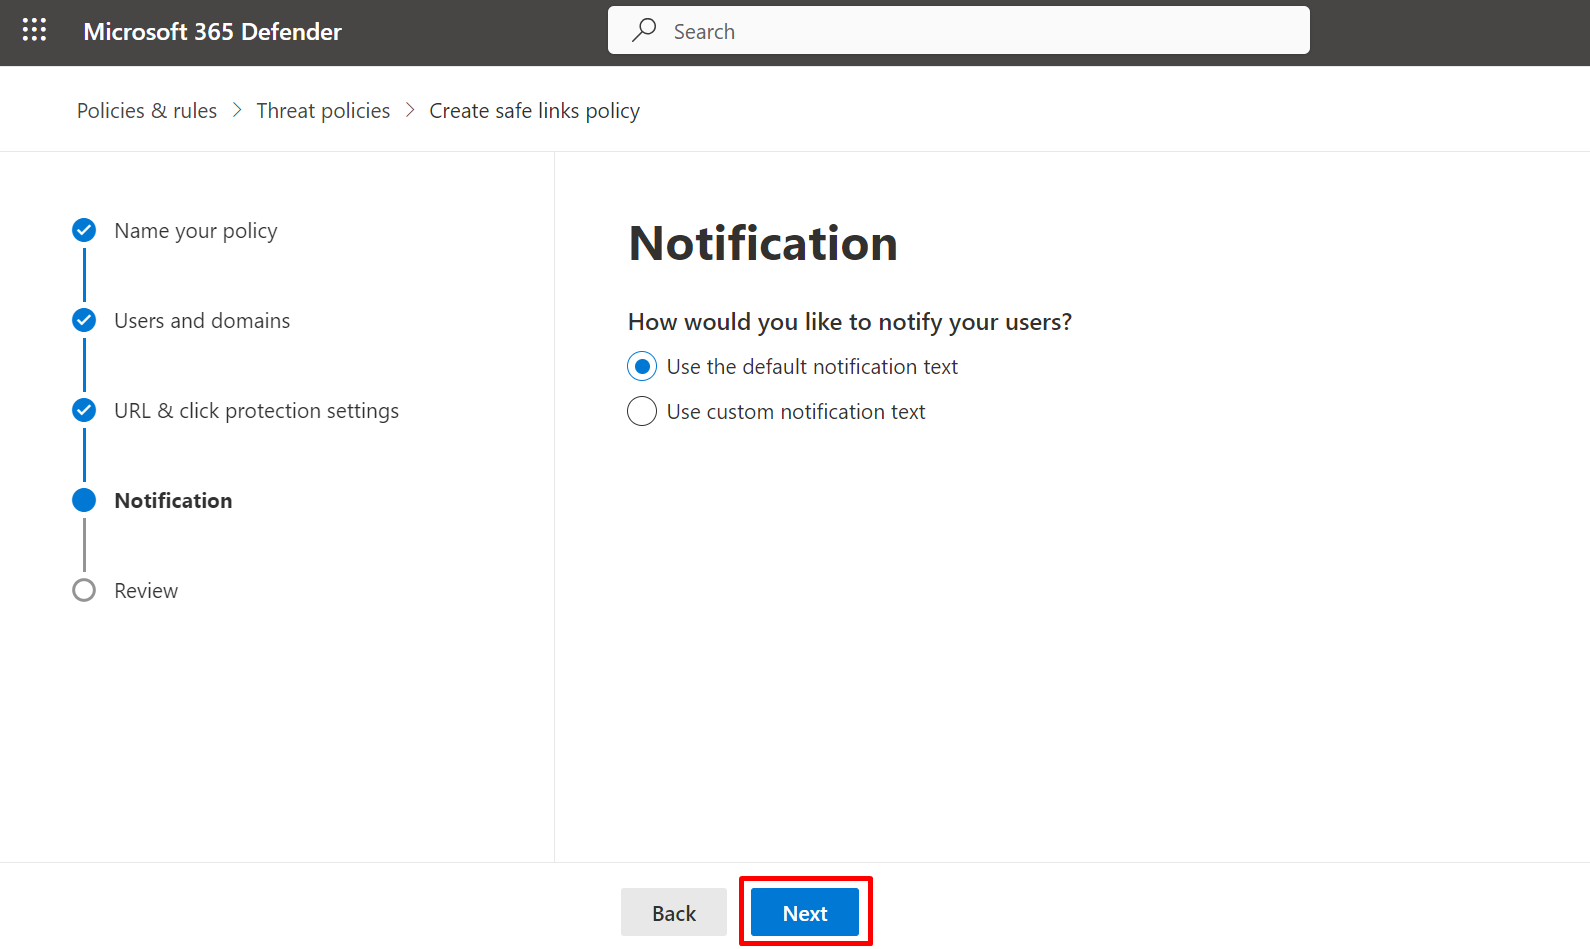
- Leave the Notification option on Default and click Next.
- Review and click Submit.
NOTE. The URL list in Step 6 must match the Simulation URLs to allow list configured in Step 7. Updating one without the other is the most common cause of “the link got rewritten and the campaign report shows zero clicks” tickets.
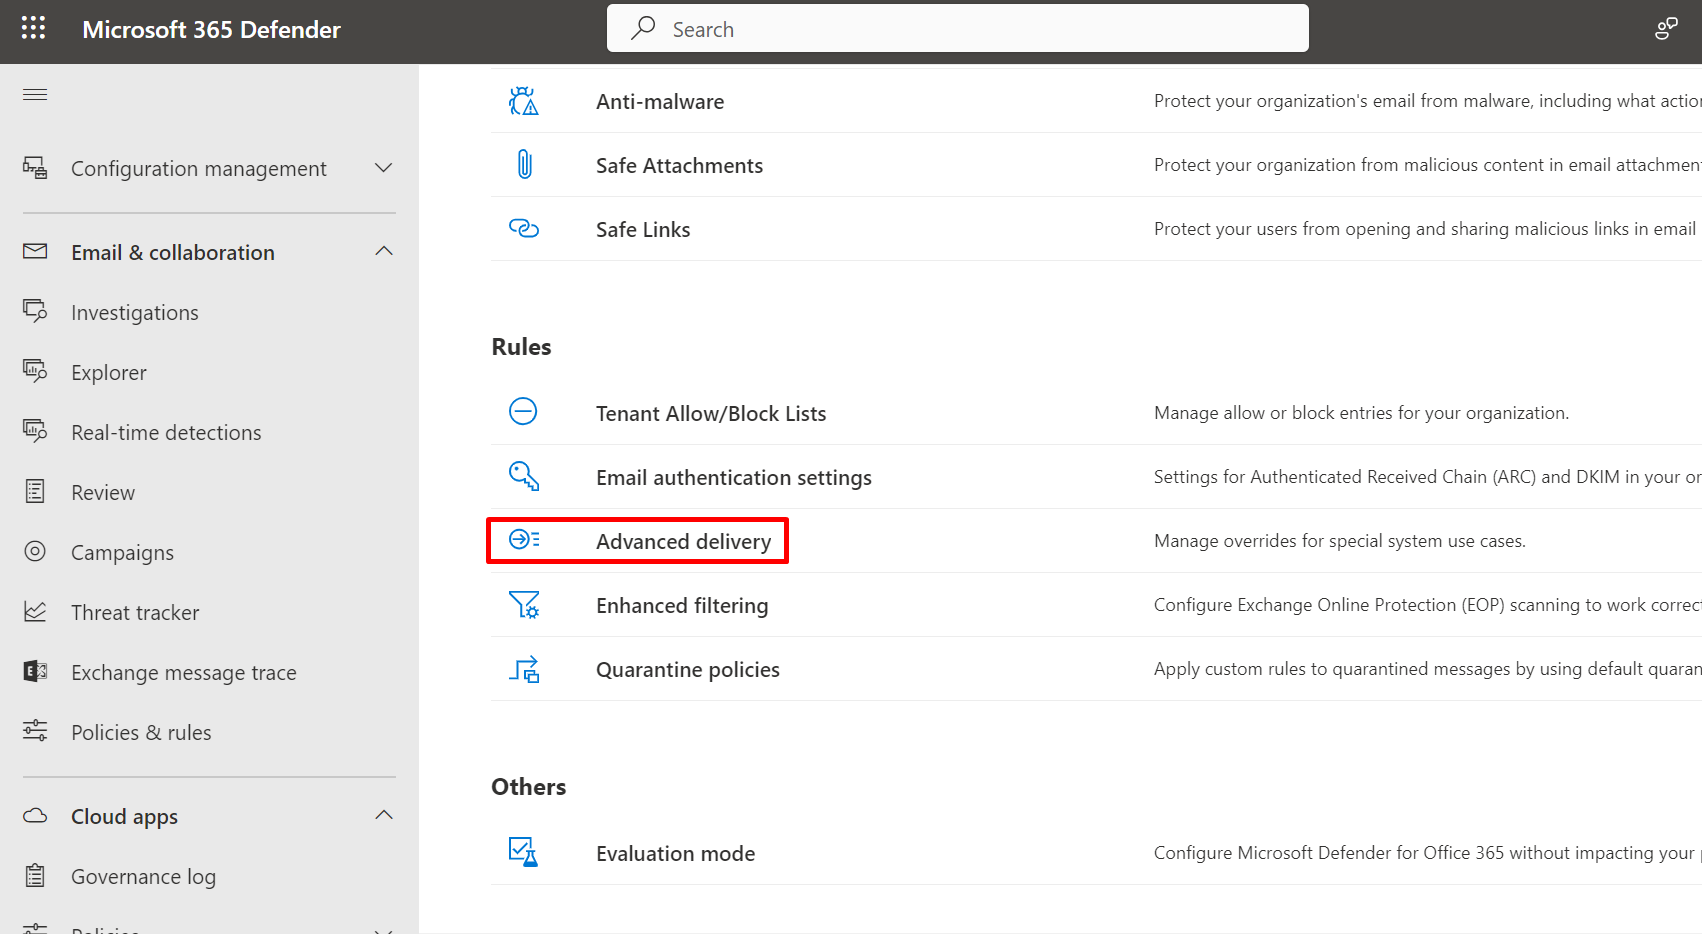
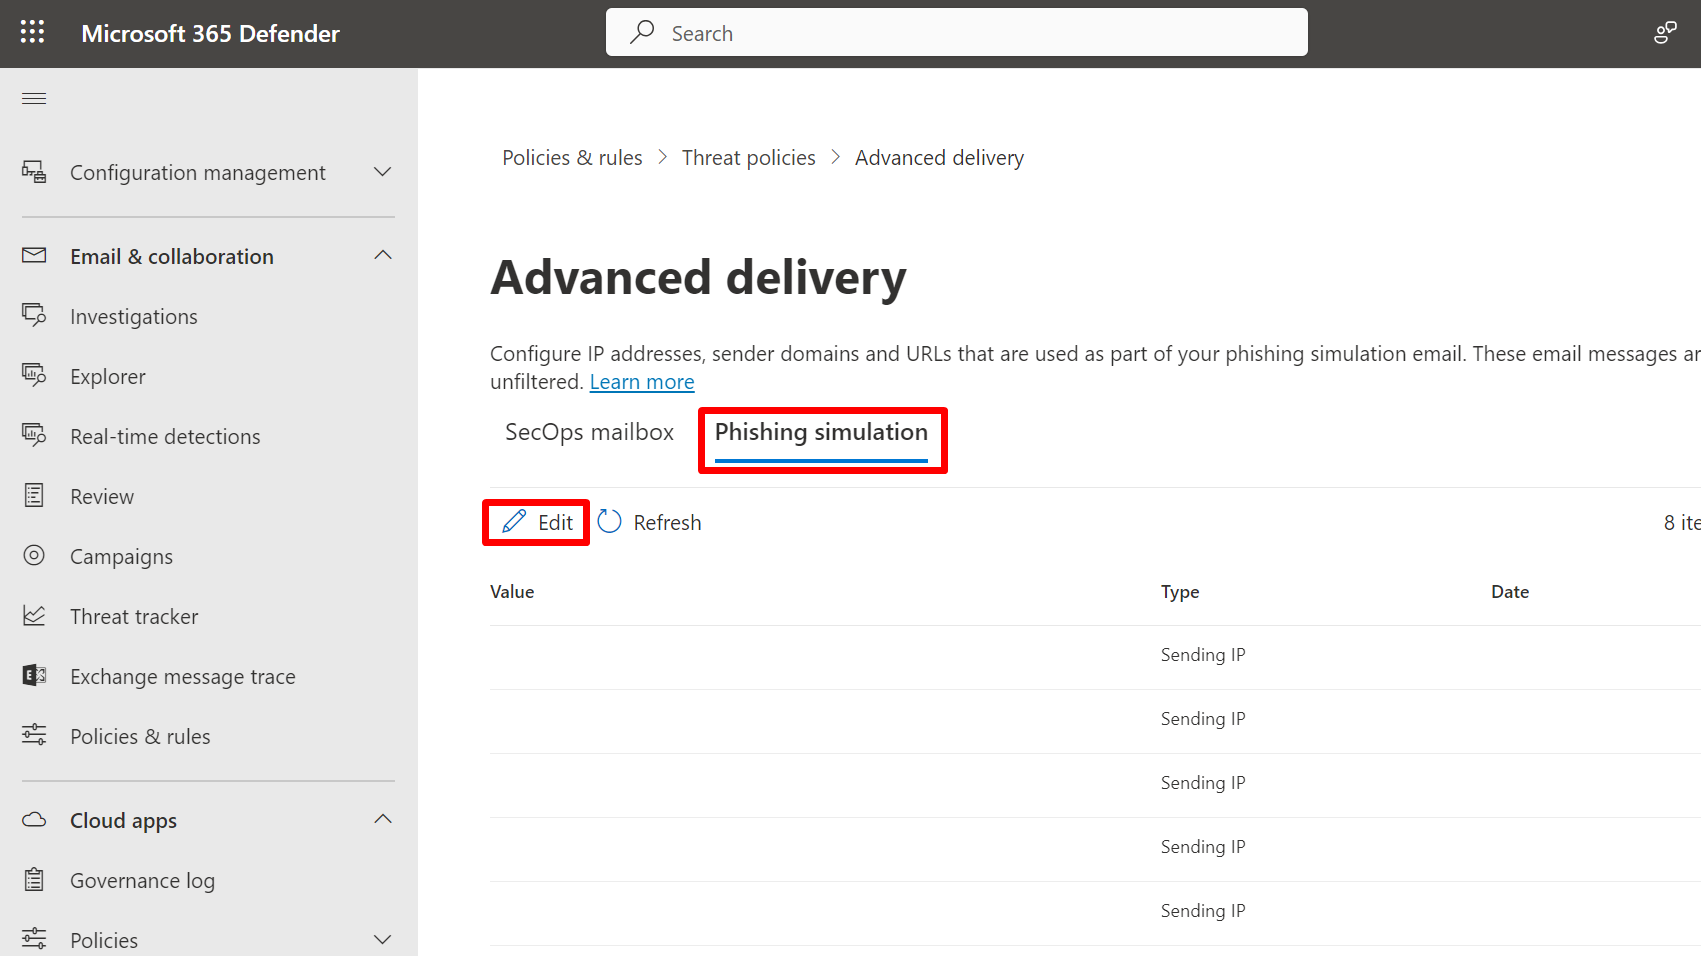
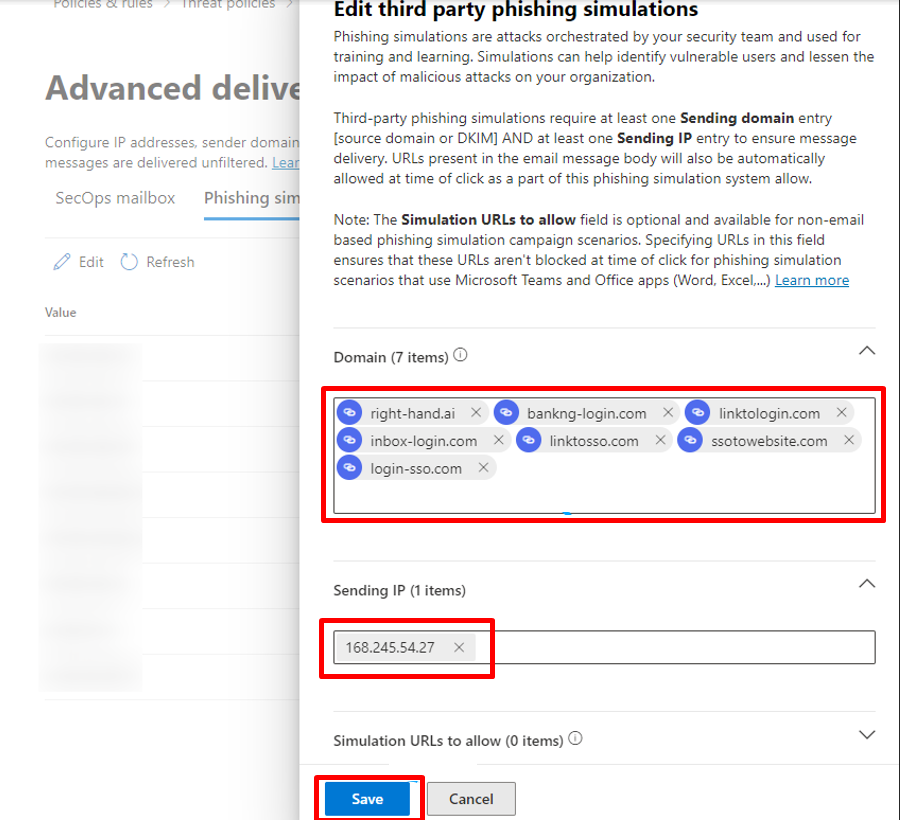
Step 7: Advanced Delivery - Phishing Simulation#
- In Threat policies → Rules → Advanced delivery, open the Phishing simulation tab and click Edit.
- In Sending IPs, add:
168.245.54.2752.74.95.172149.72.49.118
- In Sending domains, add each Right-Hand sending domain (one per line):
right-hand.ailinktosso.comlinktologin.comresetlogin.comaccount-protect.memicrrosotf.comgrnaill.commailboxaccess.comlinkdinapp.commicosot.comlogin-sso.com
- In Simulation URLs to allow, add each URL in the wildcard pattern
*.<domain>/*— one entry per line:text*.right-hand.ai/* *.linktosso.com/* *.linktologin.com/* *.resetlogin.com/* *.account-protect.me/* *.micrrosotf.com/* *.grnaill.com/* *.mailboxaccess.com/* *.linkdinapp.com/* *.micosot.com/* *.login-sso.com/* - Click Save.

NOTE. SolCyber may rotate or add sending domains as Right-Hand expands its simulation library. If you receive a campaign pre-flight notification that lists a domain not on the list above, add it here before the campaign launches.
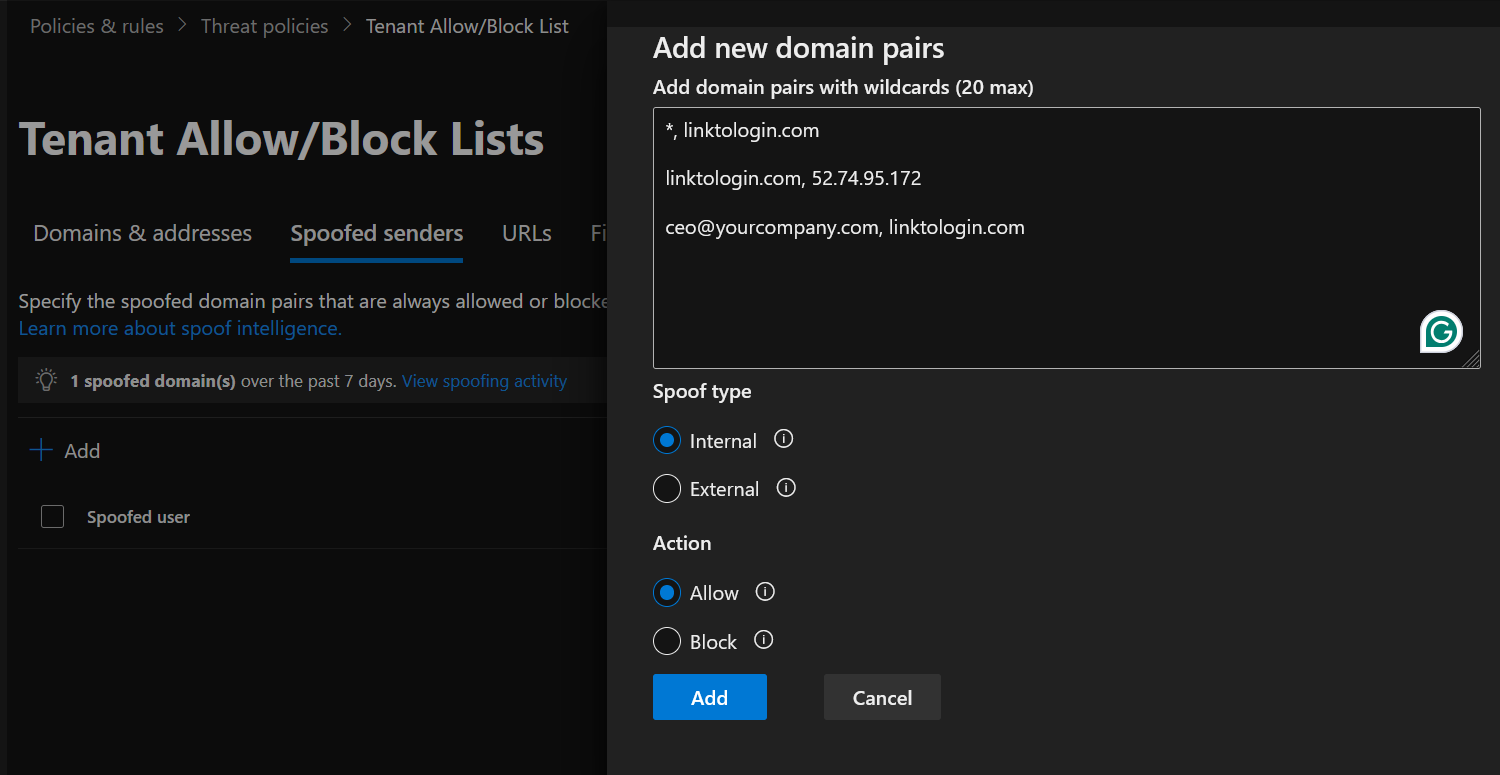
Step 8: Tenant Allow/Block List - suppress the “unverified sender” banner#
Microsoft’s Spoof Intelligence shows recipients an “Unverified sender” or “We could not verify the identity of the sender” banner on messages whose From domain fails sender alignment. Because simulations intentionally spoof external brands, you must allow the Right-Hand simulation domains explicitly to suppress the banner — otherwise users see the warning, training realism breaks, and click-through metrics suffer.
- Navigate to Threat policies → Tenant Allow/Block Lists → Spoofed senders.
- Click + Add.
- For each Right-Hand simulation domain, add an entry with the Sending infrastructure wildcard:text
*,linktosso.com *,linktologin.com *,resetlogin.com *,account-protect.me *,micrrosotf.com *,grnaill.com *,mailboxaccess.com *,linkdinapp.com *,micosot.com *,login-sso.com - Set Spoof type to External for all entries (Right-Hand mail originates outside your tenant).
- Set Action to Allow.
- Click Save.


Verify #
After all eight steps are saved, ask your SolCyber Customer Success Manager to send a single test simulation against one mailbox at your organization. Confirm that:
- The message lands directly in the Inbox (not Junk or Clutter).
- No Safe Links rewriting has been applied to URLs in the body (hover over a link — the URL should still point to a Right-Hand simulation domain such as
*.linktologin.com, not asafelinks.protection.outlook.comredirect). - Attachments (if any) open without being replaced by a Safe Attachments placeholder.
- No “Unverified sender” banner is shown at the top of the message.
If any of the above fails, re-check the rule priority in the Exchange Admin Center and Defender Portal — a higher-priority anti-spam, anti-phishing, or Safe Attachments policy will pre-empt these allow rules.