O365 Email Security Deployment and Configuration Guide
Phishing is the root cause of 95% of security breaches that lead to financial loss and brand damage. SolCyber uses Cloudflare Email Security (formerly Area1), a cloud based service that stops phishing attacks, the #1 cybersecurity threat, across all traffic vectors - email, web and network.
With globally distributed sensors & comprehensive attack analytics, Cloudflare Email Security proactively identifies phishing campaigns, attacker infrastructure, and attack delivery mechanisms during the earliest stages of a phishing attack cycle. Using flexible enforcement platforms, Cloudflare Email Security allows customers to take preemptive action against these targeted phishing attacks across all vectors - email, web and network; either at the edge or in the cloud.
To ensure changes take effect quickly, we recommend updating the Time to Live (TTL) value of the existing MX records on your domains to 1 hour or less prior to completing these steps.
Step 0: Verify Domain Ownership#
In order to add domains to Cloudflare Email Security, you must first confirm ownership of the domain. Provide SolCyber with the domain(s) to be protected by Cloudflare Email Security, and we will provide you with a TXT record that needs to be added to the DNS Records for the domain. Verification can take up to 24 hours.
Step 1: Add Cloudflare IP Addresses to Allow List#
Go to the Microsoft Security admin center.
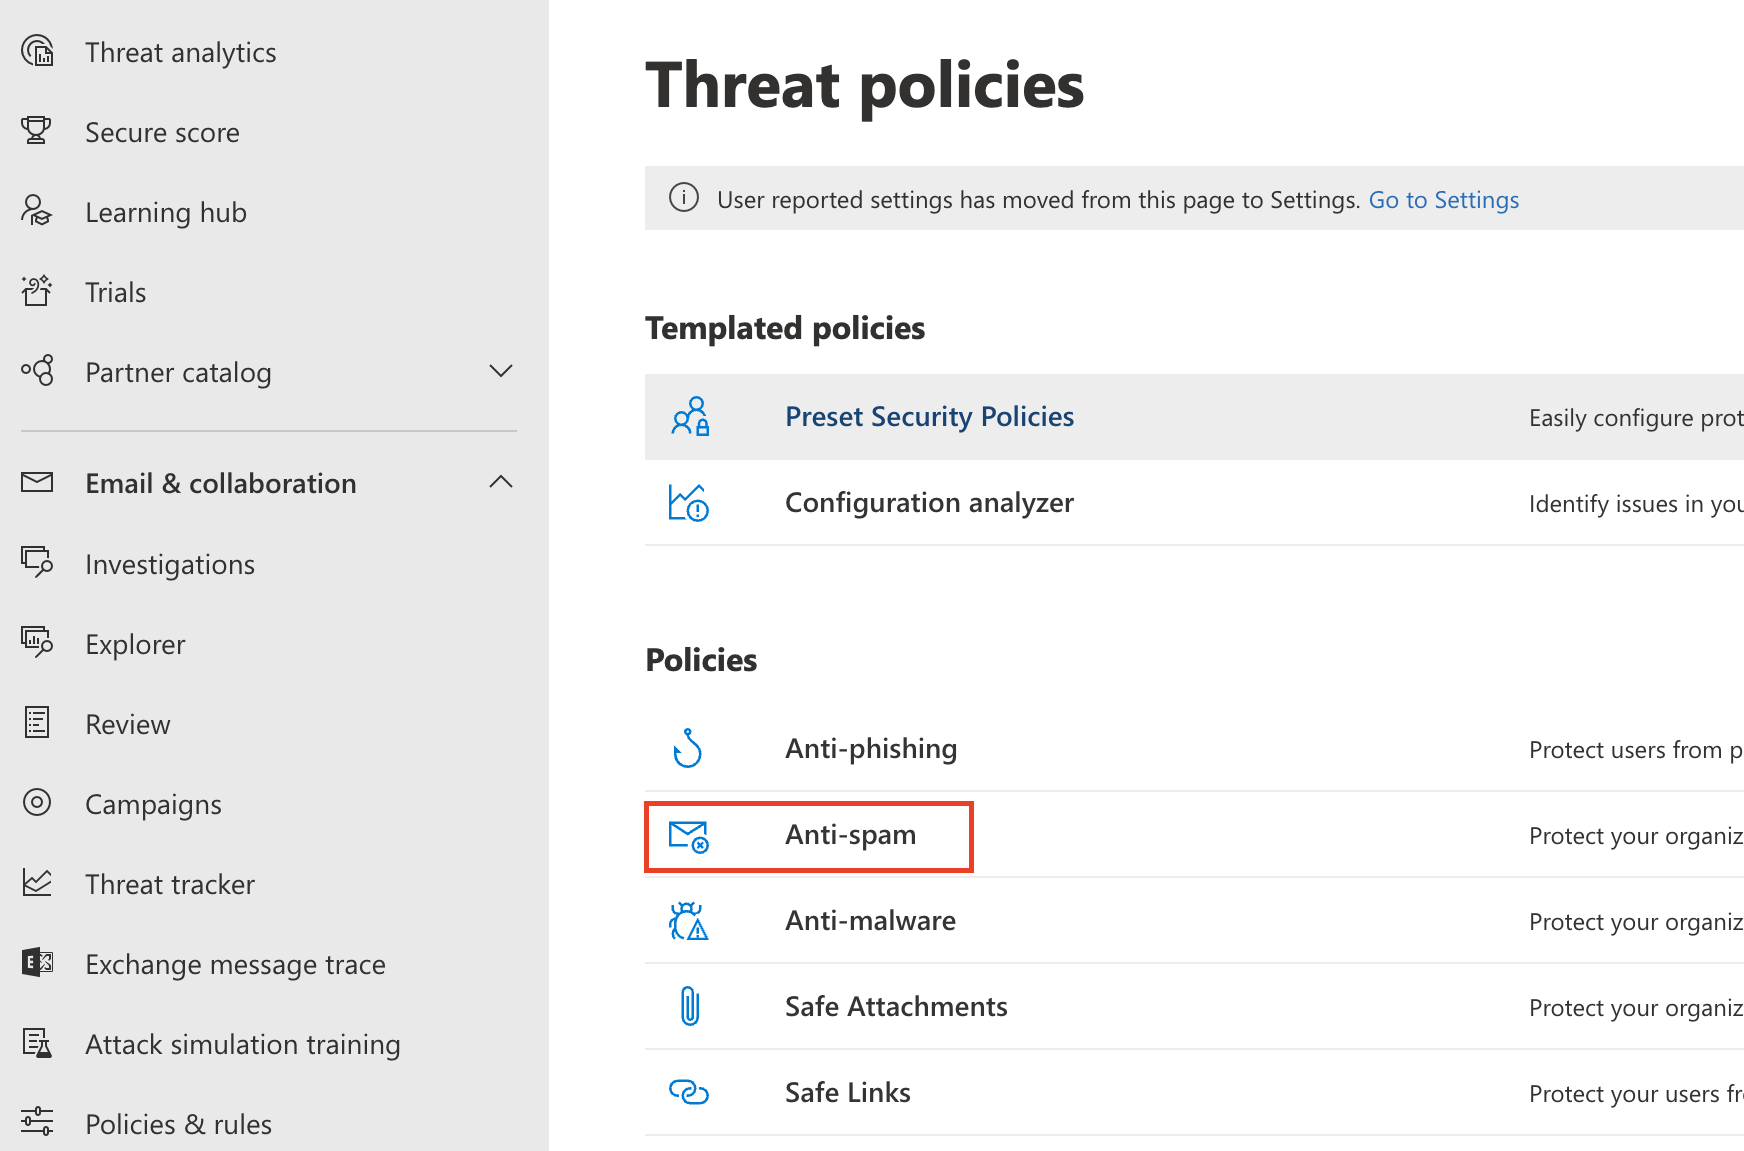
Go to Email & collaboration > Policies & Rules > Threat policies.
Select the Anti-spam option.

Select Connection filter policy (Default) > Edit connection filter policy.
.png)
In Always allow messages from the following IP addresses or address range add the IP addresses/CIDR blocks as listed here: Egress IPs.

Please note that Microsoft does not allow CIDR blocks larger than a /24 to be entered. There are two Cloudflare CIDR blocks that are too large (104.30.32.0/19 and 134.195.26.0/23). On the Egress IPs page, these two block have been broken down in to /24 blocks that can be entered.
Select Save.
Microsoft recommends disabling SPF Hard fail when an email solution is placed in front of it. Return to the Anti-spam option.
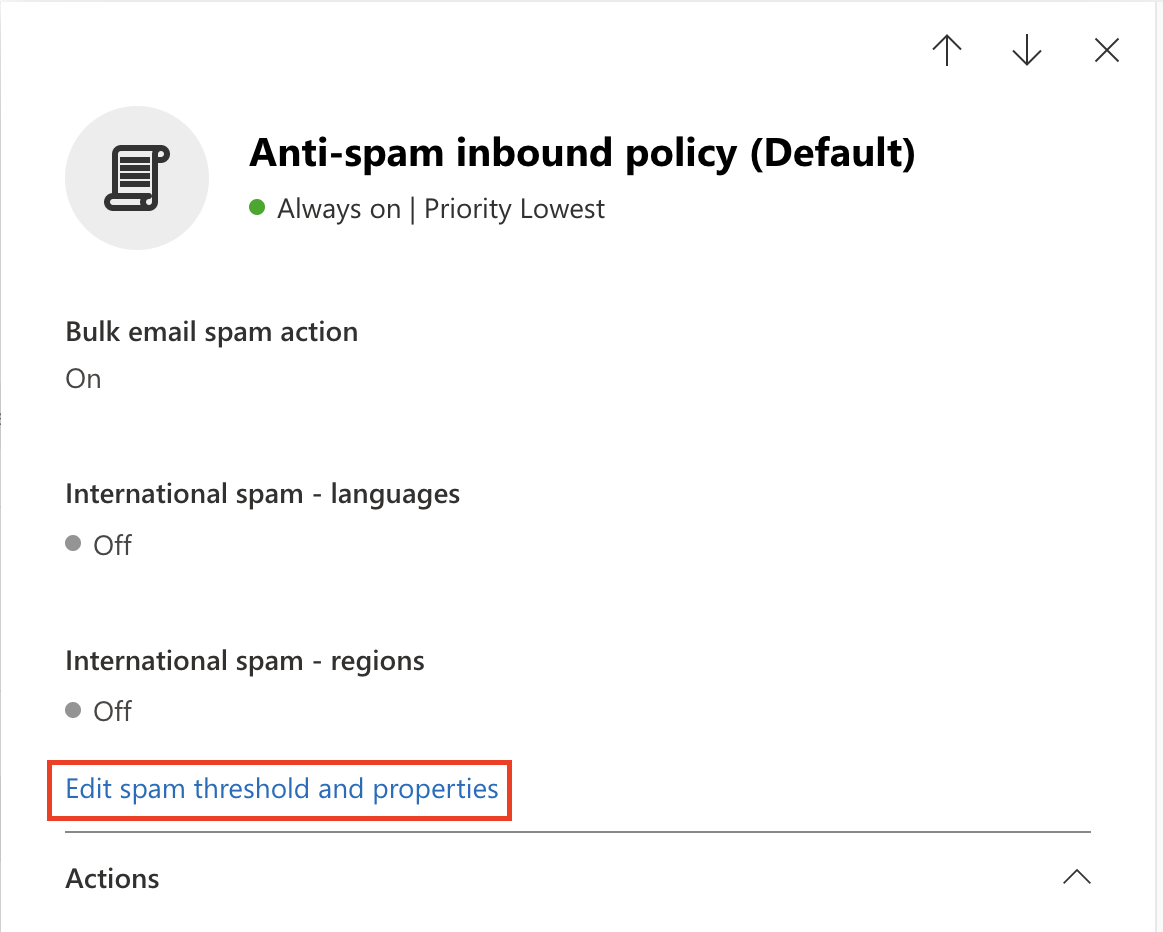
Select Anti-spam inbound policy (Default).
At the end of the Bulk email threshold & spam properties section, select Edit spam threshold and properties.

Scroll to Mark as spam > SPF record: hard fail, and ensure it is set to Off.
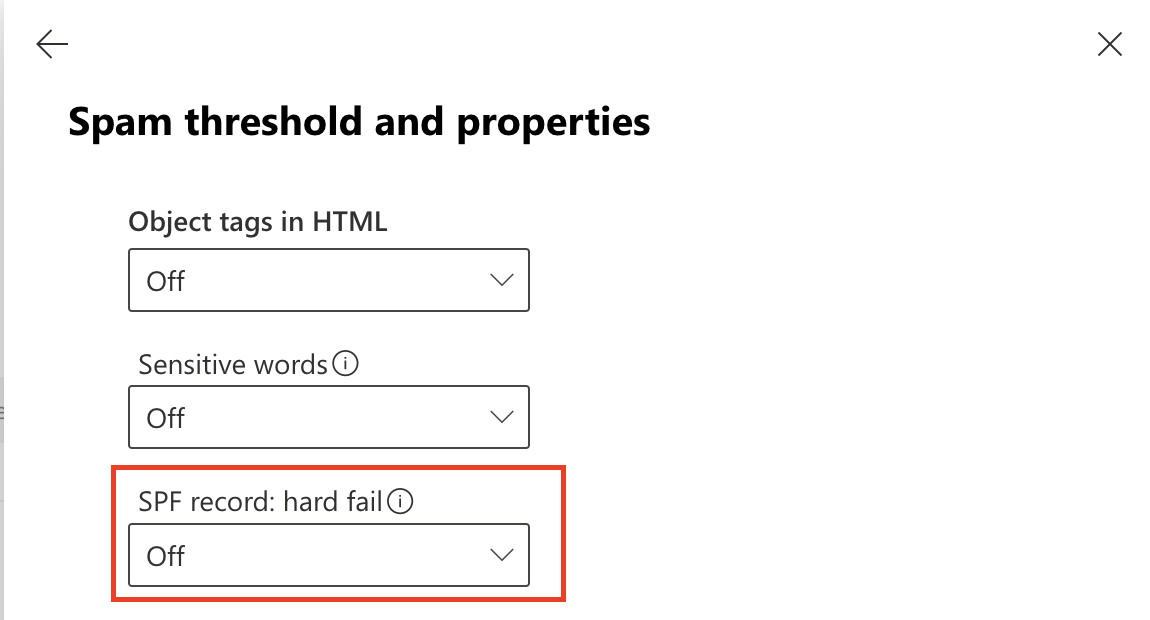

Save.
Note: Depending on your O365 configuration, you may receive a warning indicating that you need to run the Enable-OrganizationCustomization cmdlet before you create or modify objects in your Exchange Online organization. Please follow the next step to enable this cmdlet.
Reference:
https://docs.microsoft.com/en-us/powershell/module/exchange/enable-organizationcustomization for details on how to execute this cmdlet.
Step 2: Execute Enable-OrganizationCustomization (if required)#
The following steps are only required if you have not previously customized your O365 instance. In the previous step, if you received the message to run this cmdlet, you will need to execute it in order to proceed with the configuration.
Run PowerShell as administrator, execute the following command:
> Install-Module ExchangeOnlineManagement> Enter Y or A to allow the installation of the untrusted module.
Note: This module is a Microsoft module.
.png)
Execute the following commands to execute the policy change and connect to the O365 instance:
> set-executionpolicy remotesigned
> Enter Y or A, to confirm the change
> Import-Module ExchangeOnlineManagement
> Execute Connect-ExchangeOnline, to authenticate against your O365 instance
.png)
The Connect-ExchangeOnline cmdlet will prompt you to login. Please login using an O365 administrator account:
Once authenticated, you will be returned to the PowerShell prompt:.png)
.png)
You can verify that the OrganizationCustomization is enabled by running the command:
> Get-OrganizationConfig | FL isDehydrated
If the result is false OrganizationCustomization is already enabled, no further actions are required..png)
If the result is true, then you will need to run the following command to enable the OrganizationCustomization:
> Enable-OrganizationCustomization
.png)
Step 3: Enhanced Filtering Configuration#
This will allow O365 to properly identify the original connecting IP before the message was received by Area1 to help with the SPF analysis. This has two steps:
- Create an inbound connector
- Enable enhanced filtering configuration of the connector
Create an inbound connector#
- From the Microsoft Exchange admin center, select the mail flow configuration pane and navigate to the connectors section of the configuration.
2. Select Add a connector. In Connection from, select Partner Organization.
Click the Next button to continue the configuration.
3. Set the following options:
- Name -
Cloudflare Email Security Inbound Connector - Description -
Inbound connector for Enhanced Filtering
Click the Next button to continue the configuration.

4. In Authenticating sent email, select By verifying that the IP address of the sending server matches one of the following IP addresses, which belongs to your partner organization. Enter all the of IPs listed here: Egress IPs.
.png)
Click Next to continue.
5. In Security restrictions, accept the default Reject email messages if they aren’t sent over TLS setting and then select Next.
6. Review your settings and select Create connector.
Enable enhanced filtering#
Now that the Inbound connector has been configured, you will need to enable the enhanced filtering configuration of the connector.
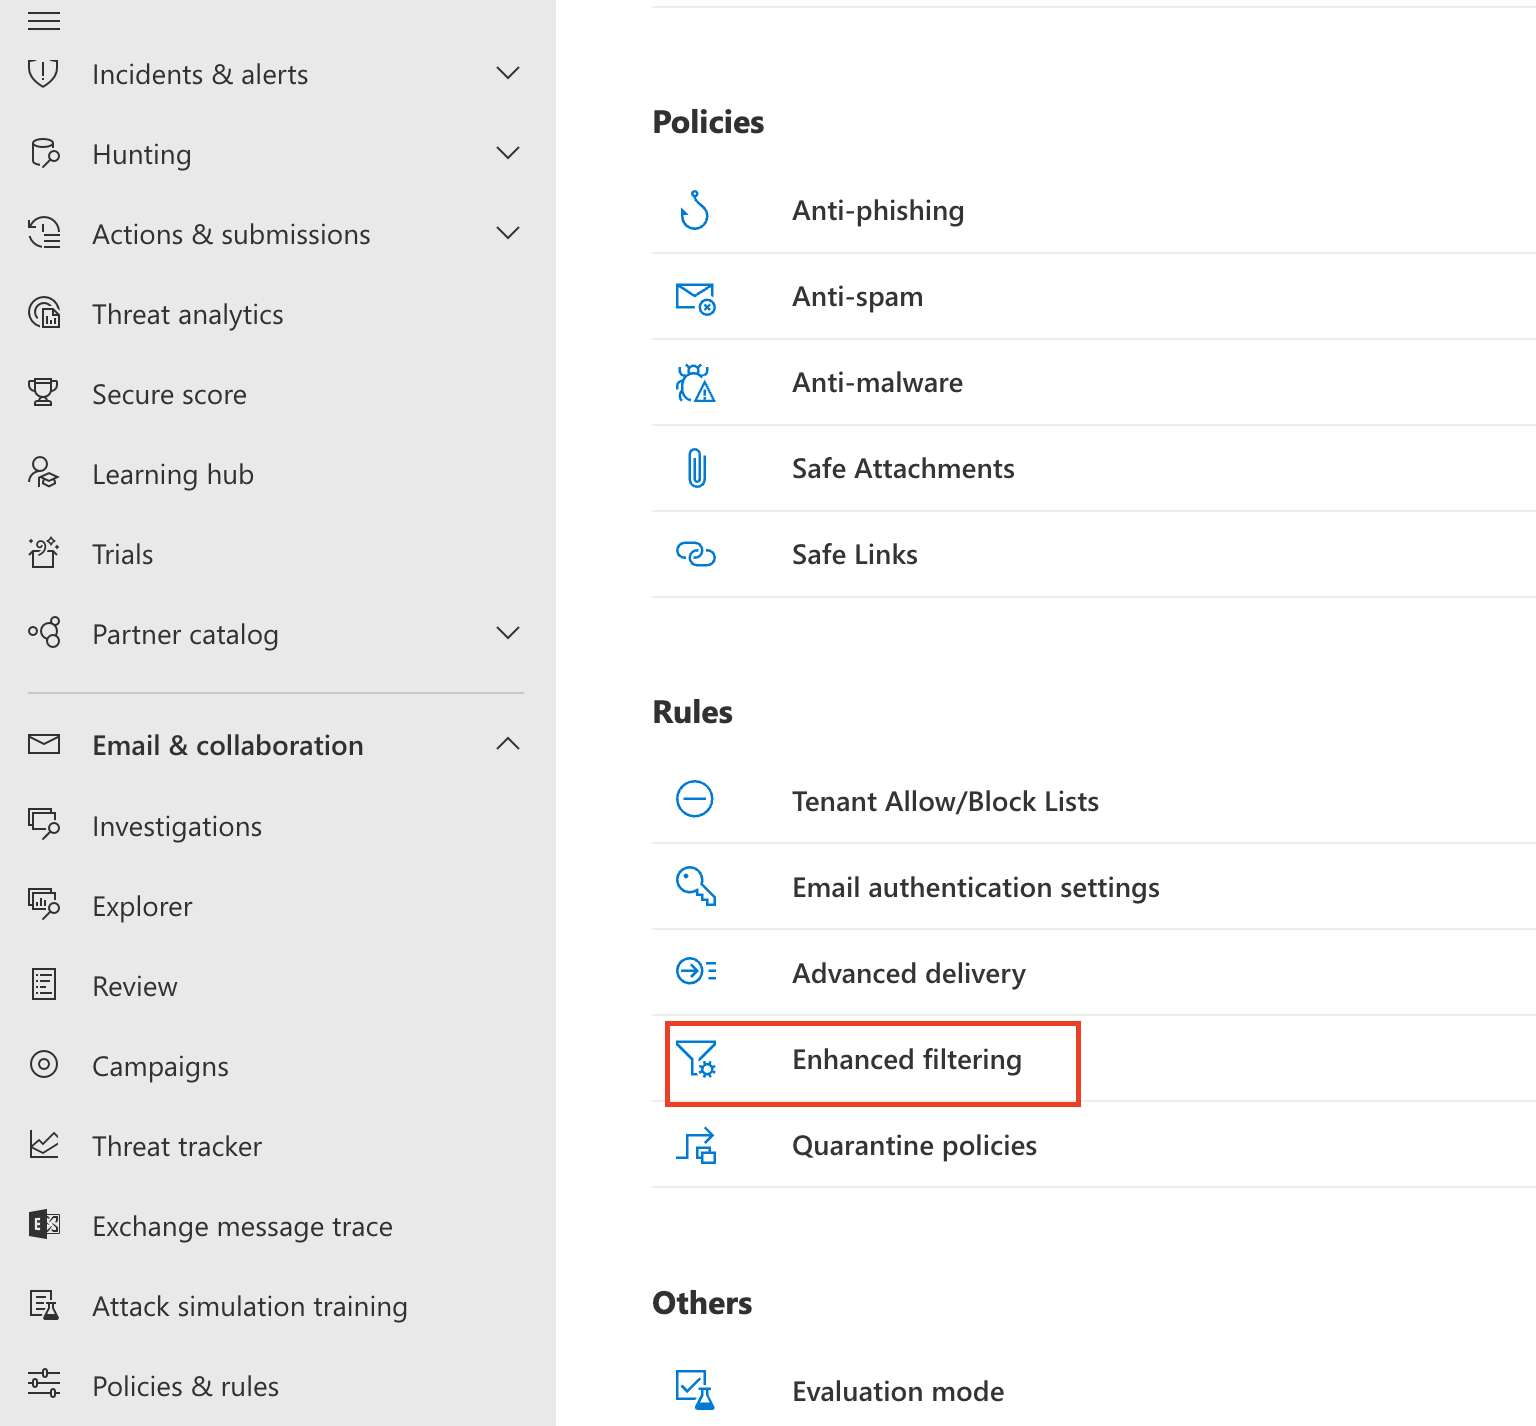
Visit https://security.microsoft.com/homepage > Email & collaboration > Policy & Rules > Threat policies > Rules, and select Enhanced filtering.
Select the
Area 1 Inbound Connectorthat you configured previously to edit its configuration parameters. Select Automatically detect and skip the last IP address and Apply to entire organization.
Click the Save button to activate the enhanced configuration.png)
Step 4: Update Your Domain MX Records#
Instructions to update your MX records will depend on the DNS provider you are using. You will need to update and replace your existing MX record with the Cloudflare hosts.
An example configuration for a North American-based company would be:
| Priority | Host |
|---|---|
| 10 | mxa.global.inbound.cf-emailsecurity.net |
| 10 | mxb.global.inbound.cf-emailsecurity.net |
When configuring the MX records, it’s recommended to configure the hosts with the same MX priority, this will allow mail flows to load balance between the hosts.
Once the MX change has been updated, the DNS updates may take up to 36 hours to fully propagate around the Internet. Some of the faster DNS providers will start to update records within minutes. DNS will reach the major DNS servers in about an hour.
Step 5: Secure Office 365 from MX records bypass #
NOTE: If you have partner organizations, devices, applications or automated senders that use your mail server as a relay (ex: an on-site printer/scanner that send scans via email) these emails will be blocked unless you add the public IP for the source device/application to this connector. Check for such conditions before you follow this procedure.
One method of DNS attacks is to search for old MX records and send phishing emails directly to the mail server. To secure the email flow, you will want to enforce an email flow where inbound messages are accepted by Office 365 only when they originate from Cloudflare Email Security. This can be done by adding a connector to only allow email from Cloudflare IPs with TLS encryption. This step is optional but recommended.
This step should not be performed until at least 36 hours after all domains (excluding your
<on_microsoft.com>domain) in your Office 365 organization have been onboarded to Cloudflare Email Security., and Cloudflare Email Security. is their MX record. If a domain has not been onboarded or DNS is still propagating, you will impact production email flow for that domain.
Create Connector#
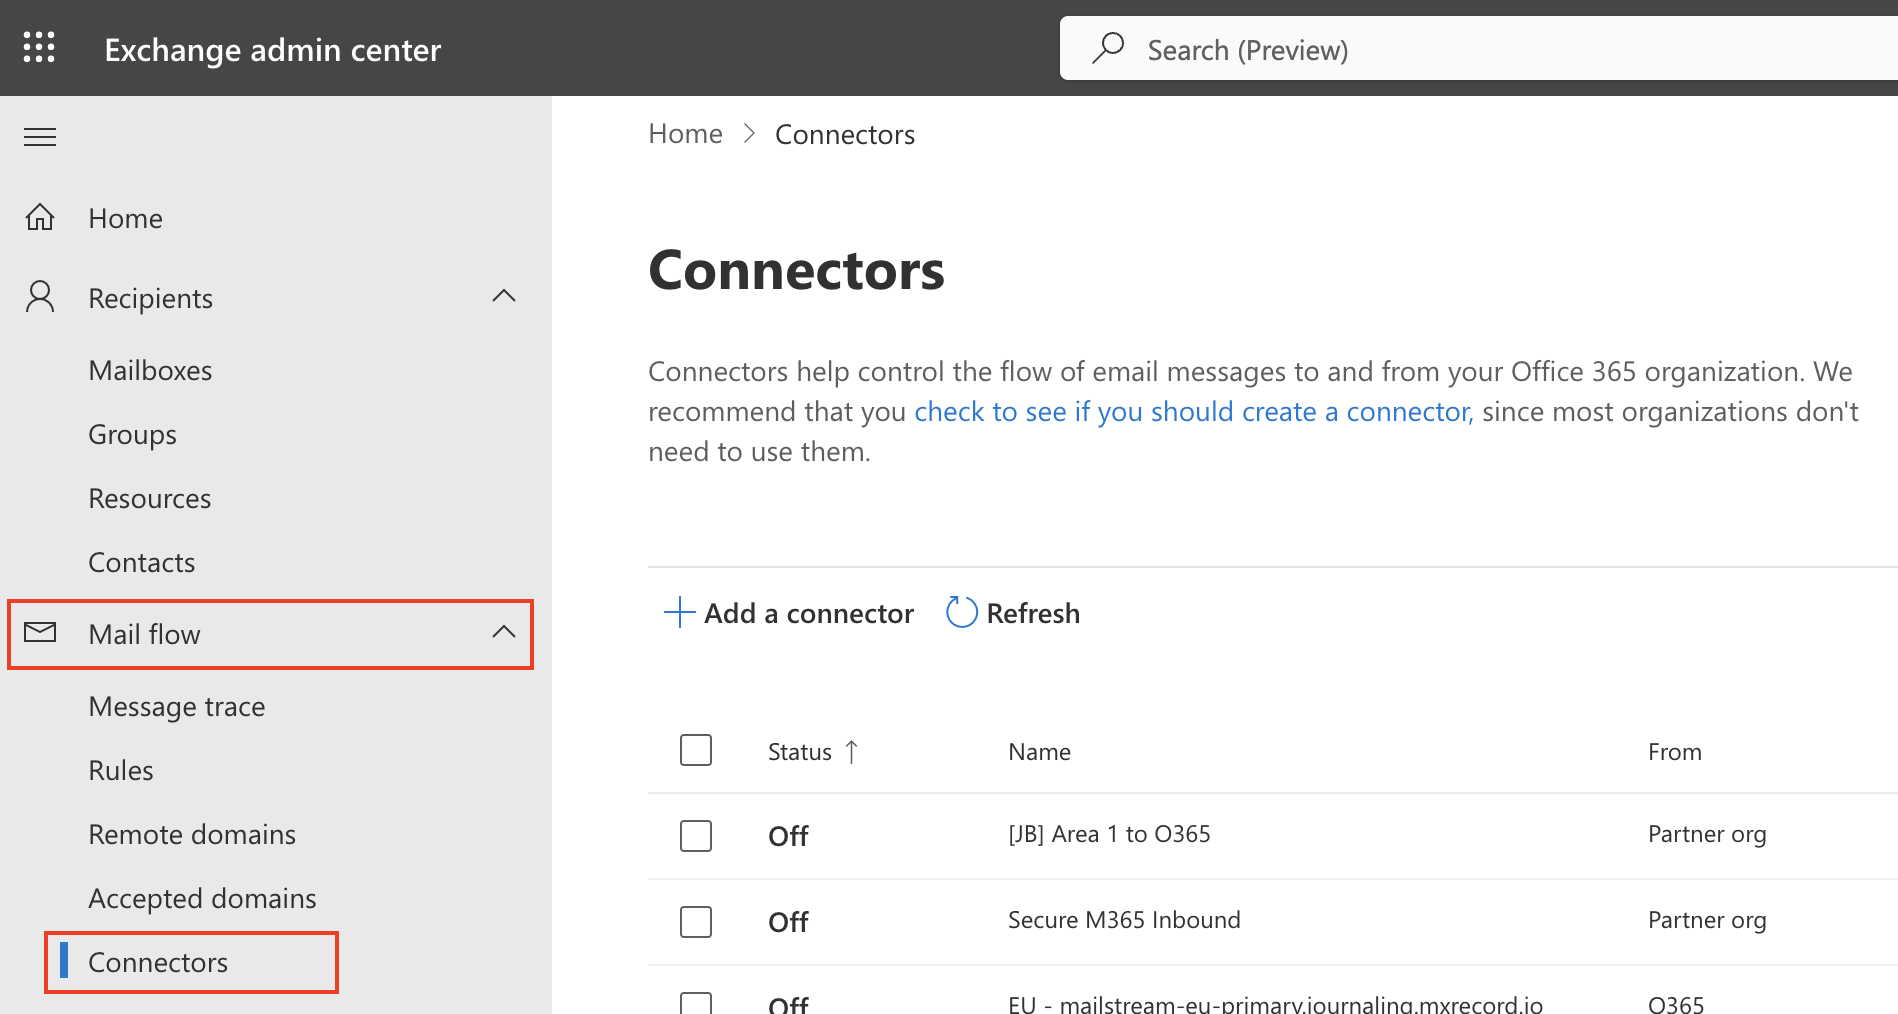
Go to the Exchange admin center.
Go to Mail flow > Connectors.
Select Add a connector.
Select Connection from > Partner organization.
Select Next.
Set the following options:
Name -
Secure O365 InboundDescription -
Only accept inbound email from Cloudflare Email SecurityEnsure that
"What do you want to do after connector is saved?: Turn it on"is checked.
Select Next.
Make sure By Verifying that the sender domain matches one of the following domains is selected.
Enter
*in the text field, and select +.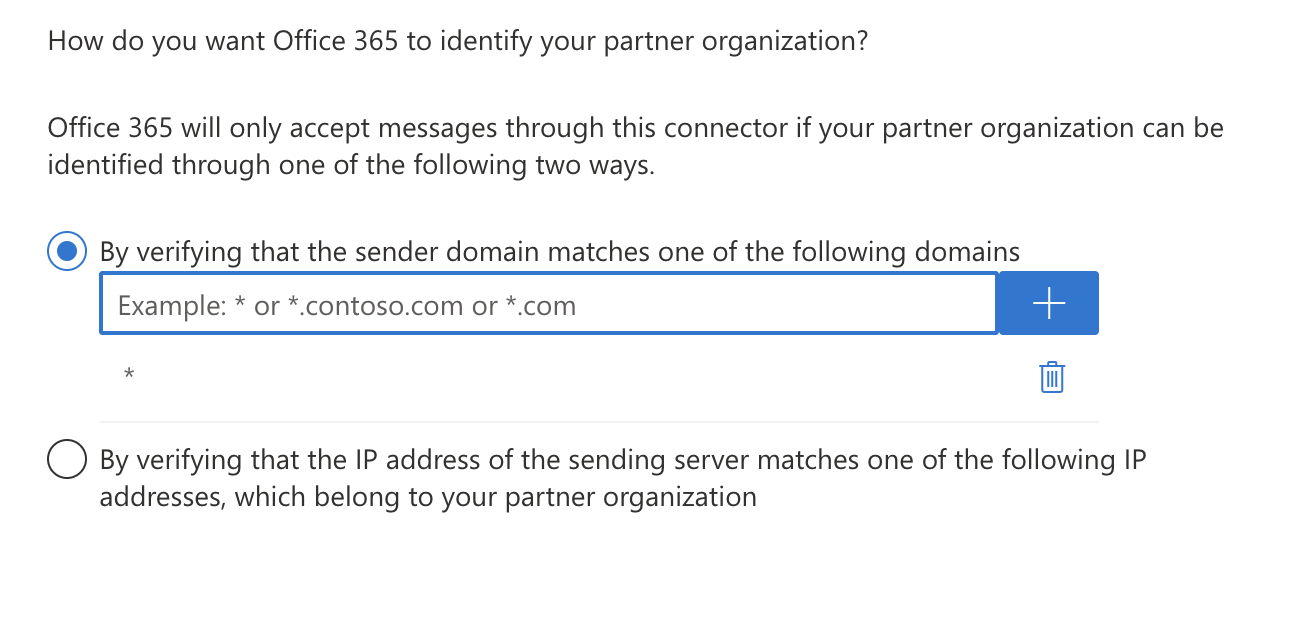
Select Next.
Make sure Reject email messages if they aren’t sent over TLS is selected.
Still in the same screen, select Reject email messages if they aren’t sent from within this IP address range, and enter all the egress IPs in the Egress IPs page.
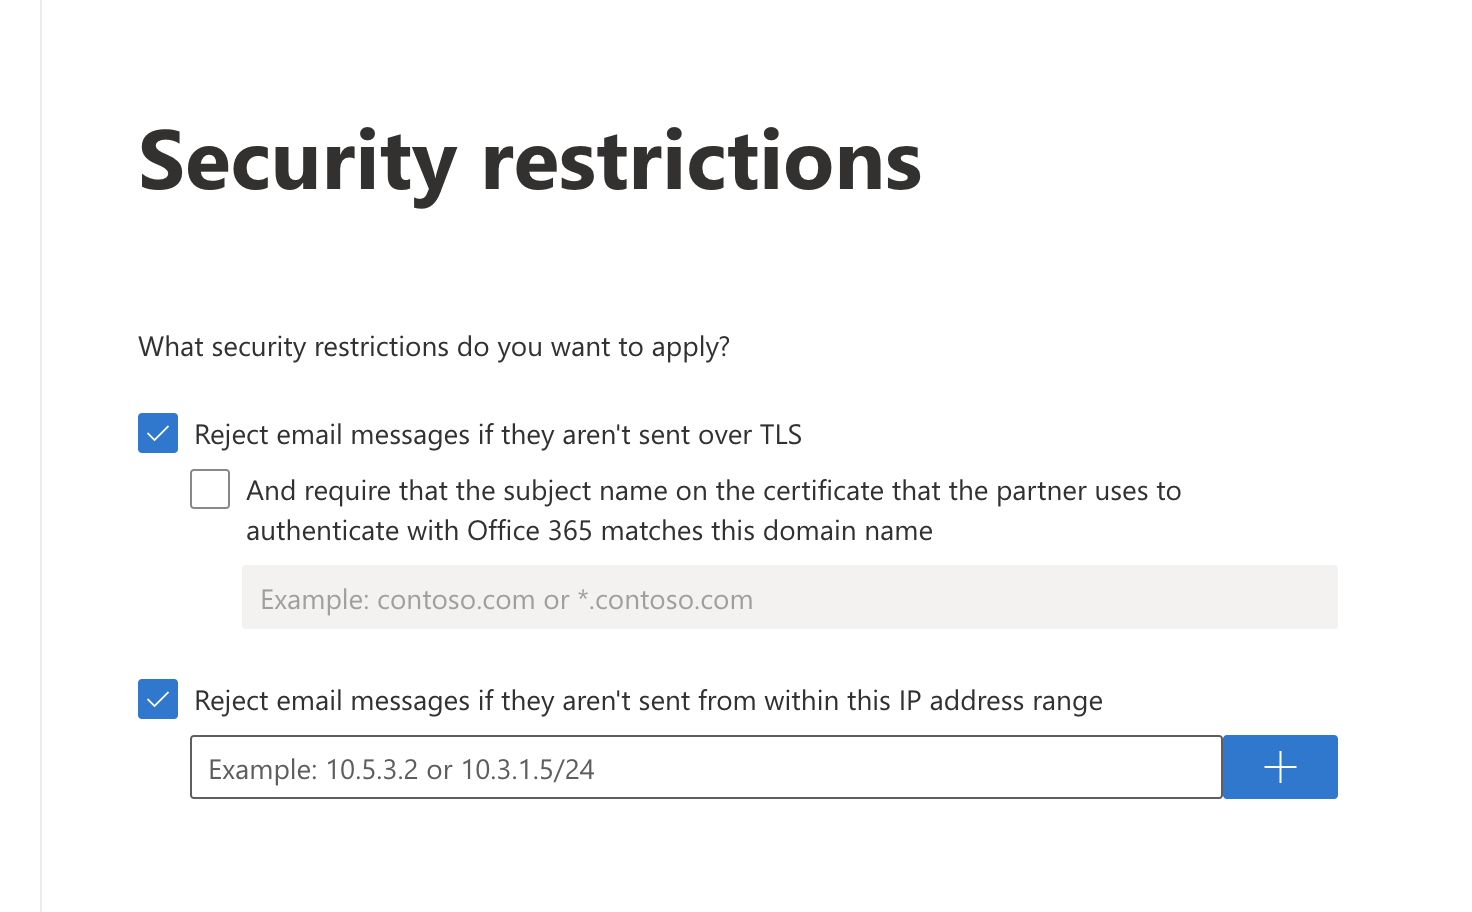
Select Next.
Review your settings and select Create connector.
Enable Enhanced Filtering#
Now that the Secure O365 Inbound connector has been configured, you will need to enable the enhanced filtering configuration of the connector.
Visit https://security.microsoft.com/homepage > Email & collaboration > Policy & Rules > Threat policies > Rules, and select Enhanced filtering.
Select the Secure O365 Inbound connector that you configured previously to edit its configuration parameters. Select Automatically detect and skip the last IP address and Apply to entire organization.
Click the Save button to activate the enhanced configuration