Google Workspace Email Security Deployment and Configuration Guide
Phishing is the root cause of 95% of security breaches that lead to financial loss and brand damage. SolCyber uses Cloudflare Email Security (formerly Area1), a cloud based service that stops phishing attacks, the #1 cybersecurity threat, across all traffic vectors - email, web and network.
With globally distributed sensors & comprehensive attack analytics, Cloudflare Email Security proactively identifies phishing campaigns, attacker infrastructure, and attack delivery mechanisms during the earliest stages of a phishing attack cycle. Using flexible enforcement platforms, Cloudflare Email Security allows customers to take preemptive action against these targeted phishing attacks across all vectors - email, web and network; either at the edge or in the cloud.
Step 0: Verify Domain Ownership#
In order to add domains to Cloudflare Email Security, you must first confirm ownership of the domain. Provide SolCyber with the domain(s) to be protected by Cloudflare Email Security, and we will provide you with a TXT record that needs to be added to the DNS Records for the domain. Verification can take up to 24 hours.
Step 1: Add Cloudflare Email Security IP addresses to the Inbound gateway configuration#
When Cloudflare Email Security is deployed as MX records upstream of Gmail, the Inbound gateways need to be configured such that GMail is aware that they are no longer the MX record for the domain. This is a critical step as it will allow Gmail to accept messages from Area1 unimpeded.
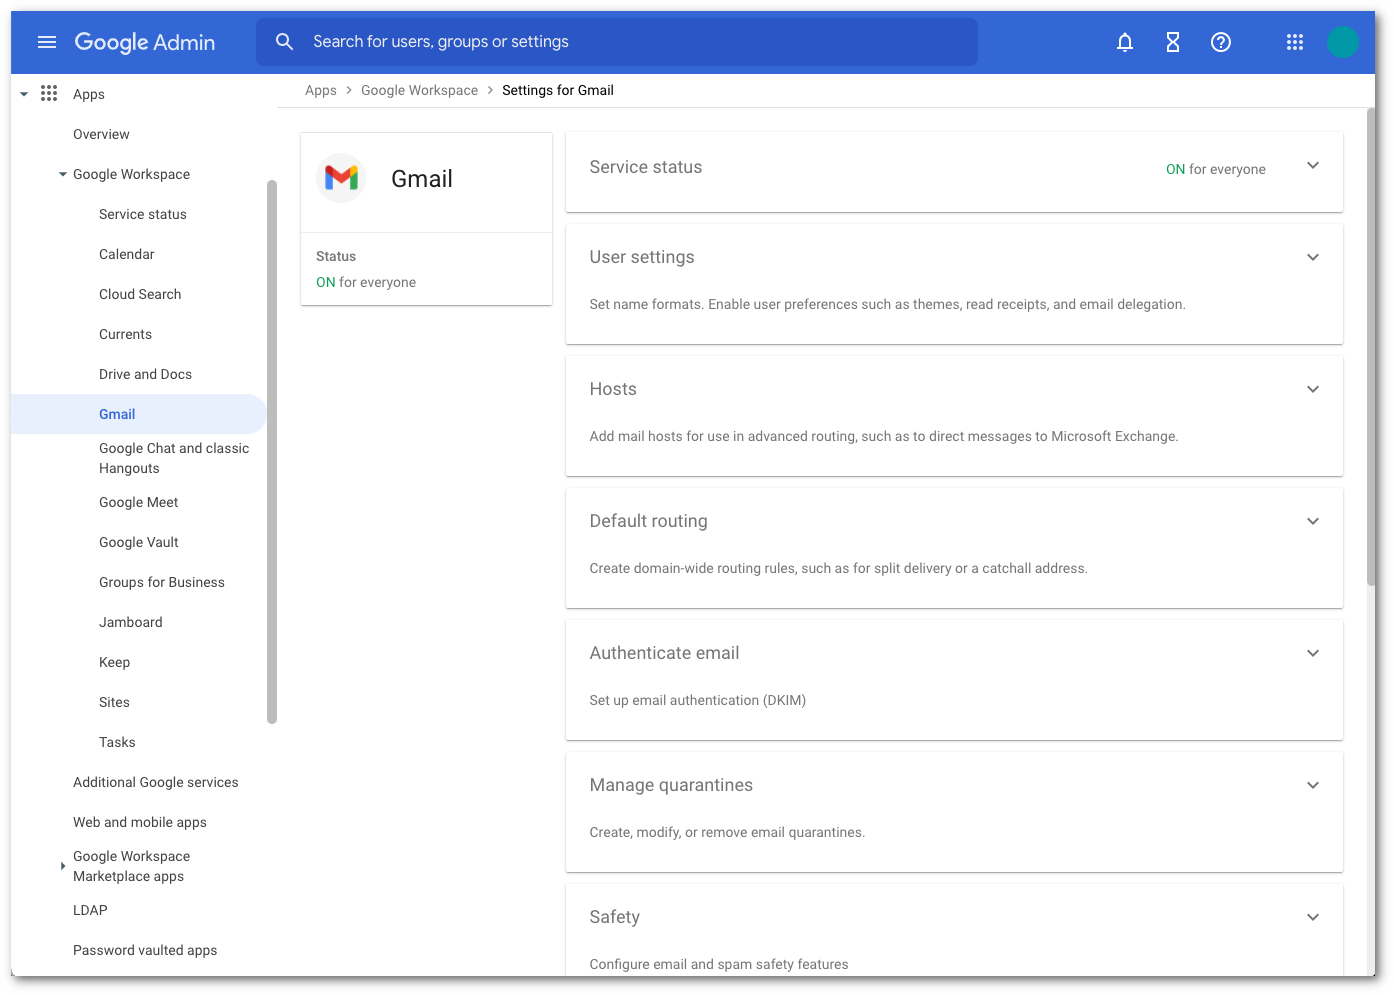
Go to the Google Administrative Console
Go to Apps > Google Workspace > Gmail.
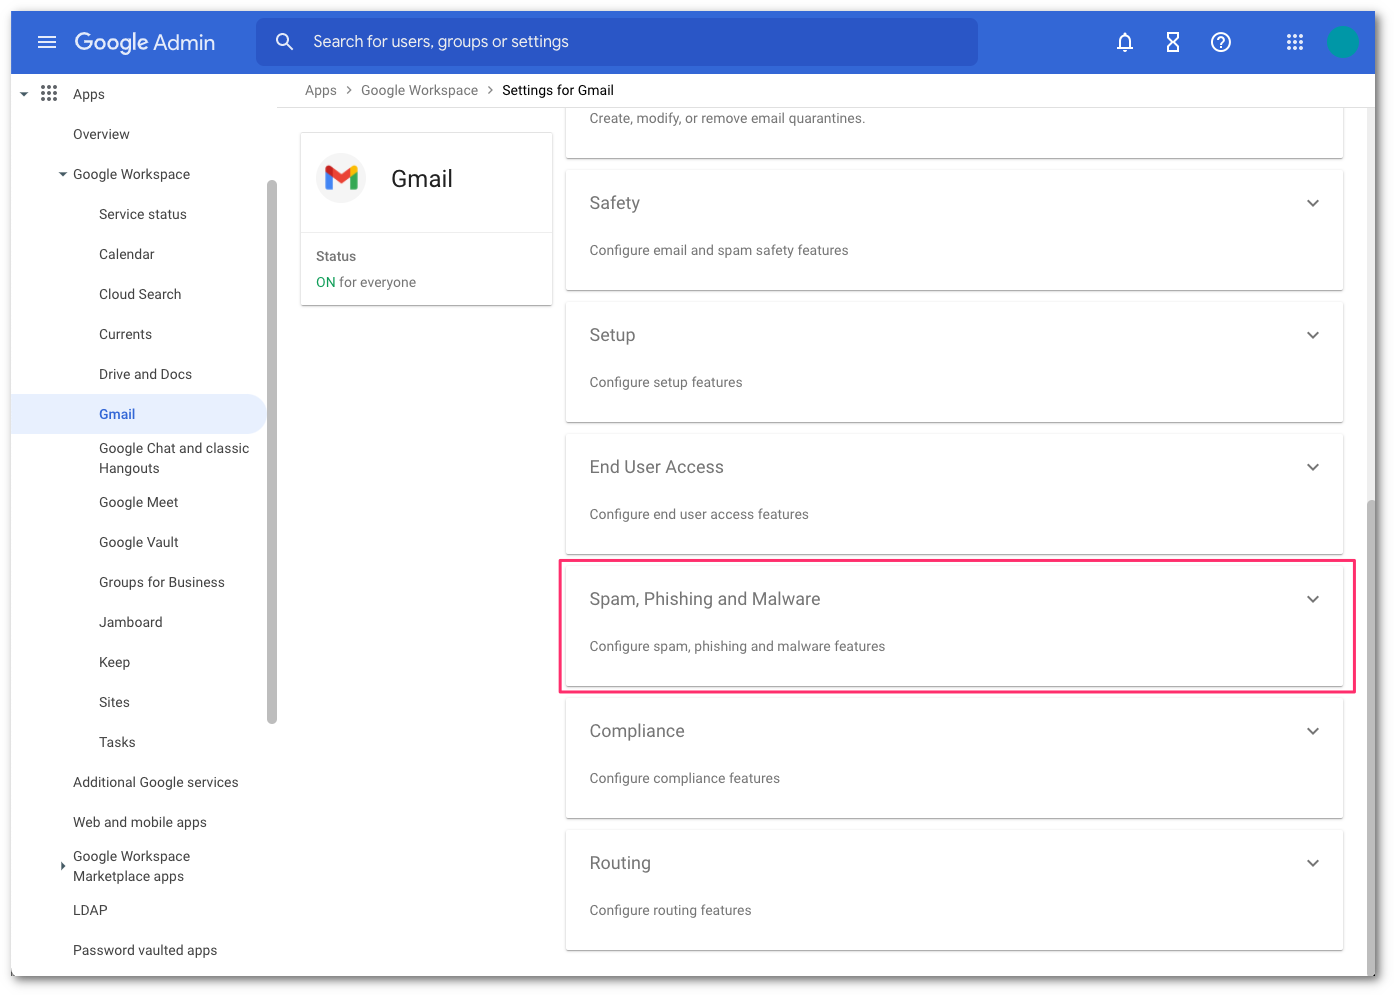
Select Spam, Phishing, and Malware and scroll to Inbound Gateway configuration.
Enable Inbound Gateway, and configure it with the following details:
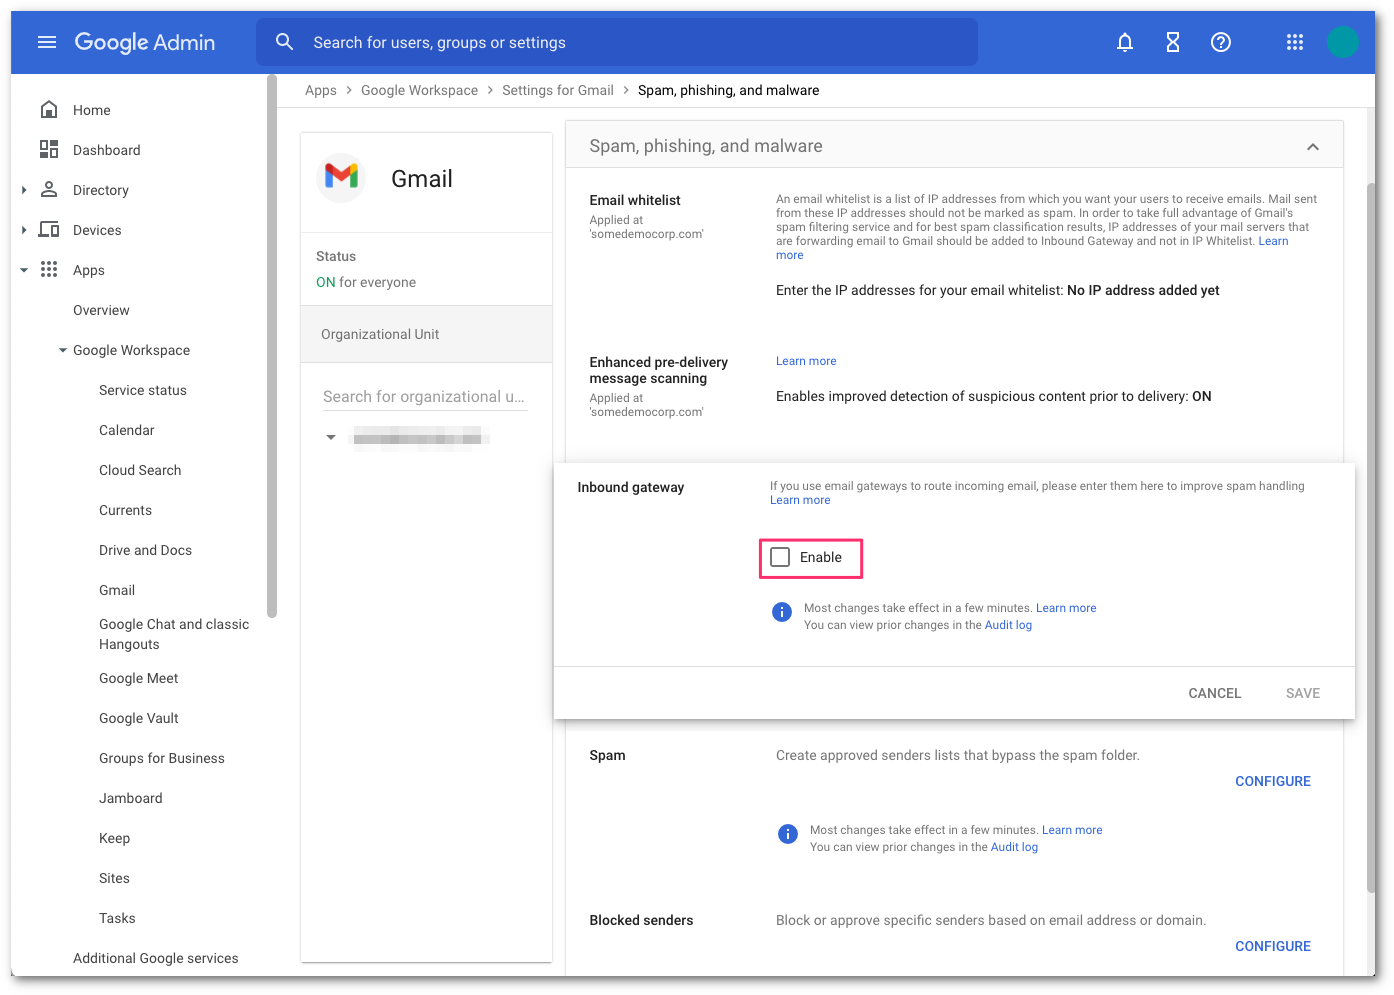
- In Gateway IPs, select the Add link, and add the IPs mentioned in Egress IPs.
- Select Automatically detect external IP (recommended).
- Select Require TLS for connections from the email gateways listed above.
Do not select Reject all mail not from gateway IPs until the MX records have fully propagated. Refer to step 4 for more details.
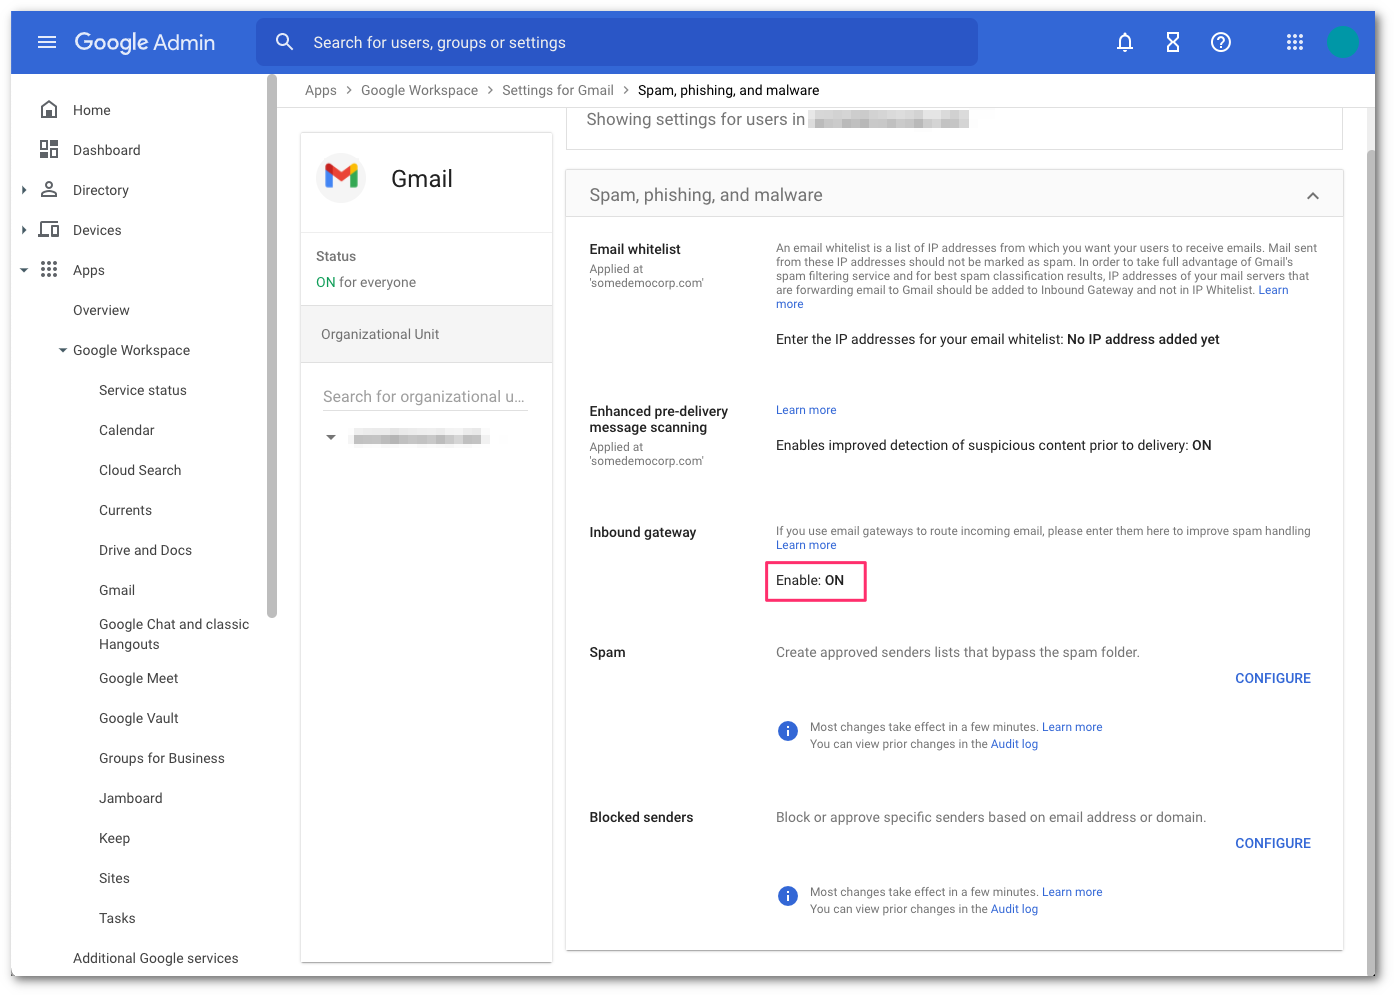
Select the Save button at the bottom of the dialog box to save the configuration once the details have been entered. Once saved, the administrator console will show the Inbound Gateway as enabled.
Step 2: Update your domain MX records#
Instructions to update your MX records will depend on the DNS provider you are using. You will need to update and replace your existing MX record with the Cloudflare hosts.
An example configuration for a North American-based company would be:
| 10 | mxa.global.inbound.cf-emailsecurity.net |
| 10 | mxb.global.inbound.cf-emailsecurity.net |
When configuring the MX records, it’s recommended to configure the hosts with the same MX priority, this will allow mail flows to load balance between the hosts.
Once the MX change has been updated, the DNS updates may take up to 36 hours to fully propagate around the Internet. Some of the faster DNS providers will start to update records within minutes. DNS will reach the major DNS servers in about an hour.
Step 3: Secure your email flow#
NOTE: If you have partner organizations, devices, applications or automated senders that use your mail server as a relay (ex: an on-site printer/scanner that send scans via email) these emails will be blocked unless you add the public IP for the source device/application to this connector. Check for such conditions before you follow this procedure..
After 36 hours, the MX record DNS update will have sufficiently propagated across the Internet. It is now safe to secure your email flow. This will ensure that Gmail only accepts messages that are first received by Area1. This step is highly recommended to prevent threat actors from using cached MX entries to bypass Area 1 by injecting messages directly into Gmail.
- Access the Google Administrative Console, then select Apps > Google Workspace > Gmail.
- Select Spam, Phishing, and Malware.
- Go to Inbound Gateway configuration and select Configure.
- Enable Reject all mail not from gateway IPs and select Save.
- Select Save once more to commit and activate the configuration change in the Gmail advanced configuration console.
.png)