Palo Alto Firewall
Step 1. Create a Syslog Server Profile #
Navigate to:
Device > Server Profiles > Syslog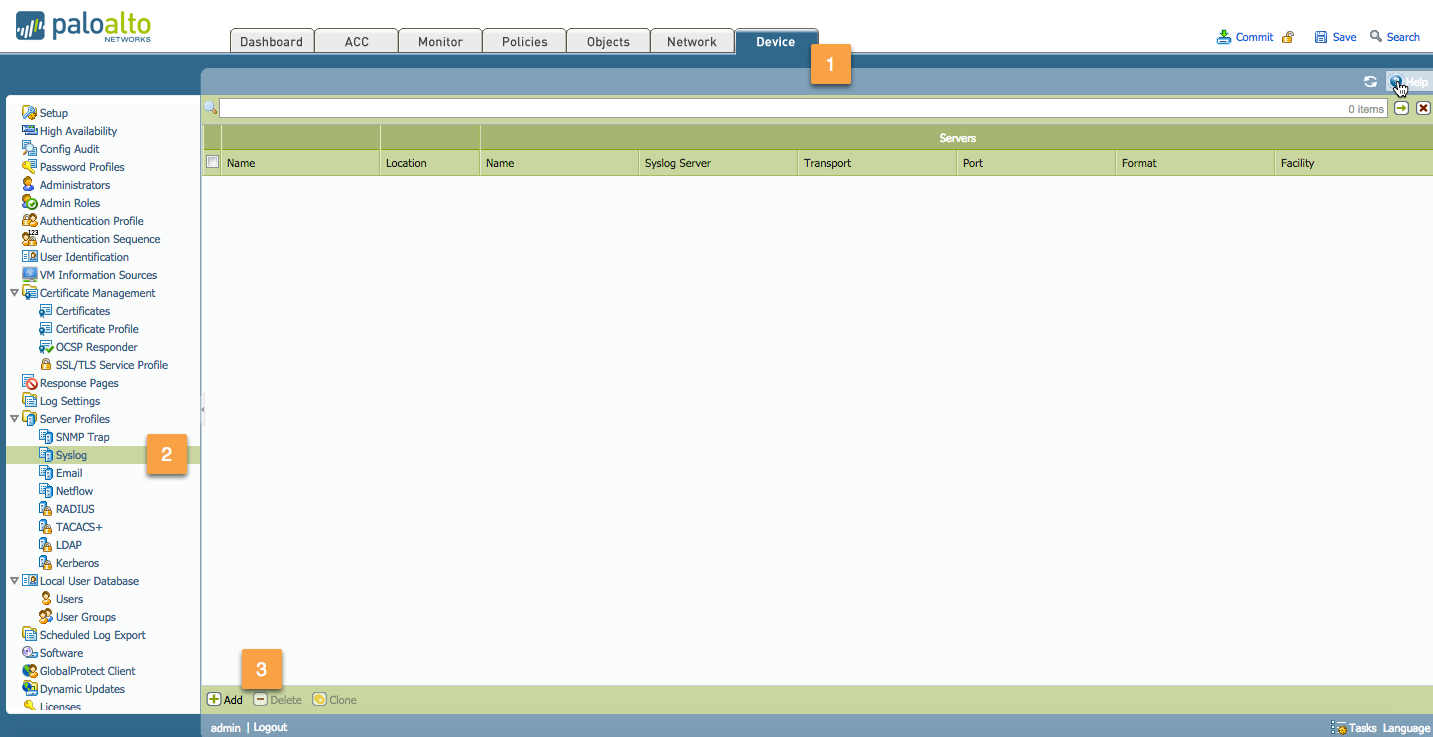
Configure the following:
Syslog Name:
Enter a name for the syslog profile (up to 31 characters).
The name is case-sensitive and must be unique. Use only letters, numbers, spaces, hyphens, and underscores.Name:
Click Add and enter a name for the syslog server (up to 31 characters).
The name is case-sensitive and must be unique. Use only letters, numbers, spaces, hyphens, and underscores.Syslog Server:
Enter the IP address of the Databahn Collector.Transport:
Select the protocol to transport the syslog messages (UDP, TCP, or SSL).Port:
Enter the port number of the syslog server: the SolCyber team will advise on what port to use.Format:
Choose the syslog format: BSD (default) or IETF.Facility:
Select one of the Syslog standard values.
Use RFC 3164 (BSD)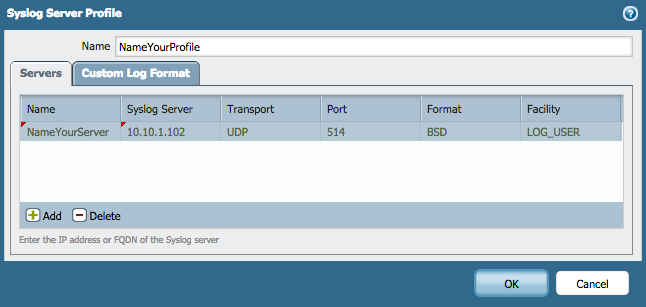
Your syslog server profile will now be created, as shown below:

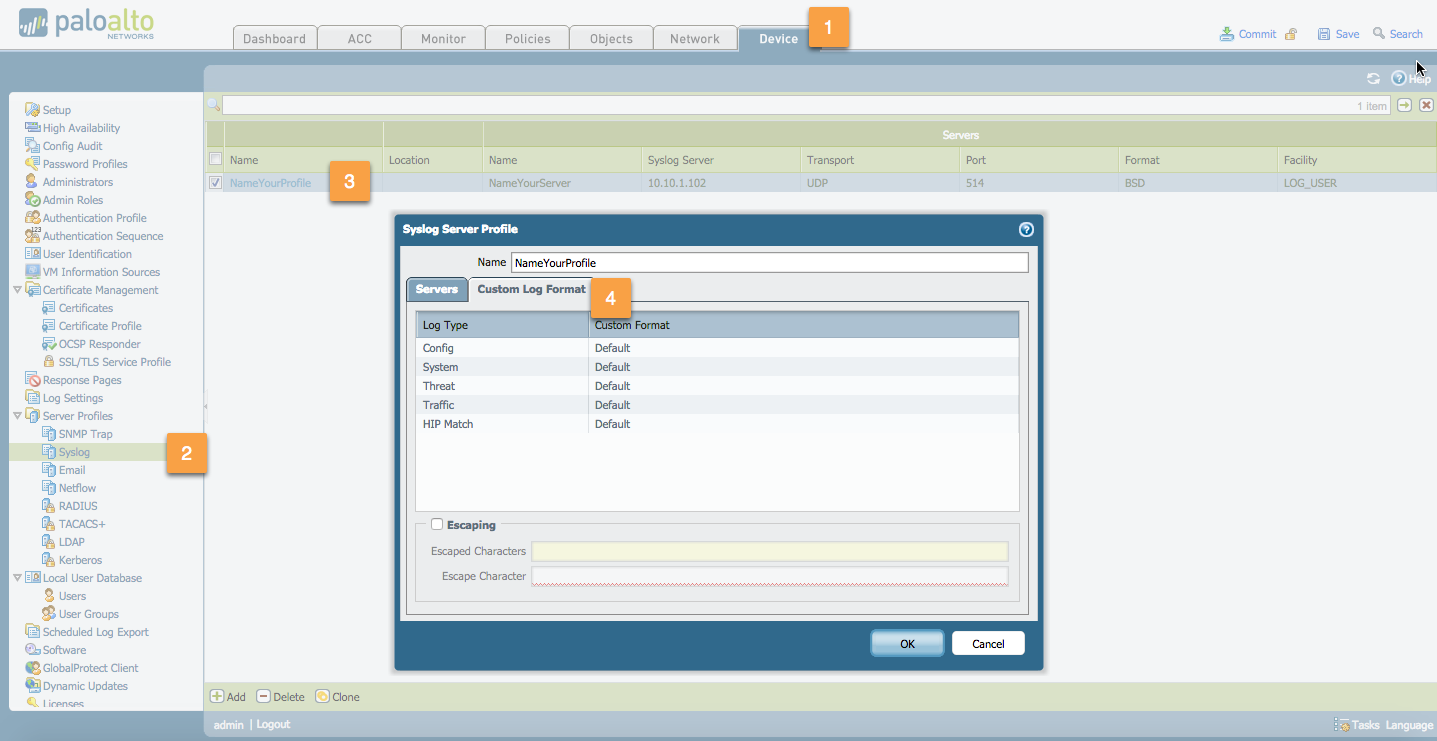
(Optional) Customize the log format and add custom
Key:Valueattribute pairs:
Go to:
For databahn standard integration use defaultDevice > Server Profiles > Syslog > Syslog Server Profile > Custom Log Format
Step 2. Create a Log Forwarding Profile #
Navigate to:
Objects > Log ForwardingClick Add
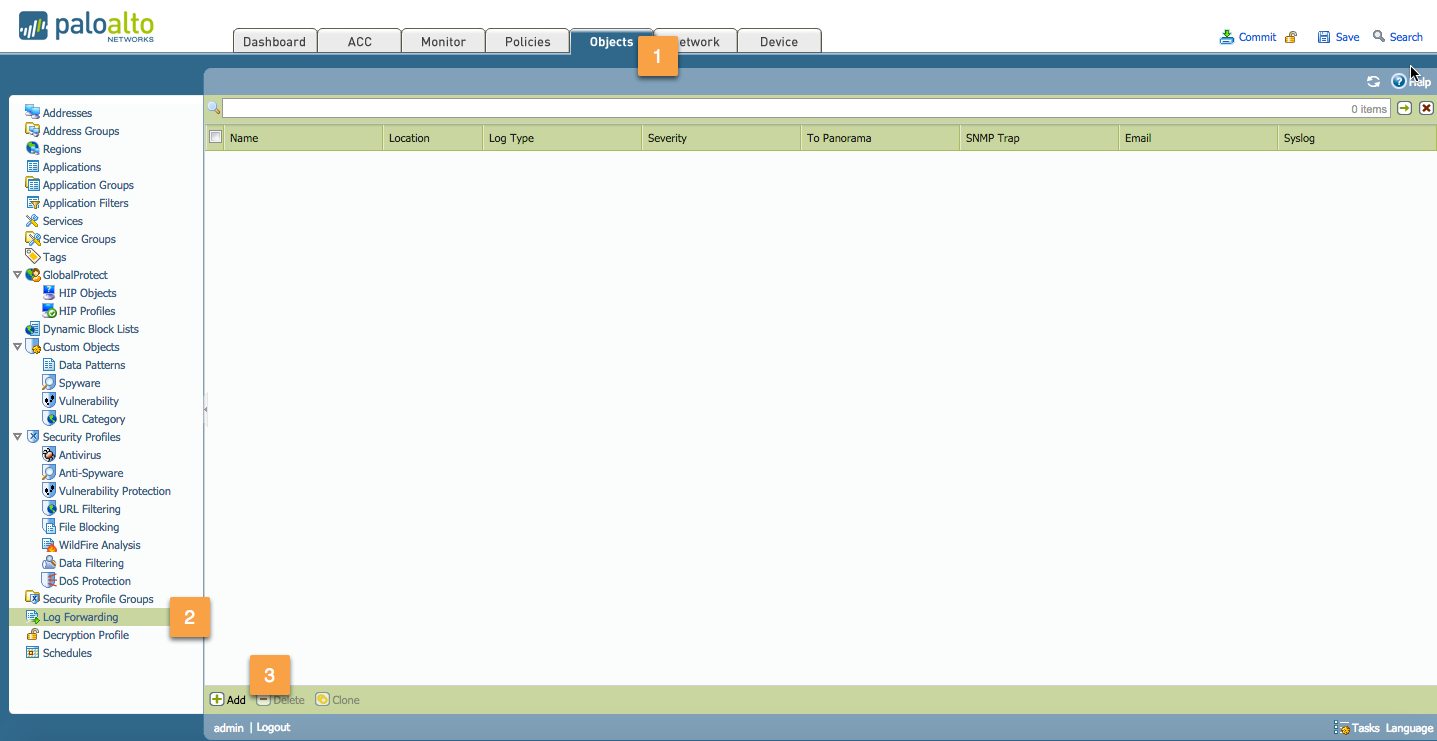
Fill in the following:
- Name:
Enter a profile name (up to 31 characters).
This name appears in the list of log forwarding profiles when defining security policies.
The name is case-sensitive and must be unique. - Syslog:
Select the syslog server profile to define the destination for traffic log entries.
- Name:
Click OK to confirm.

Your Log Forwarding Profile is now created:

Step 3. Apply the Log Forwarding Profile in Your Security Policy #
Go to the Security Policies section

Select the rule for which the log forwarding should be applied (e.g.,
Any Allow)
Go to the Actions tab:
Select the appropriate Log Forwarding Profile from the dropdown.
Click OK once satisfied with your configuration.
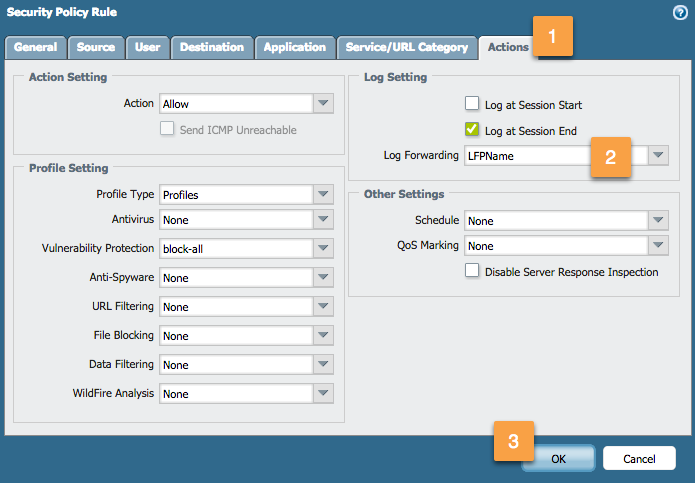
After applying, the forwarding icon will appear in the Options column of your security rule.

Step 4. Commit Your Changes #
- Don’t forget to Commit your changes to apply the configuration.