Cisco Umbrella
To facilitate log export to a SIEM, you must configure Umbrella logs to be stored in an AWS S3 bucket. We strongly recommend the use of your own S3 bucket, as the Cisco-managed option will have it’s token reset every 90-days.
Create an S3 Bucket#
When you set up your Amazon S3 bucket, you must add a bucket policy which accept uploads from Umbrella. Copy the following preconfigured JSON and substitute your S3 bucket name for bucketname. Then, paste the Umbrella S3 bucket policy into your Amazon S3 bucket policy.
{
  "Version": "2008-10-17",
  "Statement": [
    {
      "Sid": "",
      "Effect": "Allow",
      "Principal": {
        "AWS": "arn:aws:iam::568526795995:user/logs"
      },
      "Action": "s3:PutObject",
      "Resource": "arn:aws:s3:::bucketname/*"
    },
    {
      "Sid": "",
      "Effect": "Deny",
      "Principal": {
        "AWS": "arn:aws:iam::568526795995:user/logs"
      },
      "Action": "s3:GetObject",
      "Resource": "arn:aws:s3:::bucketname/*"},
    {
      "Sid": "",
      "Effect": "Allow",
      "Principal": {
        "AWS": "arn:aws:iam::568526795995:user/logs"
      },
      "Action": "s3:GetBucketLocation",
      "Resource": "arn:aws:s3:::bucketname"
    },
    {
      "Sid": "",
      "Effect": "Allow",
      "Principal": {
        "AWS": "arn:aws:iam::568526795995:user/logs"
      },
      "Action": "s3:ListBucket",
      "Resource": "arn:aws:s3:::bucketname"
    }
  ]
}
Create IAM User#
- Create new IAM user.
- Attach the following custom role:, replacing “your-bucket-name” with the name of the bucket.
{
  "Version": "2012-10-17",
  "Statement": [
    {
      "Effect": "Allow",
      "Action": [
        "s3:ListBucket",
        "s3:GetObject"
      ],
      "Resource": [
        "arn:aws:s3:::your-bucket-name",
        "arn:aws:s3:::your-bucket-name/*"
      ]
    }
  ]
}- Create a key for the user.
Create a new SQS #
Search for the SQS service and select Create Queue.
Select the Standard queue.
Enter a name for the SQS queue.

Select Advanced from Access policy.
Copy the following JSON code and paste it in Access Policy:
s
json{ "Version": "2012-10-17", "Id": "arn:aws:sqs:<AWS Region>:<AWS Account Number>:<SQS Queue Name>", "Statement": [{ "Sid": "Sid1591029198479", "Effect": "Allow", "Principal": { "AWS": "*" }, "Action": "SQS:*", "Resource": "arn:aws:sqs:<AWS Region>:<AWS Account Number>:<SQS Queue Name>", "Condition": { "ArnLike": { "aws:SourceArn": "<S3 Bucket ARN>" } } } ] }Replace the information in angle brackets with your AWS region, AWS account number, SQS queue name, and S3 bucket ARN.
Click Create Queue.
You will need to provide the SQS URL and region to SolCyber.
Events notification on S3 bucket to SQS #
Select the bucket where the Cisco Umbrella data is archived and click Properties.
Scroll down to the Event Notifications section.
Click Create Events Notifications.
Provide the name for the notification in the Event name field and select Put for Events.

Select the destination as SQS queue and select the SQS queue created in the previous step.

Click Save.
You will need to provide the S3 bucket name and region to SolCyber.
Enable Logging in Umbrella#
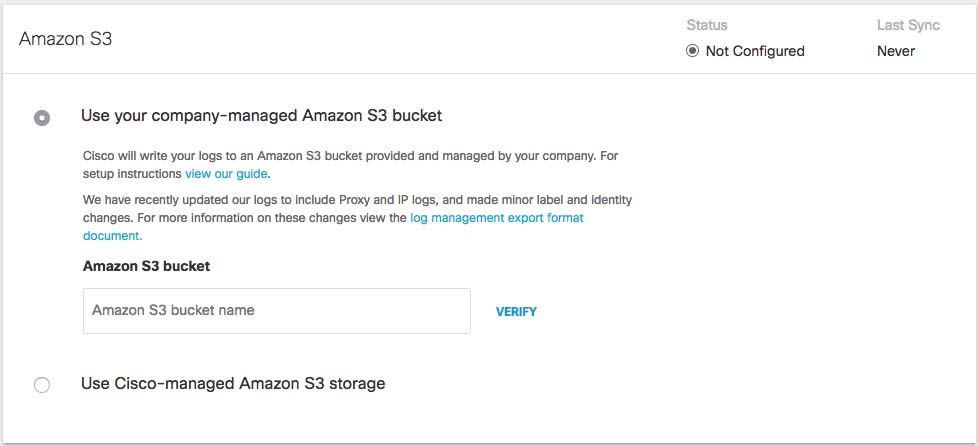
- Navigate to Admin > Log Management and select Use your company-managed Amazon S3 bucket.
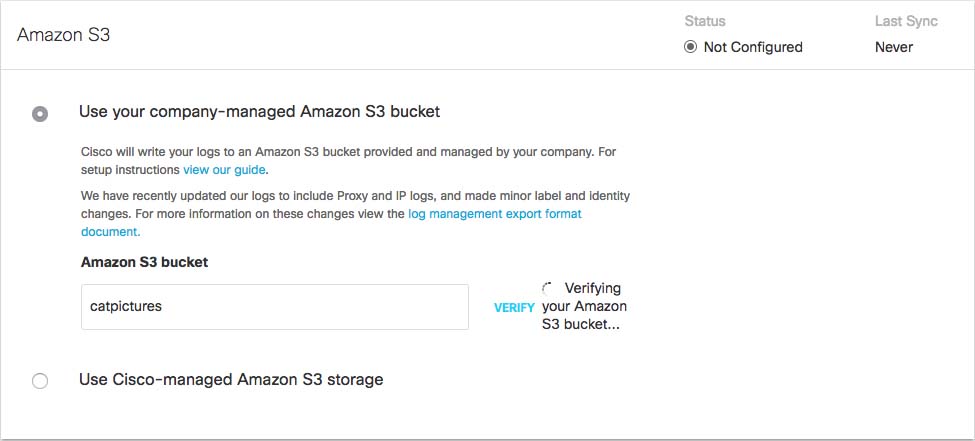
- In the Amazon S3 Bucket field, type or paste the exact bucket name you created in Amazon S3 and click Verify. Umbrella verifies your bucket, connects to it and saves a README_FROM_UMBRELLA.txt file to your bucket.
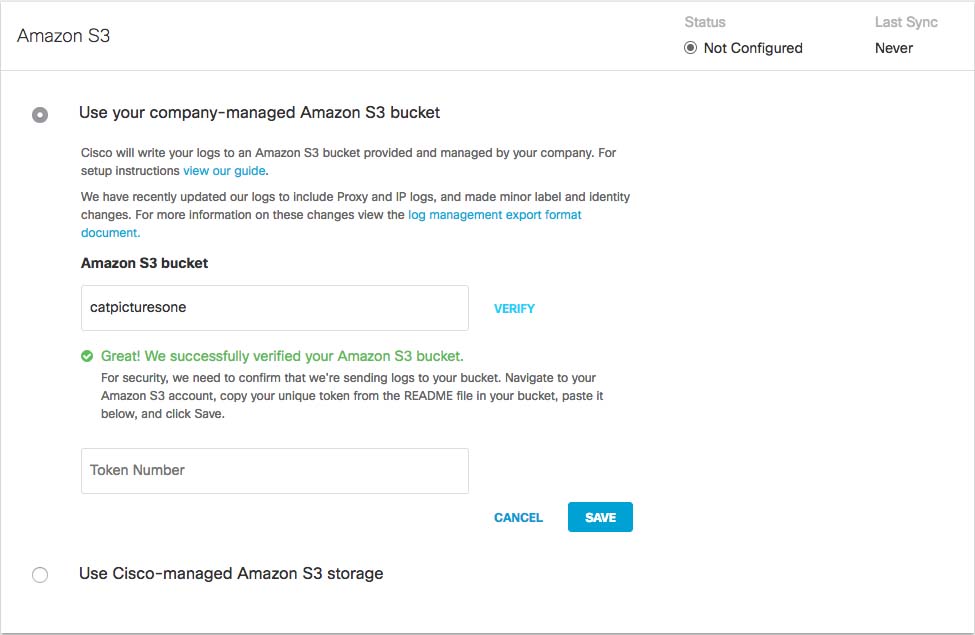
- Open the README_FROM_UMBRELLA.txt file Umbrella saved to your bucket, copy and paste the token listed in it into Token Number, and click Save.
Please provide the following to SolCyber:
- AWS Access Key ID
- AWS Secret Access Key
- S3 Bucket Name (may include path prefix)
- AWS Region (e.g., us-west-1, us-east-1)
- SQS URL